1. Produktas baigtasview
This manual provides instructions for the KICKER 48TRTP122 12-inch CompRT Down-Firing Loaded Subwoofer Enclosure, the DS18 CANDY-X1B Mono Class D Amplifier, and the accompanying DS18 AMPKIT4 4AWG Complete Amplifier Wiring Kit. This system is designed to enhance your vehicle's audio experience with powerful bass output.
2. Kas yra dėžutėje
- Kicker 48TRTP122 12" CompRT Series Down-Firing Loaded Subwoofer Enclosure
- DS18 CANDY-X1B Mono Candy-X Series Car Ampgyvybingesnis
- DS18 AMPKIT4 4AWG Complete Amplifier Kit, including:
- 17 ft 4 AWG Red Power Wire
- 3 ft 4 AWG Black Ground Wire
- 17 ft Remote Wire
- 17 ft Red/Black Speaker Cable
- 17 ft Red/Black Twisted RCA Cable
- Mini ANL Fuse Holder with Mini ANL 100A Fuse
- 6 ft 4 AWG Loom Tube
- 1 x Rubber Grommet
- 10 x Kabelių rišikliai
- 2 x žiediniai gnybtai
- 2 x Spade terminalai
- 5 x Small Spade Terminals

Figure 2.1: Components of the DS18 AMPKIT4 4AWG Complete Amppakėlimo komplektas.
3. Sąranka ir diegimas
Tinkamas montavimas yra labai svarbus optimaliam veikimui ir saugumui. Jei nesate tikri dėl kurių nors veiksmų, pasikonsultuokite su profesionaliu automobilio garso sistemų montuotoju.
3.1 Saugos priemonės
- Prieš pradėdami bet kokius elektros darbus, atjunkite neigiamą automobilio akumuliatoriaus gnybtą.
- Įsitikinkite, kad visi laidai yra tinkamai izoliuoti ir pritvirtinti, kad išvengtumėte trumpųjų jungimų ir pažeidimų.
- Montavimo metu naudokite tinkamas asmenines apsaugos priemones (AAP).
3.2 Subwoofer Enclosure Placement
The KICKER 48TRTP122 is a down-firing enclosure, designed to be placed in the trunk or cargo area of your vehicle. Ensure it is securely fastened to prevent movement during driving.

Figure 3.1: KICKER 48TRTP122 Down-Firing Subwoofer Enclosure.
3.3 Amptvirtesnis montavimas
Mount the DS18 CANDY-X1B amplifier in a location that allows for adequate ventilation and protection from moisture. Common locations include under a seat, in the trunk, or on the back of a rear seat. Ensure it is securely mounted to prevent vibration damage.

Figure 3.2: DS18 CANDY-X1B Mono Class D Ampgyvesnis.
3.4 Laidų prijungimo instrukcijos
Follow these steps carefully for wiring the system. Refer to the wiring diagram below for visual guidance.
- Power Wire (Red 4 AWG): Run the 17 ft red power wire from the vehicle's positive battery terminal to the fuse holder, then from the fuse holder to the +12V terminal on the DS18 amplifier. Ensure the fuse holder is installed close to the battery (within 18 inches).
- Ground Wire (Black 4 AWG): Connect the 3 ft black ground wire from the GND terminal on the ampPritvirtinkite fiksatorių prie švaraus, nedažyto metalinio paviršiaus ant transporto priemonės važiuoklės. Įsitikinkite, kad elektros jungtis yra gera.
- Nuotolinio įjungimo laidas: Connect the remote wire from your head unit's remote output to the REM terminal on the amplifer. Ši viela įjungia ampįjunkite ir išjunkite ližiiklį naudodami pagrindinį įrenginį.
- RCA kabeliai: Connect the RCA cables from your head unit's subwoofer output (or full-range output if no dedicated sub output) to the RCA input jacks on the DS18 ampgyvesnis.
- Garsiakalbio laidas: Prijunkite garsiakalbio kabelį iš amplifier's speaker output terminals to the KICKER subwoofer enclosure's input terminals. Ensure correct polarity (+ to + and - to -). The KICKER 48TRTP122 enclosure has a 2-ohm impedance.
- Žemųjų dažnių pultelis: Connect the included bass remote to the dedicated remote port on the DS18 amplifier. Mount the remote in an accessible location for easy adjustment.
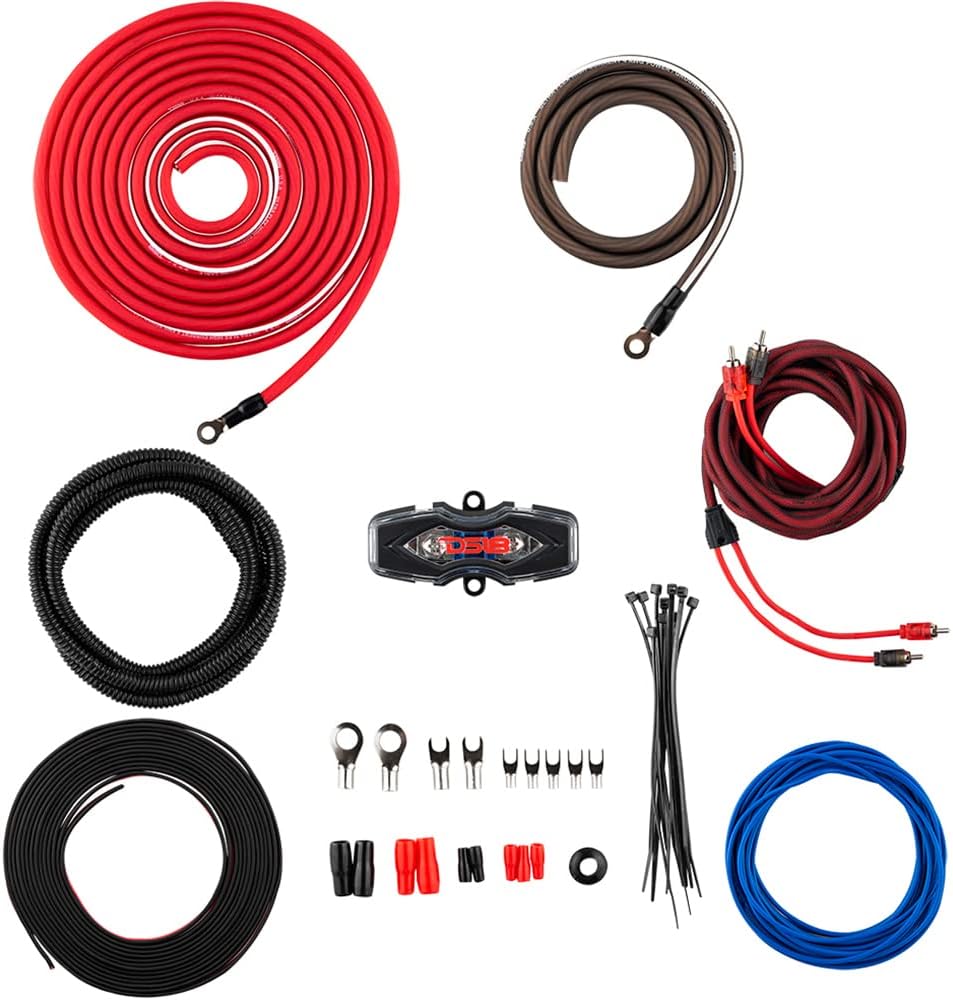
Figure 3.3: Subwoofer to Amplifier Wiring Diagram (2-ohm connection).

Figure 3.4: DS18 Bass Remote Control.
4. Naudojimo instrukcijos
Once the system is installed, follow these steps to configure and operate your subwoofer and ampgyvesnis.
4.1 Initial Power-Up and Gain Setting
- Prijunkite automobilio neigiamą akumuliatoriaus gnybtą.
- Įjunkite pagrindinį įrenginį. amplifier should power on (indicated by a blue LED on the ampgyvybingesni).
- Nustatykite amplifier's GAIN control to its minimum (fully counter-clockwise) position.
- Play a music track with strong bass at a moderate volume level on your head unit (around 75% of maximum volume).
- Lėtai didinkite GAIN valdiklį ant amplifier until you hear distortion, then back it off slightly until the sound is clear. This sets the maximum clean output level.
4.2 Amplifier Controls (DS18 CANDY-X1B)
The DS18 CANDY-X1B amplifier features several controls for fine-tuning your bass output:
- GAUTIS: Adjusts the input sensitivity to match the output of your head unit. (See 4.1)
- BASS BOOST (0-18 dB): Increases the bass output at a specific frequency (typically around 45 Hz). Use sparingly to avoid distortion and speaker damage.
- LPF (Low-Pass Filter) (50-150 Hz): This filter allows only frequencies below the set point to pass through to the subwoofer. Adjust to blend the subwoofer's output seamlessly with your main speakers.
- SUBSONIC FILTER (10-55 Hz): Filters out extremely low frequencies that are inaudible and can cause damage to the subwoofer. Set it slightly below your subwoofer's lowest usable frequency.
- PHASE (0/180 degrees): Reguliuoja žemųjų dažnių garsiakalbio išvesties fazę pagrindinių garsiakalbių atžvilgiu. Eksperimentuokite su abiem nustatymais, kad rastumėte tą, kuris užtikrina galingiausius ir darniausius žemuosius dažnius.
- NUOTOLINIS: Port for connecting the wired bass remote control, allowing convenient bass level adjustment from the driver's seat.
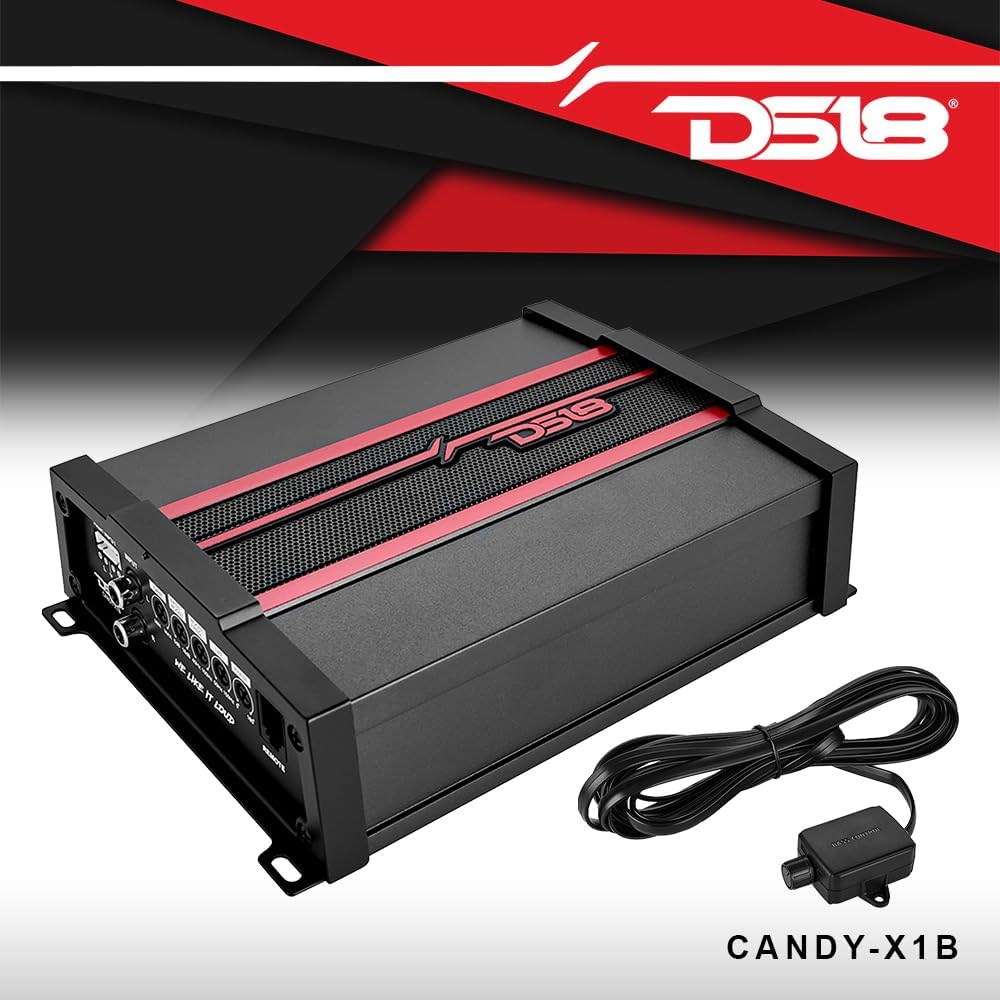
Figure 4.1: DS18 CANDY-X1B Amplifier Controls.
5. Priežiūra
Regular maintenance ensures the longevity and optimal performance of your audio system.
- Valymas: Palaikykite žemųjų dažnių garsiakalbio korpusą ir amplifier clean and free of dust and debris. Use a soft, dry cloth. Avoid liquid cleaners directly on components.
- Jungtys: Periodiškai tikrinkite visas laidų jungtis, ar jos nėra sandarios ir ar nėra korozijos. Atsilaisvinusios jungtys gali pabloginti veikimą arba sukelti gedimą.
- Vėdinimas: Užtikrinti, amplifier's cooling fins are not obstructed to prevent overheating.
- Saugiklio patikrinimas: Jei amplifier does not power on, check the fuse in the fuse holder near the battery. Replace with a fuse of the same rating (100A Mini ANL).
6. Problemų sprendimas
Dažniausiai pasitaikančias problemas ir jų sprendimus rasite šiame skyriuje.
| Problema | Galima priežastis | Sprendimas |
|---|---|---|
| Nėra garso iš žemųjų dažnių garsiakalbio |
|
|
| Iškraipytas garsas |
|
|
| Ampkeltuvas perkaista |
|
|
| Bass remote not working |
|
|
7. Specifikacijos
Detailed specifications for the components in this bundle.
7.1 KICKER 48TRTP122 12" CompRT Subwoofer Enclosure
- Garsiakalbio tipas: Žemųjų dažnių garsiakalbis
- Žemųjų dažnių garsiakalbio skersmuo: 12 colių
- Didžiausia galia: 1000 vatų
- RMS galia: 500 vatų
- Varža: 2 omai
- Jautrumas: 98 dB
- Ypatinga funkcija: Down-Firing, Active thin-mount CompRT subwoofer, High-output reFLEX passive woofer
- Medžiaga: Vidutinio tankio medienos plaušų plokštė
- Matmenys: 27.5" W x 6.125" H x 14.625" D (Top) x 14.625" D (Bottom)
7.2 DS18 CANDY-X1B Mono Class D Ampgyvybingesnis
- RMS galios įvertinimas:
- 4 omai: 240 vatų x 1 kanalai
- 2 omai: 400 vatų x 1 kanalai
- 1 ohm: 600 watts x 1 channel
- Maksimali galia: 1800 vatų
- Jautrumas: 100 dB
- Dažnio atsakas: 20-150 Hz
- Žemųjų dažnių pultelis: Įtraukta
- Dizainas: D klasė
- Kintamasis žemųjų dažnių stiprinimas: 0-18 dB
- Variable Low-pass filter (LPF): 50-150 Hz
- Pogarsinis filtras: 10-55 Hz
- Matmenys: 5.9" pločio x 8.3" gylio x 2.16" aukščio
7.3 DS18 AMPKIT4 4AWG Complete Amppakėlimo komplektas
- Vielos matuoklis: 4 AWG
- Vielos medžiaga: High Performance CCA (Copper Clad Aluminum)
- Rekomenduojama: Vienas amplifier up to 1300 Watts
- Įtraukti komponentai: Power wire, ground wire, remote wire, speaker cable, RCA cable, fuse holder with 100A fuse, loom tube, grommet, cable ties, various terminals.
8. Informacija apie garantiją
This product bundle typically comes with a manufacturer's warranty. The KICKER 48TRTP122 subwoofer enclosure and DS18 CANDY-X1B amplifier are covered by a full warranty from their respective manufacturers. Specific warranty terms, duration, and coverage details may vary. Please retain your proof of purchase for warranty claims.
For detailed warranty information, refer to the documentation included with each individual component or visit the respective manufacturer's official websvetainę.
9. Parama
If you encounter issues not covered in this manual or require further assistance, please contact the manufacturer's customer support:
- KICKER Support: Visit the official KICKER websvetainė, kurioje rasite pagalbos išteklių, DUK ir kontaktinės informacijos.
- DS18 Support: Apsilankykite oficialioje DS18 svetainėje website for product support and contact details.
When contacting support, please have your product model numbers (48TRTP122, CANDY-X1B, AMPKIT4) and proof of purchase readily available.


