1. Saugos informacija
Visada perskaitykite ir supraskite visus su šiuo elektriniu įrankiu pateiktus saugos įspėjimus, instrukcijas, iliustracijas ir specifikacijas. Nesilaikant visų toliau išvardytų instrukcijų, gali kilti elektros smūgis, gaisras ir (arba) sunkūs sužalojimai.
Bendrosios saugos priemonės:
- Visada dėvėkite tinkamas asmenines apsaugos priemones, įskaitant apsauginius akinius, klausos apsaugą ir pirštines.
- Laikykite darbo vietą švarią ir gerai apšviestą. Netvarkingos arba tamsios vietos sukelia nelaimingus atsitikimus.
- Nenaudokite elektrinių įrankių sprogioje aplinkoje, pvz., ten, kur yra degių skysčių, dujų ar dulkių.
- Dirbdami su elektriniu įrankiu saugokite vaikus ir pašalinius asmenis. Dėl išsiblaškymo galite prarasti kontrolę.
- Prieš atlikdami bet kokius reguliavimo veiksmus, keisdami priedus arba padėdami elektrinius įrankius sandėliuoti, atjunkite akumuliatorių nuo įrankio.
- Niekada nenukreipkite įrankio į save ar kitus.
- Ensure the contact pin is depressed against the workpiece before squeezing the trigger in single firing mode.
Baterijos sauga:
- To prevent battery over-discharge and potential damage, recharge the device at least once every three months, even if not in use.
- Baterijų blokui naudokite tik nurodytą įkroviklį.
- Saugokite akumuliatorių blokus nuo lietaus ar drėgmės.
- Do not incinerate the battery pack, even if it is severely damaged or completely worn out.
2. Produktas baigtasview
The DURATECH 20V Cordless Brad Nailer is a versatile 2-in-1 tool designed for driving both 18 gauge staples and brad nails. It is suitable for various applications such as woodworking, upholstery, flooring, and general DIY projects.
Komponentai:

Figure 2.1: Key Components of the Brad Nailer
- Cilindras: Houses the driving mechanism.
- Suaktyvinimas: Įjungia uždegimo mechanizmą.
- LED Lighting / Indicator Switch: Controls the work lights and displays tool status.
- Baterija: Suteikia įrankiui belaidę galią.
- Diržo segtukas: Patogiam nešiojimui.
- Depth Adjustment Wheel: Adjusts the driving depth of fasteners.
- Nagas Viewer Window: Allows visual inspection of fastener levels.
- LED indikatorius: Provides visual feedback on tool status, including jams.
- Single/Contact Firing Knob: Selects between firing modes.
- Žurnalas: Laiko sąvaržėles arba vinis.
Pakuotės turinys:
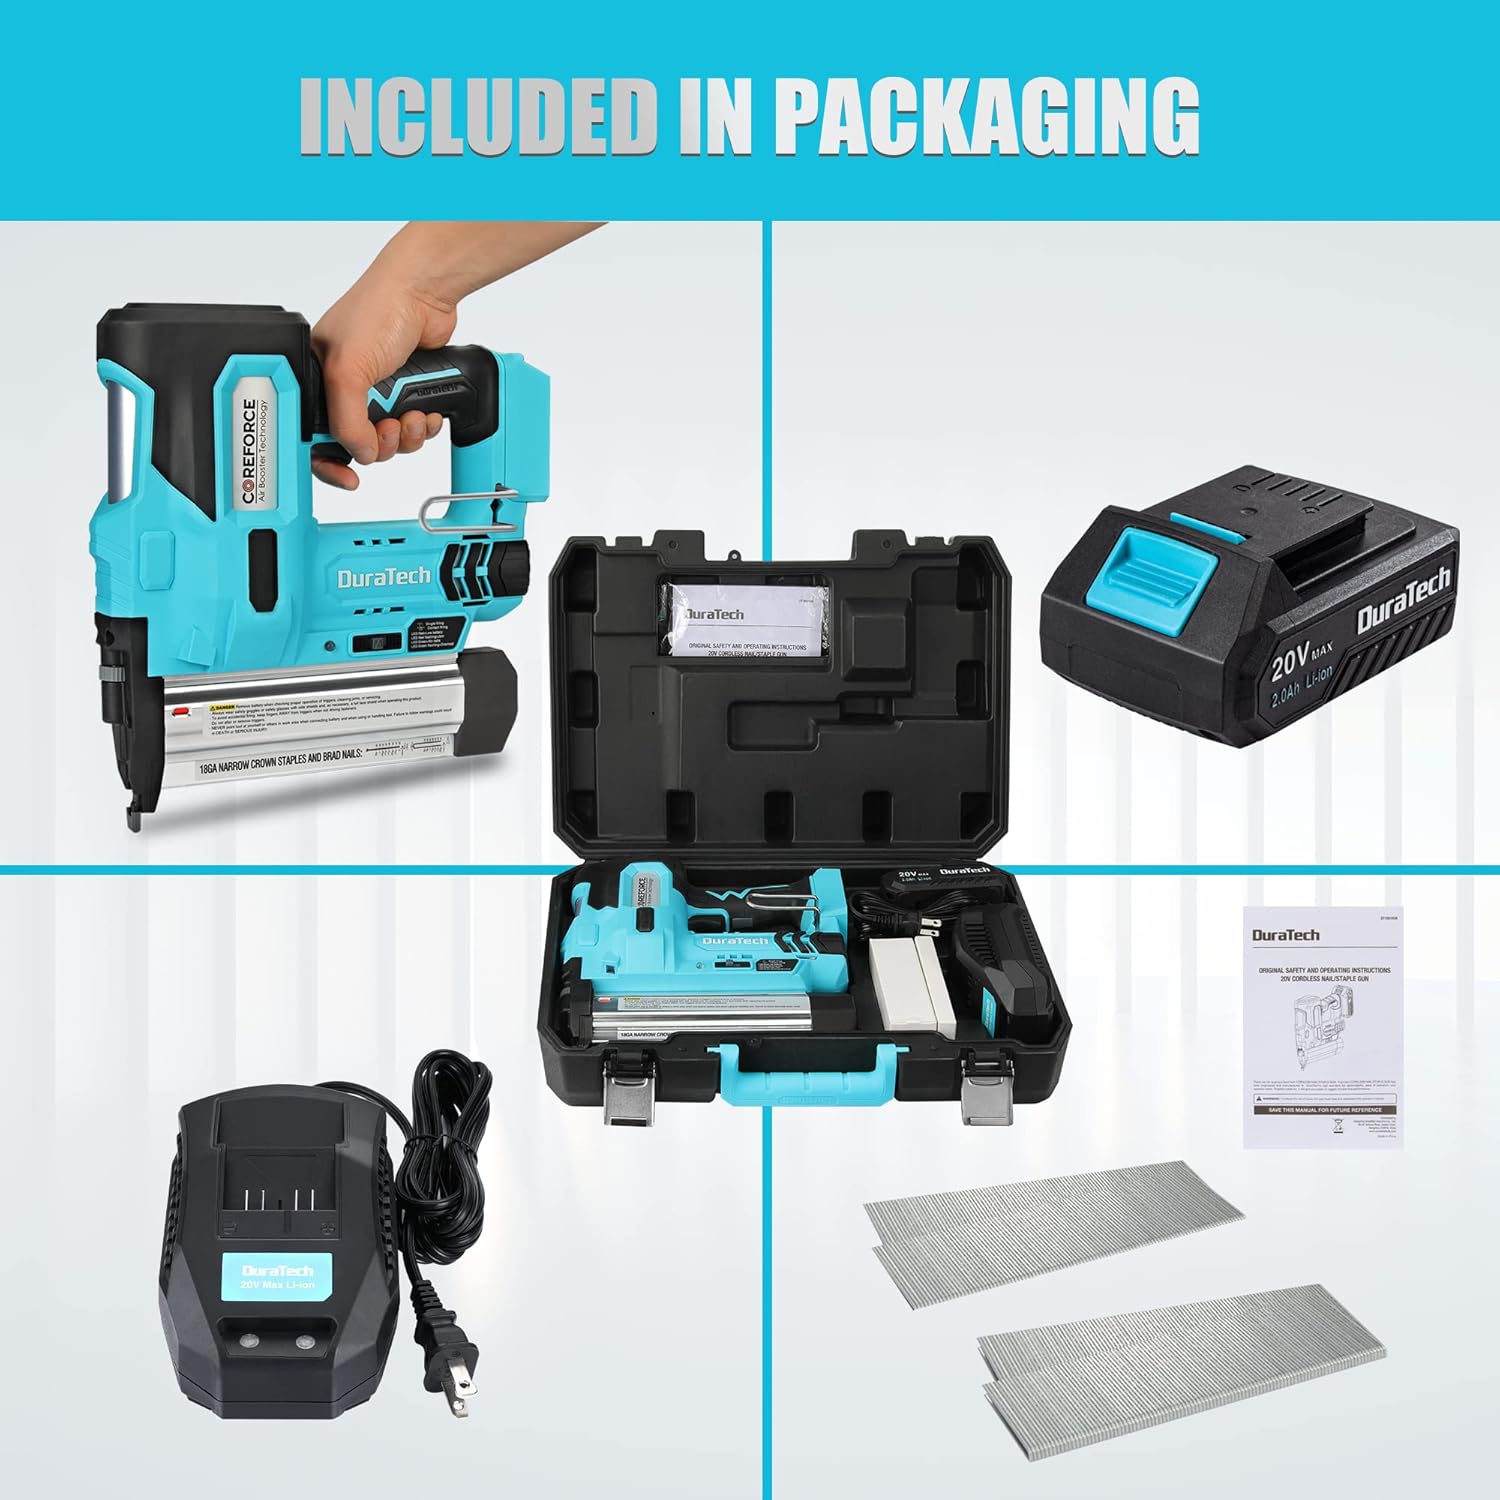
Figure 2.2: Included Items
- 1 x DURATECH 20V Cordless Brad Nailer
- 1 x 2.0Ah Rechargeable Battery
- 1 x 1H Quick Charger
- 1000 x 1-1/4" Staples (18GA)
- 1000 x 1-9/16" Nails (18GA)
- 1 x nešiojimo dėklas
- 1 x naudojimo instrukcija
3. Specifikacijos
| Funkcija | Specifikacija |
|---|---|
| Prekės ženklas | DURATECH |
| Modelio numeris | DT105103AE |
| Prekės svoris | 6.19 svaro (be akumuliatoriaus) |
| Gaminio matmenys | 9.45 x 1.96 x 10.83 colio (24 x 5 x 27.5 cm) |
| Spalva | Mėlyna, Juoda |
| Medžiagos tipas | Plastikiniai |
| Nail/Staple Gauge | 18GA |
| Sąsagėlių ilgio suderinamumas | 3/4" iki 1-9/16" (19 mm iki 40 mm) |
| Nagų ilgio suderinamumas | 3/4" to 2" (19mm to 50mm) |
| Žurnalo talpa | 100 tvirtinimo detalių |
| Šūvių skaičius vienu įkrovimu | Up to 500 nails (with 2.0Ah battery) |
| Baterijos tipas | 20 V ličio jonų |
4. Sąranka
4.1 Baterijos įdėjimas ir įkrovimas:
- Ensure the battery is fully charged before first use. Connect the charger to a power outlet and insert the battery. The charger indicator will show charging status.
- Norėdami įdėti akumuliatorių, sulygiuokite jį su įrankio rankenos lizdu ir stumkite jį, kol jis tvirtai užsifiksuos vietoje.
- Norėdami išimti bateriją, paspauskite atleidimo mygtuką, esantį ant baterijų bloko, ir išstumkite ją.
4.2 Loading Fasteners (Staples or Nails):

Figure 4.1: Loading Fasteners
- Dėl saugumo įsitikinkite, kad akumuliatorius yra išimtas iš įrankio.
- Press the magazine release button and pull out the magazine cover.
- Tilt the tool and place the strip of staples or nails into the track of the magazine channel. Ensure the fastener points are facing downwards and are against the bottom of the magazine.
- Push the magazine cover back into place until it engages with the release button, securing the fasteners.
- Verify the fastener type and length are compatible with the tool and your application. The tool accepts 18GA staples from 3/4" to 1-9/16" and 18GA nails from 3/4" to 2".
5. Naudojimo instrukcijos
5.1 Selecting Firing Mode:
The nail gun features two firing modes: Single Firing Mode and Contact Firing Mode. Select the appropriate mode using the Single/Contact Firing Knob.
- Single Firing Mode: For precise fastener placement. You must depress the contact pin against the workpiece before squeezing the trigger.
- Kontaktinio paleidimo režimas: For rapid, sequential fastening. You can squeeze the trigger first, then depress the contact pin against the workpiece to fire.
5.2 Adjusting Depth:
The depth adjustment wheel allows you to control how deep the fasteners are driven into the material. Rotate the wheel to increase or decrease the driving depth. Test on a scrap piece of material to achieve the desired depth before working on your project.
5.3 Using LED Lights:
The integrated LED lights illuminate the work area, which is beneficial in low-light conditions. Activate the LED lights using the LED Lighting/Indicator Switch.
5.4 Bendras veikimas:
- Ensure the correct fasteners are loaded and the battery is installed.
- Pasirinkite norimą degimo režimą.
- Adjust the depth setting as needed.
- Tvirtai prispauskite įrankio nosį prie ruošinio.
- Follow the firing mode instructions (depress contact pin, then squeeze trigger for single mode; squeeze trigger, then depress contact pin for contact mode).
- Po degimo įrankį nukelkite nuo ruošinio.
6. Priežiūra
6.1 Clearing Fastener Jams:
If the LED indicator turns red and flashes, it signifies a fastener jam. Follow these steps to clear it:
- Immediately remove the battery pack from the tool to prevent accidental firing.
- Atidarykite žurnalo viršelį.
- Carefully remove any jammed staples or nails from the magazine and the firing channel. Use pliers if necessary, but avoid damaging the tool.
- Close the magazine cover securely.
- Reinsert the battery pack. The tool should now be ready for use.
6.2 Bendras valymas ir sandėliavimas:
- Keep the tool's air vents clean to ensure proper motor cooling.
- Nuvalykite įrankį švaria šluoste,amp audinys. Nenaudokite stiprių cheminių medžiagų ar abrazyvinių valiklių.
- Store the tool and battery in a dry, secure location, out of reach of children and away from direct sunlight or extreme temperatures.
- Prieš ilgesnį laiką laikydami įrankį, visada išimkite akumuliatorių.
7. Problemų sprendimas
| Problema | Galima priežastis | Sprendimas |
|---|---|---|
| Įrankis neužsidega | Baterija neįdėta arba išsikrovusi | Įsitikinkite, kad akumuliatorius yra visiškai įkrautas ir tinkamai įdėtas. |
| Fastener jam (LED indicator flashing red) | Remove battery, clear jam from magazine and firing channel (refer to Section 6.1). | |
| Contact pin not fully depressed (Single Firing Mode) | Ensure the contact pin is firmly pressed against the workpiece before squeezing the trigger. | |
| Fasteners not driven to full depth | Gylio reguliavimas nustatytas per negiliai | Adjust the depth adjustment wheel to a deeper setting. |
| Insufficient pressure on workpiece | Apply more firm pressure to the tool against the workpiece during firing. | |
| Baterija greitai išsikrauna | Baterija nėra visiškai įkrauta arba sena | Įsitikinkite, kad akumuliatorius yra visiškai įkrautas. Apsvarstykite galimybę pakeisti senstantį akumuliatorių. |
| Veikimas ekstremaliomis temperatūromis | Operate the tool within recommended temperature ranges. |
8. Informacija apie garantiją
For detailed warranty terms and conditions, please refer to the product packaging or visit the official DURATECH websvetainėje. Išsaugokite pirkimo kvitą kaip pirkimo įrodymą bet kokiems garantiniams prašymams.
9. Pagalba klientams
If you have any questions, require technical assistance, or need to report an issue with your DURATECH 20V Cordless Brad Nailer, please contact DURATECH customer service. Contact information can typically be found on the product packaging, the official DURATECH websvetainėje arba per savo mažmenininką.


