1. Įvadas
The Machenike G6 Tri-mode Switch Controller is a versatile gamepad designed for a wide range of gaming platforms, including PC, Nintendo Switch, iOS, Android, and TV boxes. It features advanced technologies such as magnetic Hall sensing joysticks and triggers, Kailh mechanical micro switches, 6-axis gyro motion control, and multi-level vibration feedback. This manual provides detailed instructions for setting up, operating, and maintaining your controller to ensure optimal performance.
2. Pakuotės turinys
Prašome patikrinti, ar pakuotėje yra visi reikalingi daiktai:
- Machenike G6 Tri-mode Switch Controller
- USB-C įkrovimo laidas
- 2.4G belaidis imtuvas
- Vartotojo vadovas
3. Valdiklio išdėstymas
Familiarize yourself with the buttons and features of your Machenike G6 controller.

The controller features standard gamepad buttons (A, B, X, Y), directional pad, dual joysticks, shoulder buttons (L1, R1), and triggers (L2, R2). Additional function buttons include Start, Select, Home, and programmable back buttons.

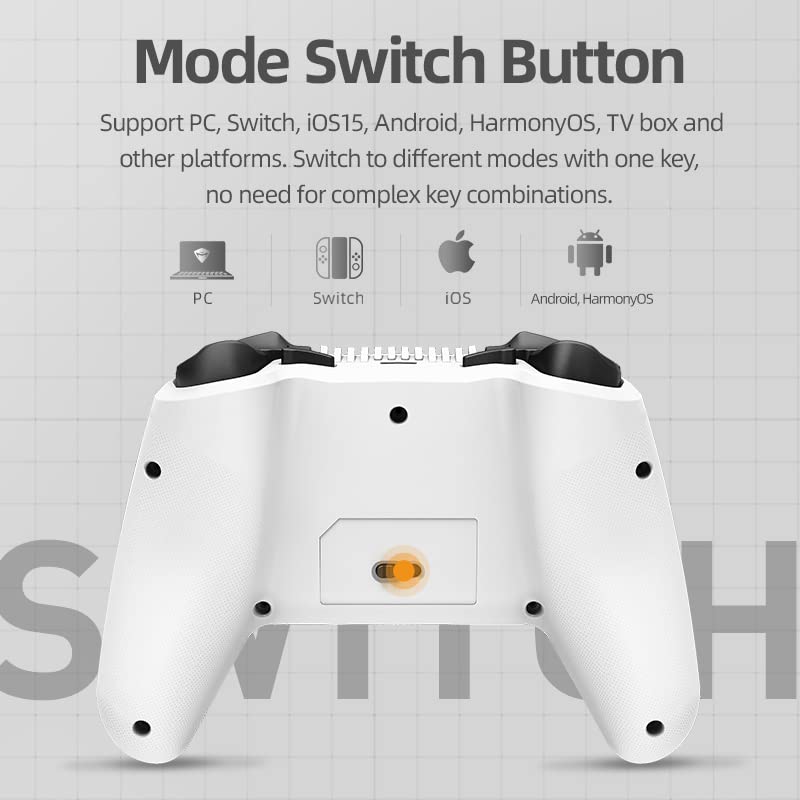
The back of the controller includes a mode switch slider and additional programmable buttons for enhanced gameplay customization.
4. Sąranka ir ryšys
4.1. Valdiklio įkrovimas
Connect the supplied USB-C cable to the controller's charging port and the other end to a USB power source (e.g., computer, wall adapter). The LED indicators will show charging status and power consumption.
4.2. Connecting via USB (Wired Mode)
Plug the USB-C cable directly from the controller to your PC or compatible device. The controller will automatically be recognized and ready for use.
4.3. Prisijungimas per 2.4G belaidį ryšį
- Insert the 2.4G wireless receiver into a USB port on your device (PC, TV box, etc.).
- Switch the mode slider on the back of the controller to the 2.4G position.
- The controller will automatically pair with the receiver. LED indicators will confirm connection.
4.4. Prisijungimas per „Bluetooth 5.0“
- Switch the mode slider on the back of the controller to the Bluetooth position.
- On your device (NS, iOS, Android, PC with Bluetooth), go to Bluetooth settings and search for new devices.
- Select "Machenike G6" from the list of available devices to pair. LED indicators will confirm connection.
4.5. Režimo perjungimas
The Machenike G6 supports multiple platforms. Use the mode slider on the back of the controller to select the appropriate connection mode for your device (PC, Switch, iOS, Android, TV box).


5. Valdiklio valdymas
5.1. Magnetic Hall Sensing Joysticks
The G6 controller features Hall effect joysticks that use magnetic induction for precise, drift-free input. This technology ensures long-term accuracy and smooth control without physical wear.

5.2. Three-Way Trigger Locks
Customize your trigger travel distance with three distinct settings:
- Gear 1 (FPS): Short pull for rapid response in first-person shooter games.
- Gear 2 (Universal): Normal travel distance for balanced gameplay across various genres.
- Gear 3 (RAC): Longer full pull for precise control in racing games or fine aiming.

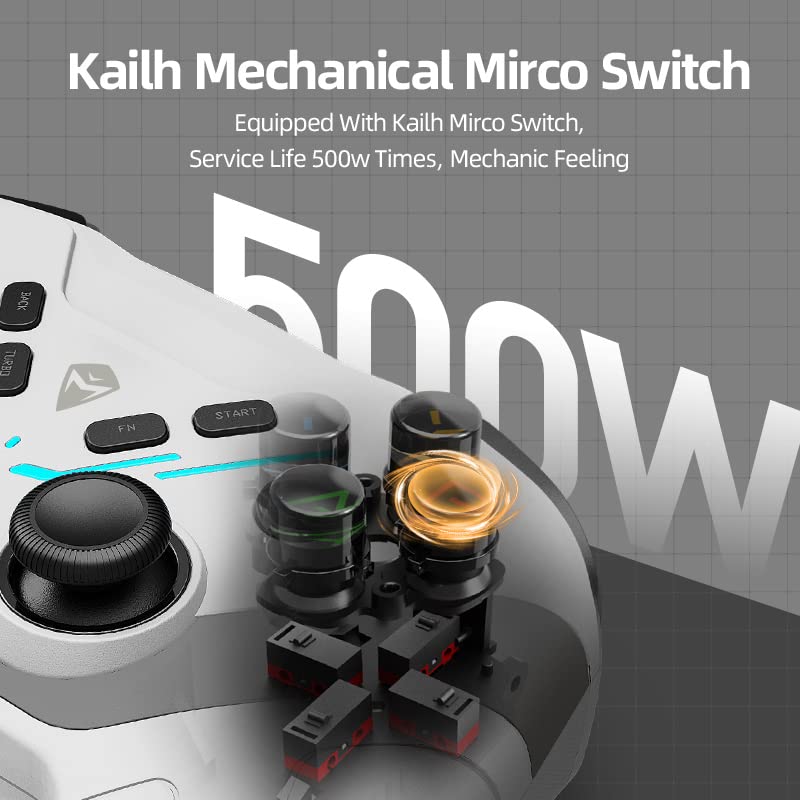
5.3. Kailh Mechanical Micro Switches
The action buttons utilize Kailh mechanical micro switches, providing a shorter trigger stroke and a tactile, responsive feel. This design allows for faster input and improved gaming performance.
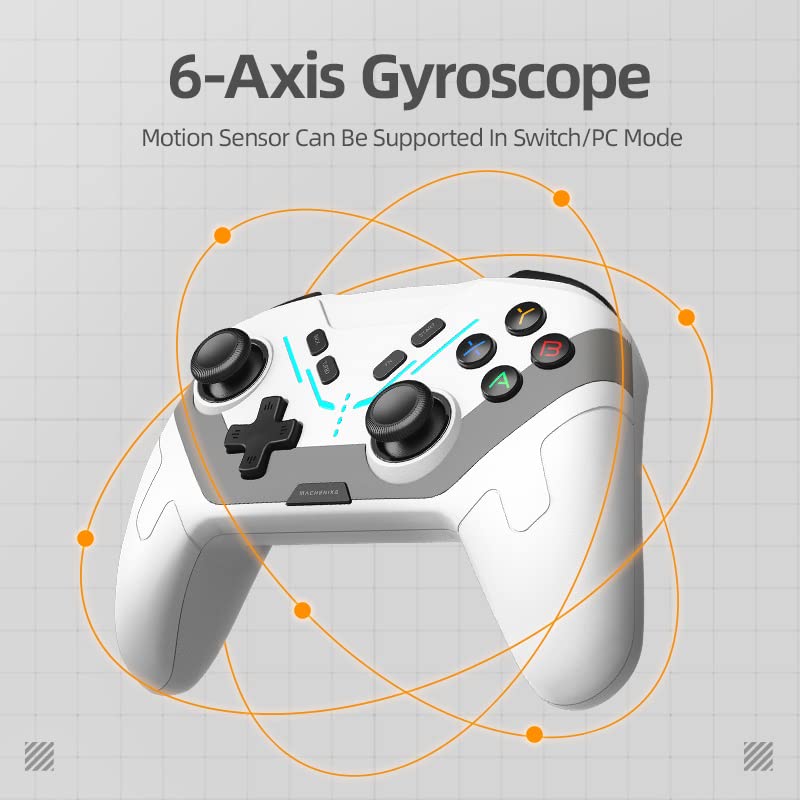
5.4. 6 ašių giroskopinis judesio valdymas
The integrated 6-axis gyro provides motion sensing capabilities, enhancing immersion and control in compatible games, particularly on Nintendo Switch and PC platforms. This allows for precise movements based on controller orientation.
5.5. Multi-level Vibration
The controller features dual motors with 100 adjustable levels of vibration. This provides realistic haptic feedback, enhancing immersion in games by simulating impacts, explosions, and other in-game events.
5.6. Turbo funkcija
Activate the Turbo function for rapid-fire inputs, useful in games requiring quick, repeated button presses. Refer to the in-app settings or specific button combinations for activation and customization.
5.7. LED lemputės
The controller includes LED lights with four different modes to create an ambient gaming atmosphere. The visualized power display ensures you are aware of the battery status, allowing timely recharging.
6. APP Customization and Macro Programming
The Machenike G6 controller can be customized using a dedicated smartphone application (KeyLinker). This app allows for extensive personalization of your gaming experience.
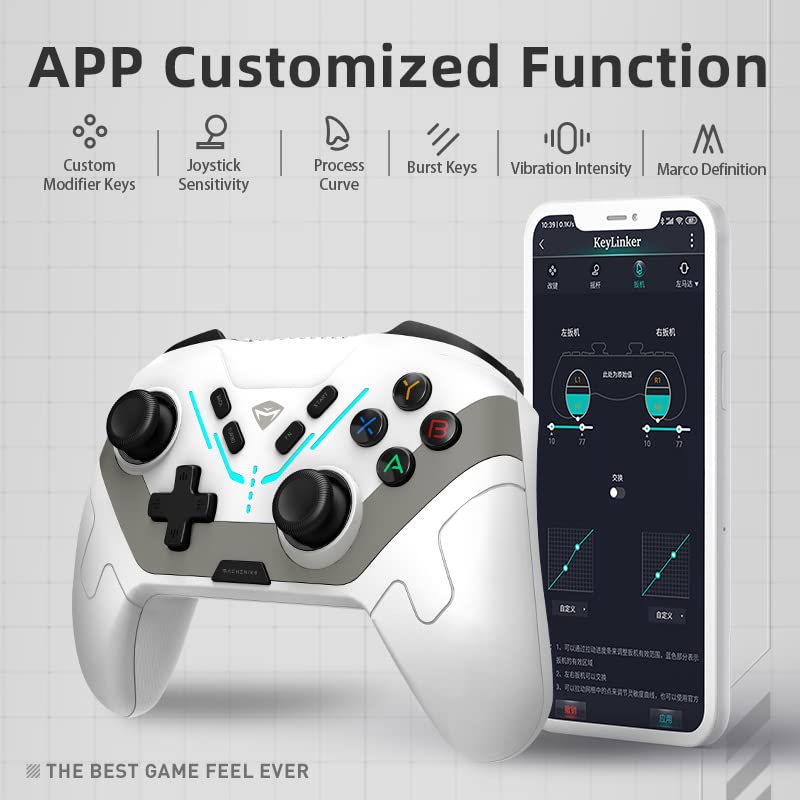
Key features of the app include:
- Makrokomandų redagavimas: Record and assign up to 42 actions to programmable buttons.
- Linear Curve Adjustments: Fine-tune joystick and trigger sensitivity.
- Button Function Mapping: Remap buttons to suit your playstyle.
- Apšvietimo efektai: Adjust LED light modes and brightness.
- Vibracijos intensyvumas: Koreguokite haptinio grįžtamojo ryšio stiprumą.

7. Priežiūra
To ensure the longevity and optimal performance of your Machenike G6 controller, follow these maintenance guidelines:
- Valymas: Valdiklį nuvalykite minkšta, sausa šluoste. Jei nešvarumai sunkiai įveikiami, šiek tiek nuvalykite.ampNuvalykite šluostę vandeniu. Venkite stiprių cheminių medžiagų ar abrazyvinių medžiagų.
- Saugykla: Laikykite valdiklį vėsioje, sausoje vietoje, apsaugotoje nuo tiesioginių saulės spindulių ir ekstremalių temperatūrų.
- Venkite lašų: Protect the controller from impacts and drops, which can damage internal components.
- Kabelio priežiūra: Handle the USB-C cable gently. Avoid bending or twisting it excessively.
8. Problemų sprendimas
If you encounter issues with your Machenike G6 controller, refer to the following common problems and solutions:
Controller Not Connecting/Disconnecting Frequently
- Patikrinkite režimo jungiklį: Ensure the mode slider on the back of the controller is set to the correct position for your device (USB, 2.4G, or Bluetooth).
- Iš naujo susiekite „Bluetooth“: If using Bluetooth, unpair the controller from your device and attempt to pair it again.
- 2.4G imtuvas: Ensure the 2.4G receiver is securely plugged into a working USB port. Try a different USB port.
- Baterijos lygis: Low battery can cause connectivity issues. Charge the controller fully.
- Trikdžiai: Pasitraukite nuo kitų belaidžių įrenginių, kurie gali sukelti trikdžius.
- Programinės aparatinės įrangos atnaujinimas: Check the official Machenike website or app for any available firmware updates for the controller.
Buttons/Joysticks Unresponsive or Drifting
- Perkalibruoti: Use the companion app to recalibrate joysticks and triggers if available.
- Išvalyti: Įsitikinkite, kad mygtuko judėjimui netrukdo jokios šiukšlės.
- Paleisti iš naujo: Turn off and restart the controller and your device.
Vibracija neveikia
- Check In-Game Settings: Ensure vibration is enabled in the game's settings.
- Patikrinkite programos nustatymus: Verify vibration intensity is not set to zero in the companion app.
9. Specifikacijos
| Funkcija | Detalė |
|---|---|
| Modelis | G6 |
| Ryšys | USB (Wired), Bluetooth 5.0, 2.4G Wireless |
| Vairasvirtės | Magnetic Hall Sensing |
| Trigeriai | Magnetic Hall Sensing with Three-Way Trigger Locks |
| Mygtukai | Kailh Mechanical Micro Switches |
| Judesio valdymas | 6-Axis Gyro (Switch/PC Mode) |
| Vibracija | Dual Motors, 100 Adjustable Levels |
| Tinkinimas | Smartphone App (Macro Programming, Curve Adjustments) |
| Matmenys | 5.91 x 3.94 x 1.97 colio |
| Svoris | 14.9 uncijos |
| Gamintojas | Machenike |
| Pirmas prieinamas | 14 m. balandžio 2023 d |
10. Garantija ir palaikymas
The Machenike G6 Tri-mode Switch Controller comes with a standard manufacturer's warranty. For specific warranty terms, conditions, and duration, please refer to the warranty card included in your product packaging or visit the official Machenike support website. For technical assistance, troubleshooting beyond this manual, or customer service inquiries, please contact Machenike customer support through their official channels.
11. Produktų vaizdo įrašai
Watch the official product video for a visual guide on the Machenike G6 Tri-mode Switch Controller's features and usage.


