1. Įvadas
Thank you for choosing the TRIGKEY Key-N Mini PC. This compact and powerful computer is designed for various tasks, from daily work to entertainment, featuring an Intel Alder Lake-N95 processor, 16GB DDR4 RAM, and a 500GB SSD. This manual provides essential information for setting up, operating, maintaining, and troubleshooting your device to ensure optimal performance.
2. Pakuotės turinys
Prašome patikrinti, ar pakuotėje yra visi reikalingi daiktai:
- 1 x TRIGKEY Key-N Mini PC
- 1x maitinimo adapteris
- 1x HDMI laidas
- 1 x Naudotojo vadovas (šis dokumentas)
- 1 x sieninis laikiklis
3. Produktas baigtasview
The TRIGKEY Key-N Mini PC offers a range of interfaces for versatile connectivity and efficient performance. Familiarize yourself with the available ports and features.

Vaizdas: Priekyje ir gale view of the TRIGKEY Key-N Mini PC, highlighting its rich interfaces including USB 3.2, LAN, 3.5mm Audio Jack, HDMI, and USB 2.0 ports.
Priekinis skydelis: Power Button, USB 3.2 (10Gbps) x 3, 3.5mm Audio Jack x 1, Power Indicator Light.
Galinis skydas: AC Jack x 1, LAN 1000Mbps x 1, HDMI (Max 4K 60Hz) x 2, USB 2.0 (480Mbps) x 3, CLR CMOS button.
4. Sąrankos instrukcijos
4.1 Pradinis prisijungimas
- Prijungti ekraną: Connect your monitor(s) to the HDMI ports on the rear panel using the provided HDMI cable. The device supports dual 4K 60Hz displays.
- Prijunkite išorinius įrenginius: Plug in your keyboard and mouse to the available USB ports.
- Prijunkite tinklą: For a wired connection, connect an Ethernet cable to the 1000M LAN port. For wireless, the device supports WiFi 5.
- Prijunkite maitinimą: Plug the power adapter into the AC Jack on the rear panel and then into a power outlet.
4.2 Įjungimas
Press the Power Button on the front panel. The power indicator light will illuminate, and the system will begin to boot up.
4.3 Dviejų ekranų rodymo sąranka
The TRIGKEY Key-N Mini PC supports dual 4K displays, enhancing productivity by allowing you to extend your desktop across two screens. Once both monitors are connected via HDMI, Windows 11 Pro should automatically detect and configure them. If not, navigate to Display Settings in Windows to arrange and extend your displays.
Video: Demonstrates how to set up and utilize the dual-screen display feature of the TRIGKEY Mini PC, showing two monitors connected and functioning simultaneously.
5. Mini kompiuterio valdymas
5.1 Pagrindinės operacijos
- Maitinimo įjungimas/išjungimas: Press the power button to turn on. To turn off, use the Windows Shut Down option or press and hold the power button for 5 seconds.
- Paleisti iš naujo: Use the Windows Restart option for a proper system reboot.
5.2 Tinklo ryšys
The Mini PC supports both wired (1000M LAN) and wireless (WiFi 5) network connections. For wireless, ensure your router is broadcasting a WiFi 5 signal for optimal performance. Bluetooth 5.0 allows for easy connection to compatible devices like headphones or speakers.

Image: Illustrates the built-in wireless module, highlighting WiFi 5 and Bluetooth 5.0 capabilities for reliable networking.
5.3 Efficient Performance
The Intel Alder Lake-N95 processor provides stable performance for everyday tasks, office work, media streaming, and light entertainment. Its compact design makes it suitable for various environments.

Image: Shows the Key-N Mini PC in an office setting, demonstrating its stable performance for applications like Word, Excel, and PowerPoint.
6. Priežiūra ir atnaujinimai
The TRIGKEY Key-N Mini PC is designed for easy upgrades to enhance its storage and memory capabilities.
6.1 Upgrading RAM
The Mini PC is equipped with 16GB DDR4 3200MHz RAM. You can upgrade or replace the RAM module by following these steps:
- Išjunkite įrenginį ir atjunkite visus laidus.
- Unscrew the four screws at the bottom of the Mini PC.
- Carefully lift the back panel from the side to expose the internal components.
- Locate the SO-DIMM DDR4 slot. Gently push the clips outward to release the existing RAM module, then lift it out.
- Align the notch of the new RAM module with the slot and insert it firmly at an angle. Push down until the clips snap into place.
- Reinstall the back panel and secure it with the screws.
Video: A step-by-step tutorial on how to install or upgrade RAM in your TRIGKEY Mini PC.
6.2 Upgrading Storage
The Mini PC comes with a single M.2 SATA 500GB SSD and supports dual M.2 2280 PCIe SSDs. You can expand the internal storage up to 4TB with two SSDs (one M.2 SATA III and one PCIe 3.0 NVMe, not included).
- Follow steps 1-3 from the RAM upgrade section to open the device.
- Locate the M.2 SSD slots. If adding a 2.5-inch SATA drive, align the slot and insert the SSD into the designated bay on the back panel.
- Secure the SSD with the provided screws.
- Reinstall the back panel and secure it with the screws.

Vaizdas: vidinis view of the Mini PC, illustrating the SO-DIMM DDR4 slot and dual M.2 2280 PCIe SSD slots for storage expansion.
Video: A detailed guide on how to install an additional HDD or SSD into your TRIGKEY Mini PC.
6.3 Bendras valymas
Norėdami palaikyti optimalų veikimą, reguliariai valykite „Mini PC“ išorę minkštu, sausu skudurėliu. Įsitikinkite, kad ventiliacijos angos nėra dulkės ir neužsikimšusios. Nenaudokite skystų valiklių tiesiai ant įrenginio.
7. Problemų sprendimas
If you encounter issues with your TRIGKEY Key-N Mini PC, please refer to the following common solutions:
- Nėra galios: Ensure the power adapter is securely connected to both the Mini PC and a working power outlet. Check the power indicator light.
- Nėra ekrano: Verify that the HDMI cables are firmly connected to both the Mini PC and the monitor(s). Try using a different HDMI port or cable. Ensure the monitor is set to the correct input source.
- Tinklo ryšio problemos: For wired connections, check the Ethernet cable and router status. For wireless, ensure WiFi is enabled in Windows settings and you are connected to the correct network.
- Lėtas našumas: Close unnecessary applications, check for background processes, and ensure your system is up to date. Consider upgrading RAM or storage if performance issues persist.
- Sistemos užstrigimai / gedimai: Perform a system restart. If issues continue, check for driver updates or perform a system restore.
For more complex issues, please contact TRIGKEY customer support.
8. Specifikacijos
Below are the detailed technical specifications for the TRIGKEY Key-N Mini PC:
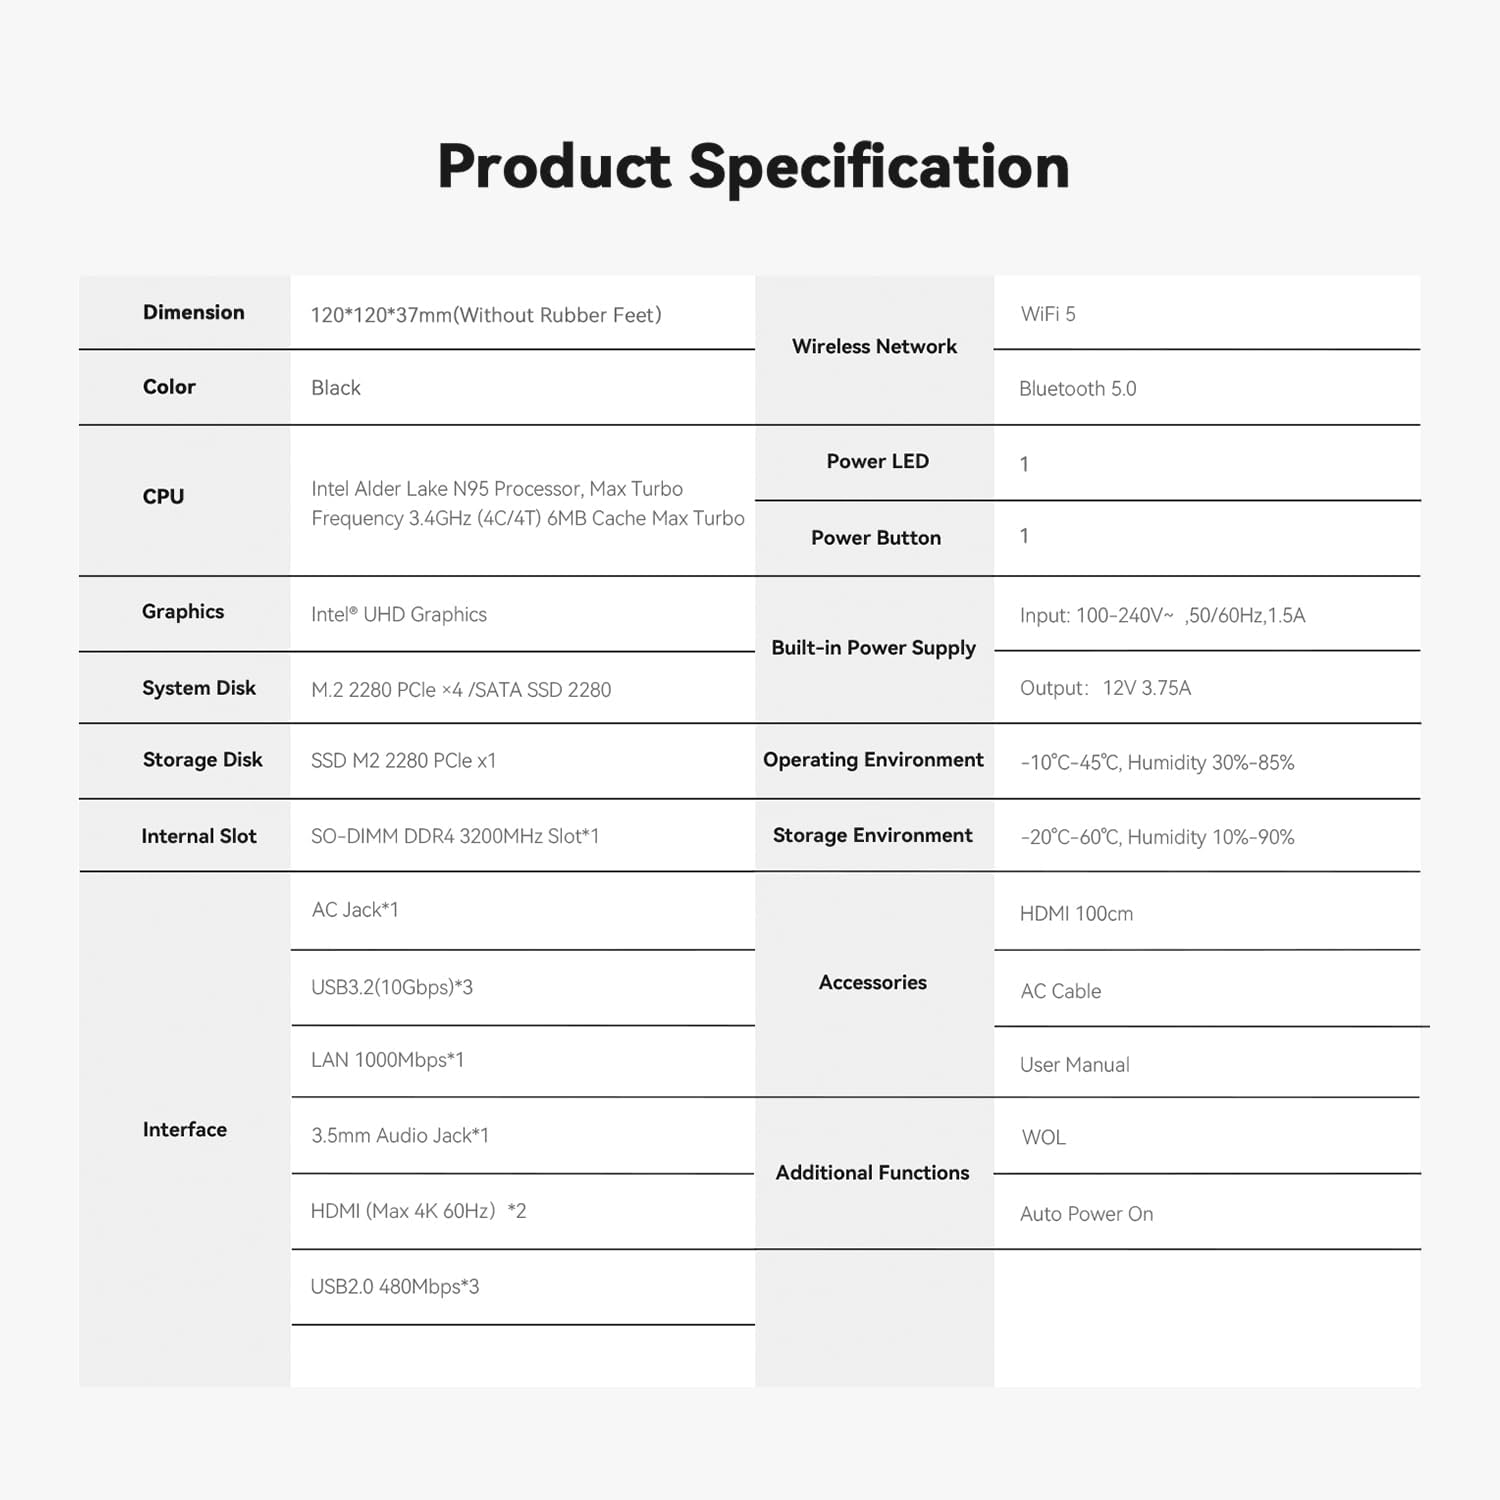
Image: A comprehensive table detailing the product specifications of the TRIGKEY Key-N Mini PC, including dimensions, CPU, RAM, storage, and interfaces.
| Funkcija | Specifikacija |
|---|---|
| Procesorius | Intel Alder Lake N95 (4C/4T, up to 3.4GHz, 6M cache) |
| RAM | 16GB DDR4 3200MHz (SO-DIMM) |
| Sandėliavimas | 500GB M.2 SATA SSD (expandable with another PCIe 3.0 NVMe SSD) |
| Grafika | Intel UHD grafika |
| Vaizdo išvestis | 2 x HDMI (Max 4K 60Hz) |
| Belaidis ryšys | WiFi 5, Bluetooth 5.0 |
| Laidinis ryšys | 1 x 1000M LAN |
| USB prievadai | 3 x USB 3.2 (10 Gb/s), 3 x USB 2.0 (480 Mb/s) |
| Garsas | 1 x 3.5 mm garso lizdas |
| Operacinė sistema | Windows 11 Pro |
| Matmenys | 120 x 120 x 37mm (Without Rubber Feet) |
| Svoris | Maždaug 1.85 svaro |
9. Garantija ir palaikymas
„TRIGKEY“ yra įsipareigojusi teikti puikų klientų aptarnavimą ir palaikymą jūsų „Mini PC“.
9.1 Informacija apie garantiją
Your TRIGKEY Key-N Mini PC comes with a vienerių metų garantija nuo įsigijimo datos. Ši garantija taikoma gamybos defektams ir užtikrina pakeitimo galimybę per 12 mėnesių.
9.2 Pagalba klientams
Mes siūlome 7x24-hour one-on-one customer support ir visą gyvenimą trunkanti techninė pagalba. If you have any questions, encounter problems, or require assistance, please do not hesitate to contact us.

Image: Visual representation of TRIGKEY's service commitments: 24-hour quick reply, 30-day return policy, 12-month replacement, and lifetime technical support.
9.3 Susisiekite su mumis
You can reach our support team through various channels. Please refer to the contact information provided with your product or visit the official TRIGKEY webpagalbos svetainę.
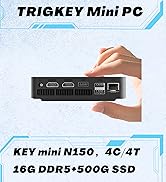
Image: Various platforms and methods to contact TRIGKEY support, including social media, email, and technical support channels.
Video: A short promotional video highlighting TRIGKEY's commitment to customer service and support for their products.


