1. Produktas baigtasview
The Geevon Wireless Indoor Outdoor Thermometer (Model GN-8688-DE-T) is designed to provide accurate temperature and humidity readings for both indoor and outdoor environments. It features a large LCD display with backlight, an integrated alarm clock, snooze function, and calendar. The system includes a main display unit and one wireless outdoor sensor, with support for up to three remote sensors (additional sensors sold separately).

Image: Main display unit showing indoor and outdoor readings, time, and date.
Pagrindinės funkcijos:
- Max & Min Data Records: Tracks and displays the highest and lowest indoor/outdoor temperature and humidity over a 24-hour period or since the last reset.
- Tendencijos rodikliai: Arrows on the display indicate whether temperature and humidity are rising, falling, or remaining stable.
- Belaidis diapazonas: The outdoor sensor can transmit data up to 60 meters (200 feet) in an open area to the main display unit.
- Foninis apšvietimas: A soft white backlight illuminates the display for 10 seconds for easy reading in low-light conditions.
- Universalus išdėstymas: The main unit can be placed on a tabletop using its integrated stand or mounted on a wall. The outdoor sensor can also be wall-mounted.
2. Sąranka ir diegimas
2.1 Akumuliatoriaus įdėjimas
Both the main display unit and the outdoor sensor require batteries (not included).
- Lauko jutiklis: Open the battery compartment on the back of the outdoor sensor. Insert 2 x AAA batteries, ensuring correct polarity (+/-). Before closing, select a channel (1, 2, or 3) using the small switch inside the compartment. This allows for multiple sensors if purchased separately. Close the battery compartment.
- Pagrindinis ekranas: Open the battery compartment on the back of the main display unit. Insert 3 x AAA batteries, ensuring correct polarity (+/-). Close the battery compartment.
2.2 Jutiklių susiejimas
After installing batteries, the main unit will automatically search for the outdoor sensor signal. Place the main unit and the sensor close to each other (within a few feet) for approximately 2-3 minutes to ensure successful pairing. The outdoor temperature and humidity should appear on the main display.

Image: Main display unit and outdoor sensor.
2.3 Įdėjimo gairės
For optimal performance and accurate readings:
- Pagrindinis blokas: Place the main unit indoors, away from direct sunlight, heat sources, or drafts that could affect its internal temperature sensor. It can be placed on a flat surface or mounted on a wall.
- Lauko jutiklis: Position the outdoor sensor vertically in a shaded area, protected from direct sunlight and precipitation. Ensure it is within the 60-meter (200-foot) wireless range of the main unit. Avoid placing it directly on the ground or horizontally, as this can affect accuracy and signal transmission.

Image: Recommended placement for the outdoor sensor.

Image: Main unit placement options: wall mount and tabletop stand.
3. Naudojimo instrukcijos
3.1 Rodyti informaciją
Dideliame LCD ekrane rodoma ši informacija:
- Current Time (12/24 hour format)
- Date and Day of the Week
- Patalpų temperatūra ir drėgmė
- Outdoor Temperature and Humidity (from connected sensor)
- Temperature and Humidity Trend Arrows
- Max/Min Records for Indoor/Outdoor Temperature and Humidity
- Signalo piktograma

Image: Display features and dimensions.
3.2 Laiko ir datos nustatymas
Refer to the buttons on the back or side of the main unit. Typically, a 'SET' or 'MODE' button is used to enter setting mode, and 'UP'/'DOWN' or '+'/'–' buttons are used to adjust values. Press 'SET'/'MODE' repeatedly to cycle through time, date, and 12/24 hour format settings. Confirm each setting by pressing 'SET'/'MODE' again.

Image: Main unit display with control buttons.
3.3 Celsijaus / Farenheito pasirinkimas
To switch between Celsius (°C) and Fahrenheit (°F), press the 'UP' button (often labeled 'C/F') on the main display unit.
3.4 Foninio apšvietimo įjungimas
Press the 'SNOOZE/LIGHT' button to activate the soft white backlight. The backlight will remain on for approximately 10 seconds before automatically turning off.
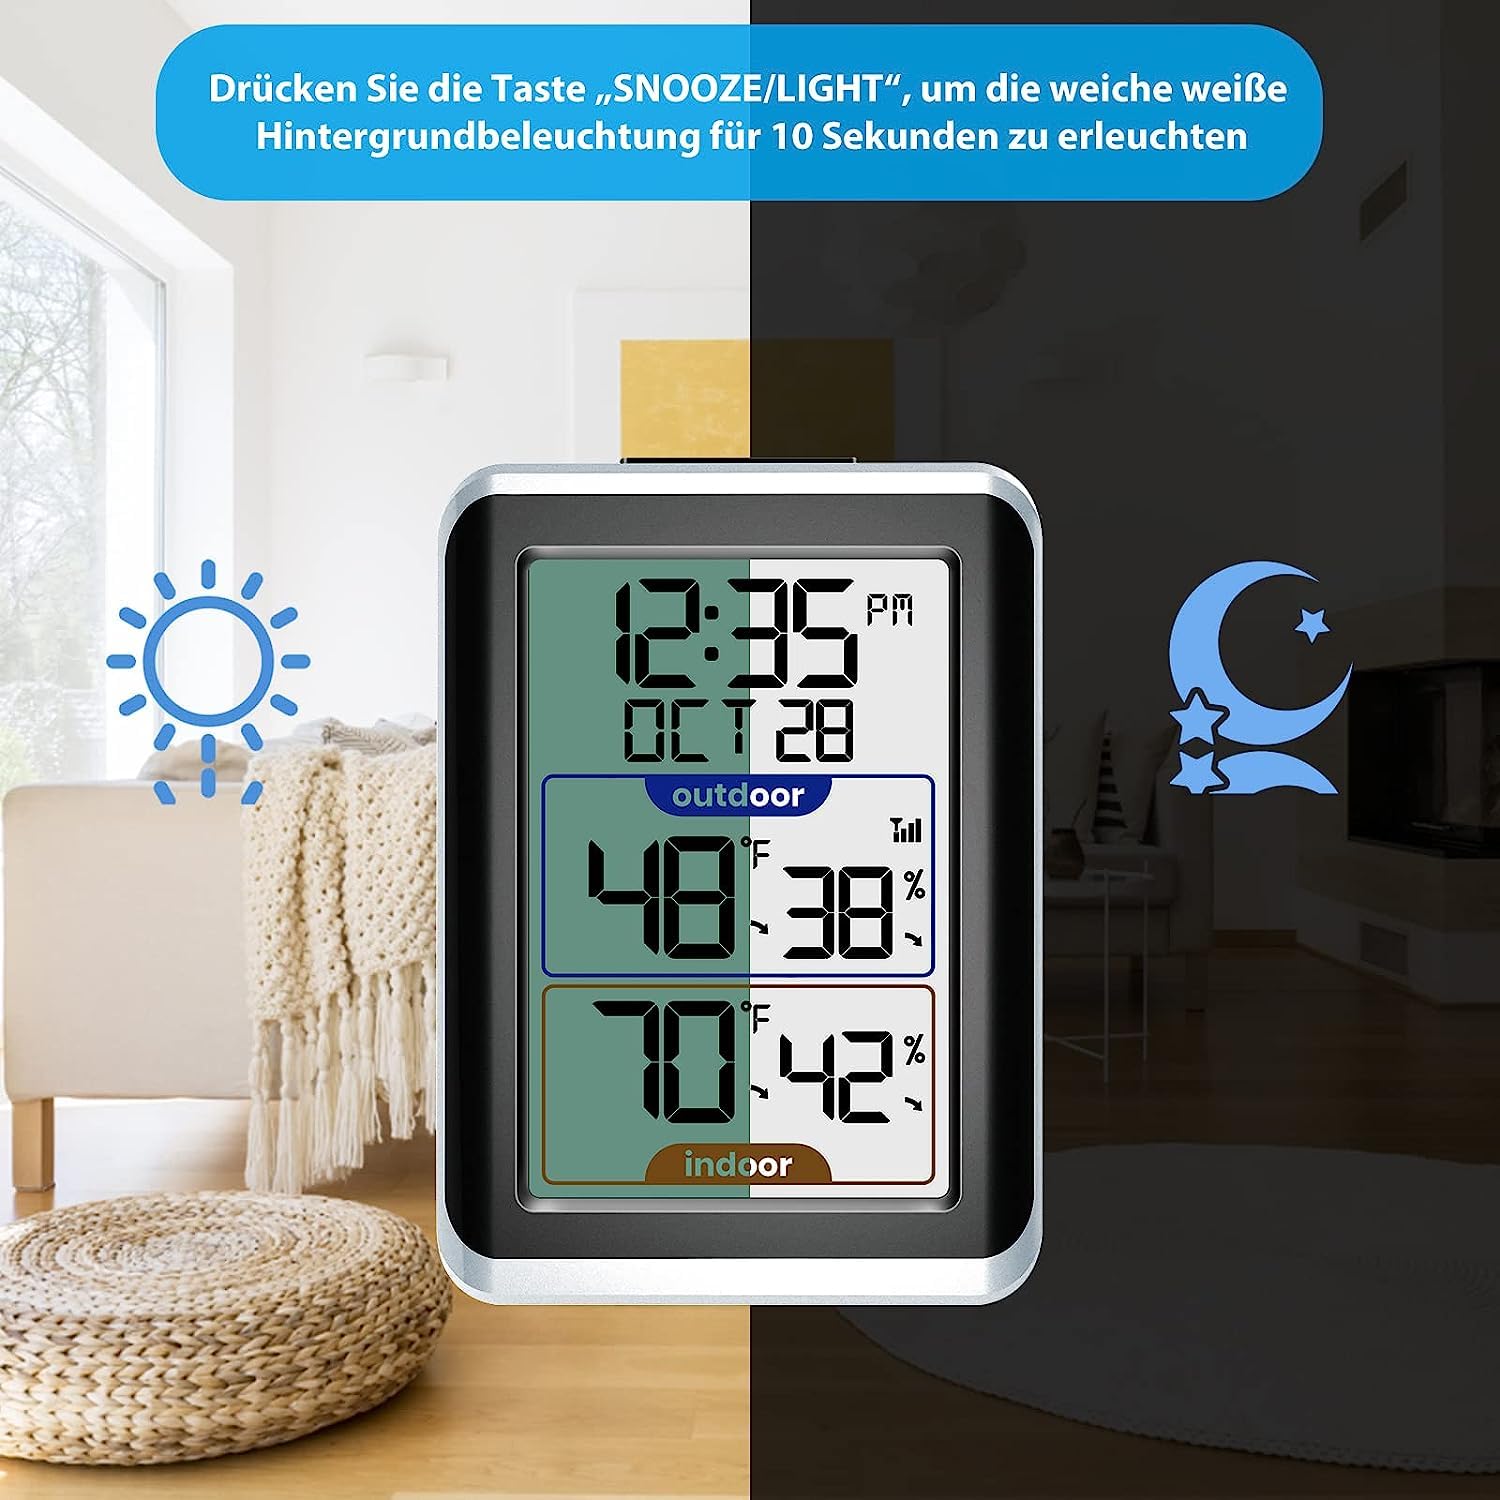
Image: Backlight function in use.
3.5 Žadintuvas ir snaudimo funkcija
To set the alarm, use the 'ALARM' or 'MODE' button to enter alarm setting mode. Use the 'UP'/'DOWN' buttons to adjust the alarm time. Press 'ALARM' or 'MODE' again to confirm. When the alarm sounds, press the 'SNOOZE/LIGHT' button to activate the snooze function, which will temporarily silence the alarm for a few minutes.
3.6 Maksimalūs/minimalūs įrašai
The device automatically records the maximum and minimum temperature and humidity values. Press the 'MAX/MIN' button to view these records. Pressing it again will cycle through the maximum, minimum, and current readings. To reset the Max/Min records, press and hold the 'MAX/MIN' button while viewįrašus.

Image: Trend arrows and Max/Min records.
3.7 Multiple Sensor Channels
If you have multiple outdoor sensors (up to 3), the main unit can display readings from each. Press the 'CHANNEL' button to cycle through the connected sensors (CH1, CH2, CH3). The display will show the readings for the selected channel. If you wish to view all channels in rotation, press the 'CHANNEL' button until the cycle icon appears.

Image: Support for up to 3 remote sensors.
4. Priežiūra
4.1 Akumuliatoriaus keitimas
When the battery indicator appears on the display, it is time to replace the batteries. Replace all batteries in the respective unit (main display or sensor) with new ones of the same type (AAA). Ensure correct polarity. After replacing batteries in the sensor, you may need to re-pair it with the main unit by following the steps in Section 2.2.
4.2 Valymas
Nuvalykite ekraną ir įrenginį casings su minkštu, damp cloth. Do not use abrasive cleaners or solvents, as these can damage the plastic and electronic components. Avoid submerging the units in water.
4.3 Aplinkosaugos aspektai
To prolong the life of your outdoor sensor, ensure it is placed in a location protected from extreme weather conditions, such as heavy rain, snow, or direct, intense sunlight. While designed for outdoor use, excessive exposure to harsh elements can reduce its lifespan.
5. Problemų sprendimas
| Problema | Galima priežastis | Sprendimas |
|---|---|---|
| No display on main unit or sensor. | Neišsikrovusios arba neteisingai įdėtos baterijos. | Pakeiskite baterijas, užtikrindami teisingą poliškumą. |
| Outdoor reading not displayed or flashing. | Sensor not paired, out of range, or interference. | 1. Ensure sensor channel is selected correctly. 2. Re-pair the sensor (remove/reinsert batteries in both units, place close together). 3. Move sensor closer to the main unit. 4. Avoid sources of electromagnetic interference (e.g., TVs, microwaves). |
| Netikslūs temperatūros / drėgmės rodmenys. | Improper placement, direct sunlight/heat, or ventilation issues. | 1. Ensure both units are away from direct sunlight, heat sources, or drafts. 2. Place outdoor sensor in a shaded, well-ventilated area. |
| Alarm settings are incorrect or difficult to set. | User error or specific button sequence required. | Carefully follow the alarm setting instructions in Section 3.5. If issues persist, try resetting the unit by removing and reinserting batteries. |
6. Specifikacijos
- Modelio numeris: GN-8688-DE-T
- Prekinis ženklas: Geevonas
- Maitinimo šaltinis: Main Unit: 3 x AAA batteries (not included); Outdoor Sensor: 2 x AAA batteries (not included)
- Belaidis diapazonas: Iki 60 metrų (200 pėdų) atviroje erdvėje
- Sensor Channels: Supports up to 3 outdoor sensors
- Ypatingos savybės: Alarm, Wireless, Clock, Backlight, Max/Min Records, Trend Indicators
- Ekranas: 3.7-inch LCD with white backlight
- Matmenys (paketas): Approximately 12.4 x 8.9 x 5.8 cm; 190 g
7. Garantija ir palaikymas
For warranty information and customer support, please refer to the documentation included with your purchase or contact Geevon customer service directly. Details are typically available on the manufacturer's official websvetainėje arba per pardavėją, iš kurio įsigijote produktą.