
Svarbi saugos informacija
Prieš montuodami ir naudodami, atidžiai perskaitykite visas instrukcijas. Nesilaikant šių instrukcijų, galite sugadinti turtą arba susižaloti.
- Įsitikinkite, kad visos jungtys yra tvirtos, kad išvengtumėte nuotėkio.
- Neperveržkite komponentų, nes tai gali juos pažeisti.
- Always test water temperature before showering to avoid scalding.
- Smulkias dalis laikykite vaikams nepasiekiamoje vietoje.
- If you are unsure about any installation step, consult a qualified plumber.
Pakuotės turinys
Prieš pradėdami diegti, patikrinkite, ar yra visi komponentai:
- 1 x 10-Inch Rain Shower Head
- 1 x Handheld Shower Head
- 1 x 70-Inch Shower Hose
- 1 x T-Valve (Diverter)
- 1 x Wall Bracket for Handheld Shower
- Washers and Plumber's Tape
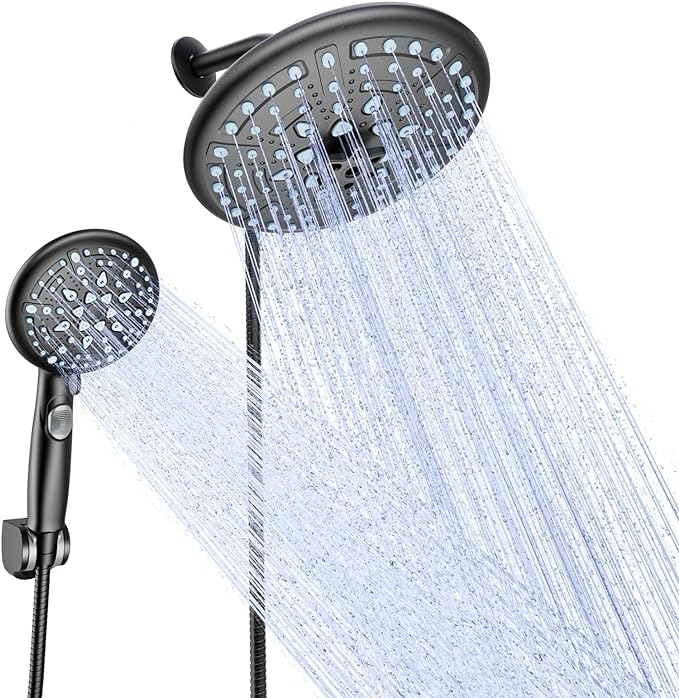
Vaizdas: Viršview of the Veken dual shower head system components, including the rain shower head, handheld shower, hose, and diverter.
Sąranka ir diegimas
Tools required: Adjustable wrench, plumber's tape (included).
- Prepare Existing Shower Arm: Remove your existing shower head from the shower arm. Clean any old plumber's tape or debris from the threads.
- Užklijuokite santechniko juostą: Wrap plumber's tape clockwise around the threads of your existing shower arm 3-5 times.
- Install T-Valve (Diverter): Screw the T-valve onto the shower arm. Hand-tighten first, then use an adjustable wrench for a final quarter-turn to ensure a snug fit. Do not overtighten. Ensure the diverter lever is accessible.
- Attach Rain Shower Head: Apply plumber's tape to the top outlet threads of the T-valve. Screw the 10-inch rain shower head onto these threads. Hand-tighten securely.
- Connect Shower Hose to T-Valve: Apply plumber's tape to the side outlet threads of the T-valve. Connect one end of the 70-inch shower hose to this outlet. Ensure a washer is inside the hose connection. Hand-tighten.
- Connect Shower Hose to Handheld Shower Head: Connect the other end of the 70-inch shower hose to the handheld shower head. Ensure a washer is inside the hose connection. Hand-tighten.
- Įdiekite sieninį laikiklį: Choose a suitable location on your shower wall for the handheld shower head bracket. Clean the surface thoroughly. Peel off the adhesive backing and firmly press the bracket onto the wall for at least 30 seconds. Allow 24 hours for the adhesive to set before placing the handheld shower head in the bracket.
- Testas dėl nuotėkio: Turn on the water supply and check all connections for leaks. If leaks occur, tighten the connection slightly or reapply plumber's tape.
Naudojimo instrukcijos
This dual shower head system offers versatile showering options.
- Diverter Lever: Use the lever on the T-valve to switch between the rain shower head, the handheld shower head, or both simultaneously.
- Rain Shower Head Settings: The 10-inch rain shower head provides a wide, drenching spray.
- Handheld Shower Head Settings: The handheld shower head features 5 spray settings: Rain, Massage, Mist, Rainstorm, and a combination setting. Rotate the dial on the face of the handheld shower head to cycle through these settings.
- Adjustable Extension Arm: The rain shower head is attached to an adjustable extension arm. Loosen the collar on the arm, adjust the height and angle of the rain shower head as desired, then tighten the collar to secure its position.
Priežiūra ir valymas
Regular cleaning will help maintain the performance and appearance of your shower system.
- Bendras valymas: Clean the shower heads and hose regularly with a soft cloth and mild soap or a non-abrasive bathroom cleaner.
- Venkite stiprių cheminių medžiagų: Do not use abrasive cleaners, scouring pads, or cleaners containing ammonia, bleach, or alcohol, as these can damage the finish.
- Purkštukų valymas: The nozzles on both shower heads are made of silicone. If mineral deposits build up, gently rub the nozzles with your finger or a soft brush to dislodge them.
- Žarnos priežiūra: Periodically wipe down the shower hose to prevent soap scum buildup.
Trikčių šalinimas
| Problema | Galima priežastis | Sprendimas |
|---|---|---|
| Žemas vandens slėgis | Clogged nozzles; partially closed water valve; mineral buildup in shower head. | Clean shower head nozzles; ensure main water valve is fully open; remove and clean shower head filters. |
| Nuotėkiai jungtyse | Atsilaisvinusios jungtys; nepakankamai stipri santechniko juosta; susidėvėjusios poveržlės. | Tighten connections (hand-tighten plus a quarter-turn with wrench); reapply plumber's tape; replace washers if damaged. |
| Handheld shower head not staying in bracket | Bracket not properly adhered; bracket worn. | Ensure wall surface was clean and dry before installation; allow 24 hours for adhesive to cure; replace bracket if worn. |
| Difficulty switching between shower heads | Diverter lever stiff or obstructed. | Ensure no debris is obstructing the lever; apply a small amount of silicone grease if stiff. |
Specifikacijos
| Funkcija | Detalė |
|---|---|
| Prekės ženklas | Veken |
| Modelio numeris | SHC3V102 |
| Lietaus dušo galvutės dydis | 10 colių |
| Handheld Shower Head Settings | Rain, Massage, Mist, Rainstorm |
| Žarnos ilgis | 70 colių |
| Medžiaga | Akrilnitrilo butadieno stirenas (ABS) |
| Baigti | Matinė juoda (dažyta) |
| Diegimo tipas | Montuojamas ant sienos |
| UPC | 850051133659 |
Garantija ir palaikymas
For warranty information, please refer to the documentation included with your purchase or contact the retailer. If you require further assistance or have questions not covered in this manual, please contact Veken customer support.
Klientų aptarnavimas:
- El. paštas: support@veken.com (Pvzample)
- Websvetainė: www.veken.com (Pvzample)
Please note that contact details are examples and may vary. Refer to your product packaging for official support information.