1. Įvadas
Thank you for choosing the Conentool 21V Cordless Impact Drill/Driver Kit. This tool is designed for various drilling and screwdriving tasks in wood, metal, plastics, and masonry. Please read this manual carefully before operating the tool to ensure safe and efficient use. Keep this manual for future reference.

Image 1.1: The Conentool 21V Cordless Impact Drill/Driver Kit, including the drill, two 2500mAh batteries, charger, and a variety of drill bits and accessories in a carrying case.
2. Bendrosios saugos instrukcijos
ĮSPĖJIMAS: perskaitykite visus su šiuo elektriniu įrankiu pateiktus saugos įspėjimus, instrukcijas, iliustracijas ir specifikacijas. Jei nesilaikysite visų toliau išvardytų nurodymų, galite gauti elektros smūgį, gaisrą ir (arba) rimtus sužalojimus.
2.1 Darbo zonos sauga
- Laikykite darbo vietą švarią ir gerai apšviestą. Netvarkingos arba tamsios vietos sukelia nelaimingus atsitikimus.
- Nenaudokite elektrinių įrankių sprogioje aplinkoje, pvz., ten, kur yra degių skysčių, dujų ar dulkių. Elektriniai įrankiai sukuria kibirkštis, kurios gali uždegti dulkes arba dūmus.
- Dirbdami su elektriniu įrankiu saugokite vaikus ir pašalinius asmenis. Dėl išsiblaškymo galite prarasti kontrolę.
2.2 Elektros sauga
- Elektrinio įrankio kištukai turi atitikti lizdą. Niekada jokiu būdu nemodifikuokite kištuko.
- Venkite kūno kontakto su įžemintais paviršiais, tokiais kaip vamzdžiai, radiatoriai, viryklės ir šaldytuvai. Jei jūsų kūnas yra įžemintas arba įžemintas, padidėja elektros smūgio rizika.
- Saugokite elektrinius įrankius nuo lietaus ar drėgnų sąlygų. Į elektrinį įrankį patekęs vanduo padidins elektros smūgio riziką.
2.3 Asmens sauga
- Visada dėvėkite akių apsaugos priemones. Naudokite apsauginius akinius, akinius nuo saulės arba veido kaukę.
- Ilgai dirbdami su įrankiu, dėvėkite klausos apsaugos priemones.
- Apsirenkite tinkamai. Nedėvėkite laisvų drabužių ar papuošalų. Laikykite plaukus ir drabužius toliau nuo judančių dalių.
- Būkite budrūs, stebėkite, ką darote, ir vadovaukitės sveiku protu, kai naudojate elektrinį įrankį.
3. Pakuotės turinys
Patikrinkite, ar pakuotėje yra visi toliau išvardyti daiktai. Jei kurių nors daiktų trūksta arba jie pažeisti, susisiekite su klientų aptarnavimo tarnyba.
- 1 x Conentool 21V Cordless Impact Drill/Driver
- 2 x 2500mAh Lithium-ion Batteries
- 1 x akumuliatoriaus įkroviklis
- 1 x Flexible Shaft Extension
- Various Drill Bits (for wood, metal, masonry)
- Various Screwdriver Bits
- Lizdų adapteriai
- Dėklas nešiojimui
- Vartotojo vadovas

Image 3.1: A complete overview of the kit contents, including the drill, two batteries, charger, flexible shaft, various drill bits, screwdriver bits, and socket adapters, all neatly arranged.
4. Produktas baigtasview
Familiarize yourself with the main components of your drill/driver:
- Chuckas: Talpina grąžtų ir atsuktuvų antgalius.
- Sukimo momento reguliavimo žiedas: Selects the desired torque setting.
- Režimo pasirinkimo žiedas: Switches between screwdriving, drilling, and impact drilling modes.
- Greičio pasirinkimo jungiklis: Changes between high and low-speed gears.
- Trigerio jungiklis: Įjungia įrankį ir valdo greitį (kintamas greitis).
- Pirmyn/atgal perjungiklis: Keičia sukimosi kryptį.
- LED darbo lemputė: Apšviečia darbo zoną.
- Baterija: Suteikia įrankiui galios.
- Baterijos atleidimo mygtukas: Baterijos išėmimui.
- Rankena: Ergonomiška rankena patogiam naudojimui.

4.1 pav.: Vidinis view highlighting the brushless motor, which provides increased power, efficiency, and a quieter operation with no sparks.
5. Sąranka
5.1 Akumuliatoriaus įkrovimas
The battery pack is not fully charged at the time of purchase. It is recommended to fully charge the battery before first use.
- Prijunkite įkroviklį prie standartinio maitinimo lizdo.
- Slide the battery pack onto the charger base. Ensure it clicks into place.
- The charger indicator light will show the charging status. A red light typically indicates charging, and a green light indicates a full charge.
- Visiškai įkrovę, atjunkite įkroviklį nuo maitinimo lizdo ir išimkite akumuliatorių.

Image 5.1: The battery charger connected to a wall outlet, with a battery pack inserted for charging. The red light indicates charging, and the green light indicates a completed charge.
5.2 Akumuliatoriaus įdėjimas ir išėmimas
- Norėdami įdiegti: Sulygiuokite akumuliatorių bloką su įrankio rankenos pagrindu ir stumkite jį, kol jis spragtelėdamas tvirtai užsifiksuos vietoje.
- Norėdami pašalinti: Press the battery release button (usually located at the front of the battery) and slide the battery pack out of the tool.

5.2 pav.: Pjūvis view of the 2500mAh battery pack, illustrating its internal lithium-ion cells and power management system, designed for up to 90 minutes of use per battery.
5.3 Installing and Removing Drill/Screwdriver Bits
- Norėdami įdiegti: Rotate the chuck counter-clockwise to open the jaws. Insert the desired bit into the chuck as far as it will go. Rotate the chuck clockwise to tighten the jaws firmly around the bit.
- Norėdami pašalinti: Pasukite griebtuvą prieš laikrodžio rodyklę, kad atlaisvintumėte žandikaulius ir ištrauktumėte antgalį.
Ensure the bit is securely fastened to prevent it from slipping during operation.
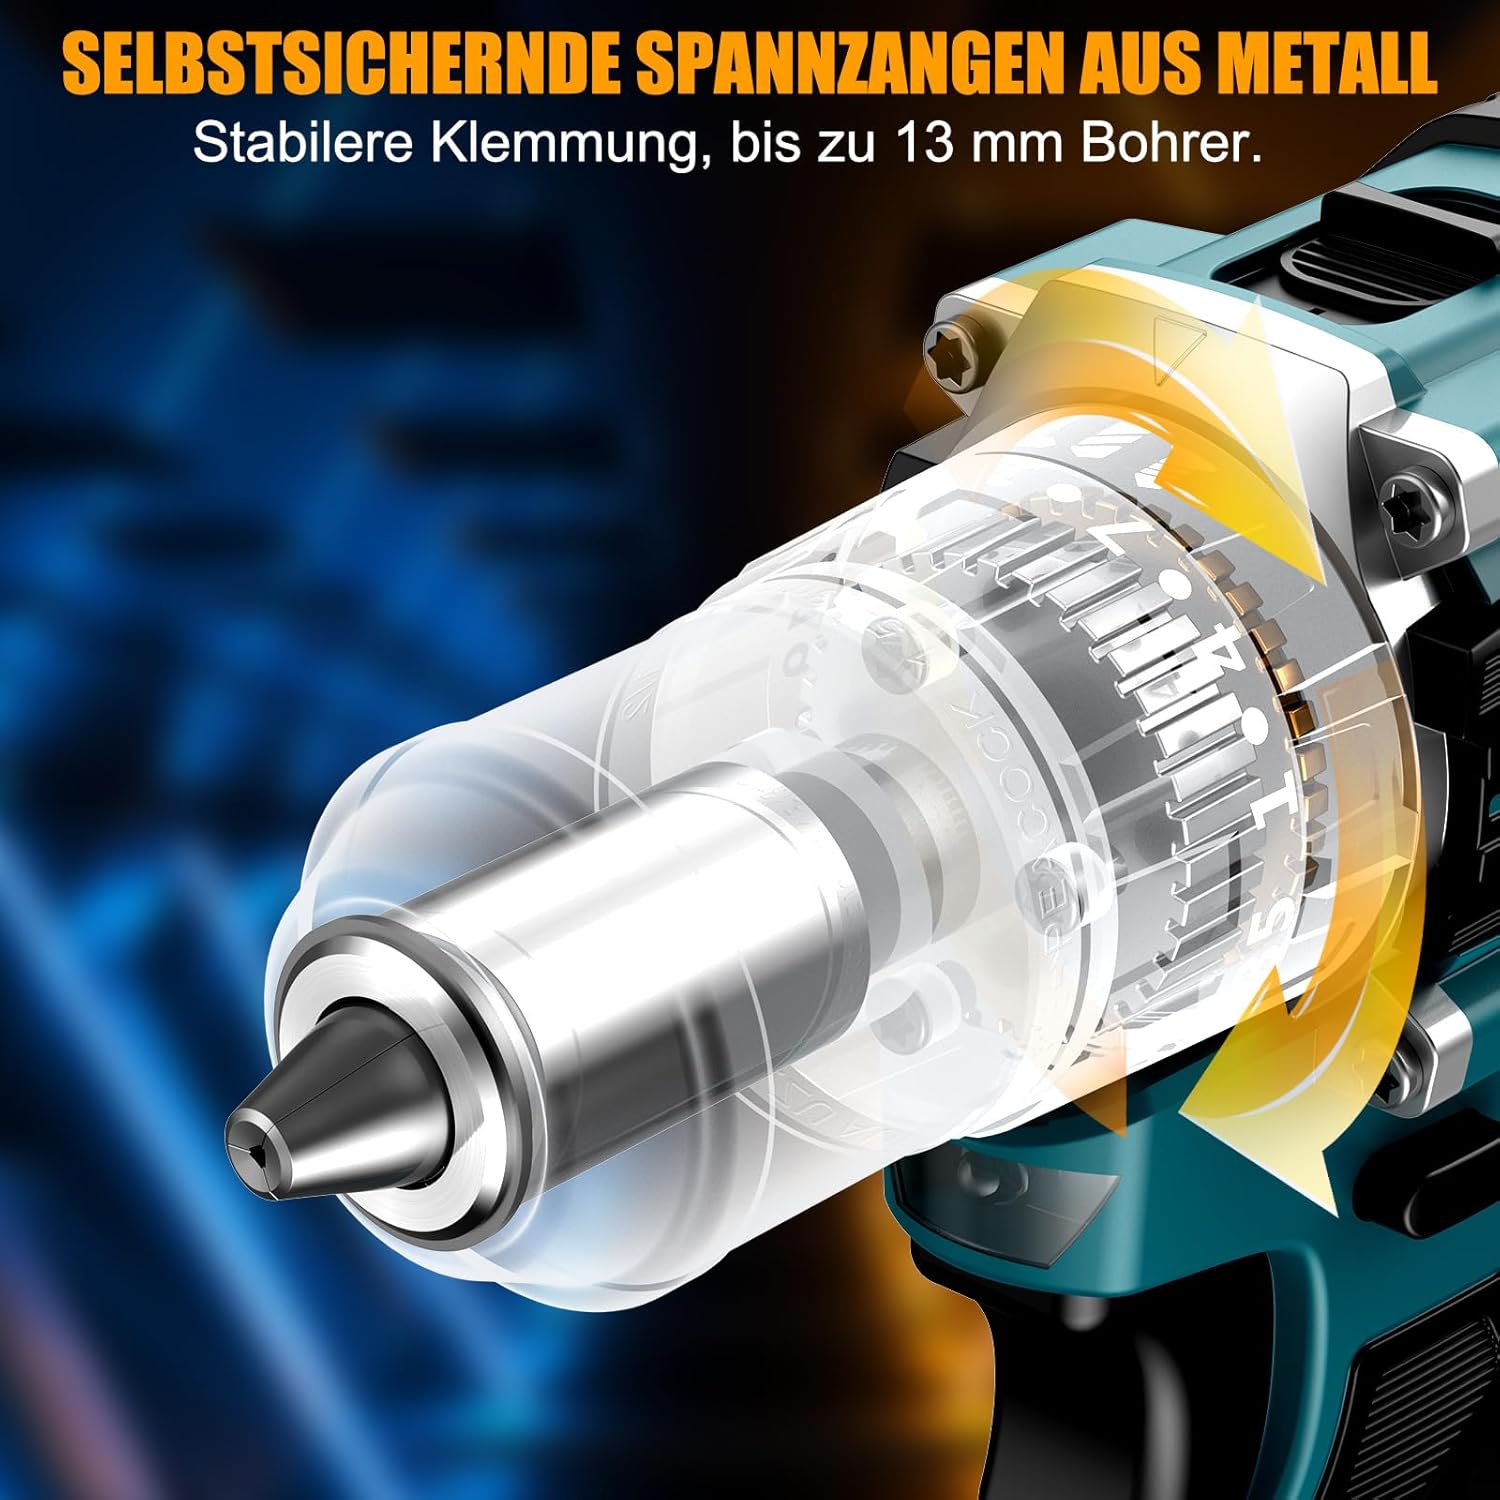
5.3 paveikslėlis: Išsamus view of the self-locking metal chuck, demonstrating its stable clamping mechanism capable of holding drill bits up to 13mm securely.
6. Naudojimo instrukcijos
6.1 Įjungimas / išjungimas ir greičio valdymas
- To turn the tool ON, press the trigger switch. The speed is variable; press the trigger further for higher speed.
- Norėdami IŠJUNGTI įrankį, atleiskite gaiduko jungiklį.
- The integrated LED work light will illuminate when the trigger is pressed, providing visibility in dimly lit areas.
6.2 Sukimasis į priekį / atgal
The forward/reverse selector switch is located above the trigger. Push it to the left for forward rotation (for screwdriving and drilling) and to the right for reverse rotation (for removing screws or freeing jammed bits). Ensure the tool is stopped before changing direction.
6.3 Speed Gear Selection
The drill features a 2-speed gear selector switch on top of the tool:
- 1 pavara (mažas greitis, 0–650 aps./min.): Ideal for high-torque applications like driving large screws or drilling large holes.
- 2 pavara (didelis greitis, 0–1850 aps./min.): Suitable for fast drilling in softer materials and smaller diameter holes.
Always select the appropriate gear for the task. Change gears only when the tool is completely stopped.
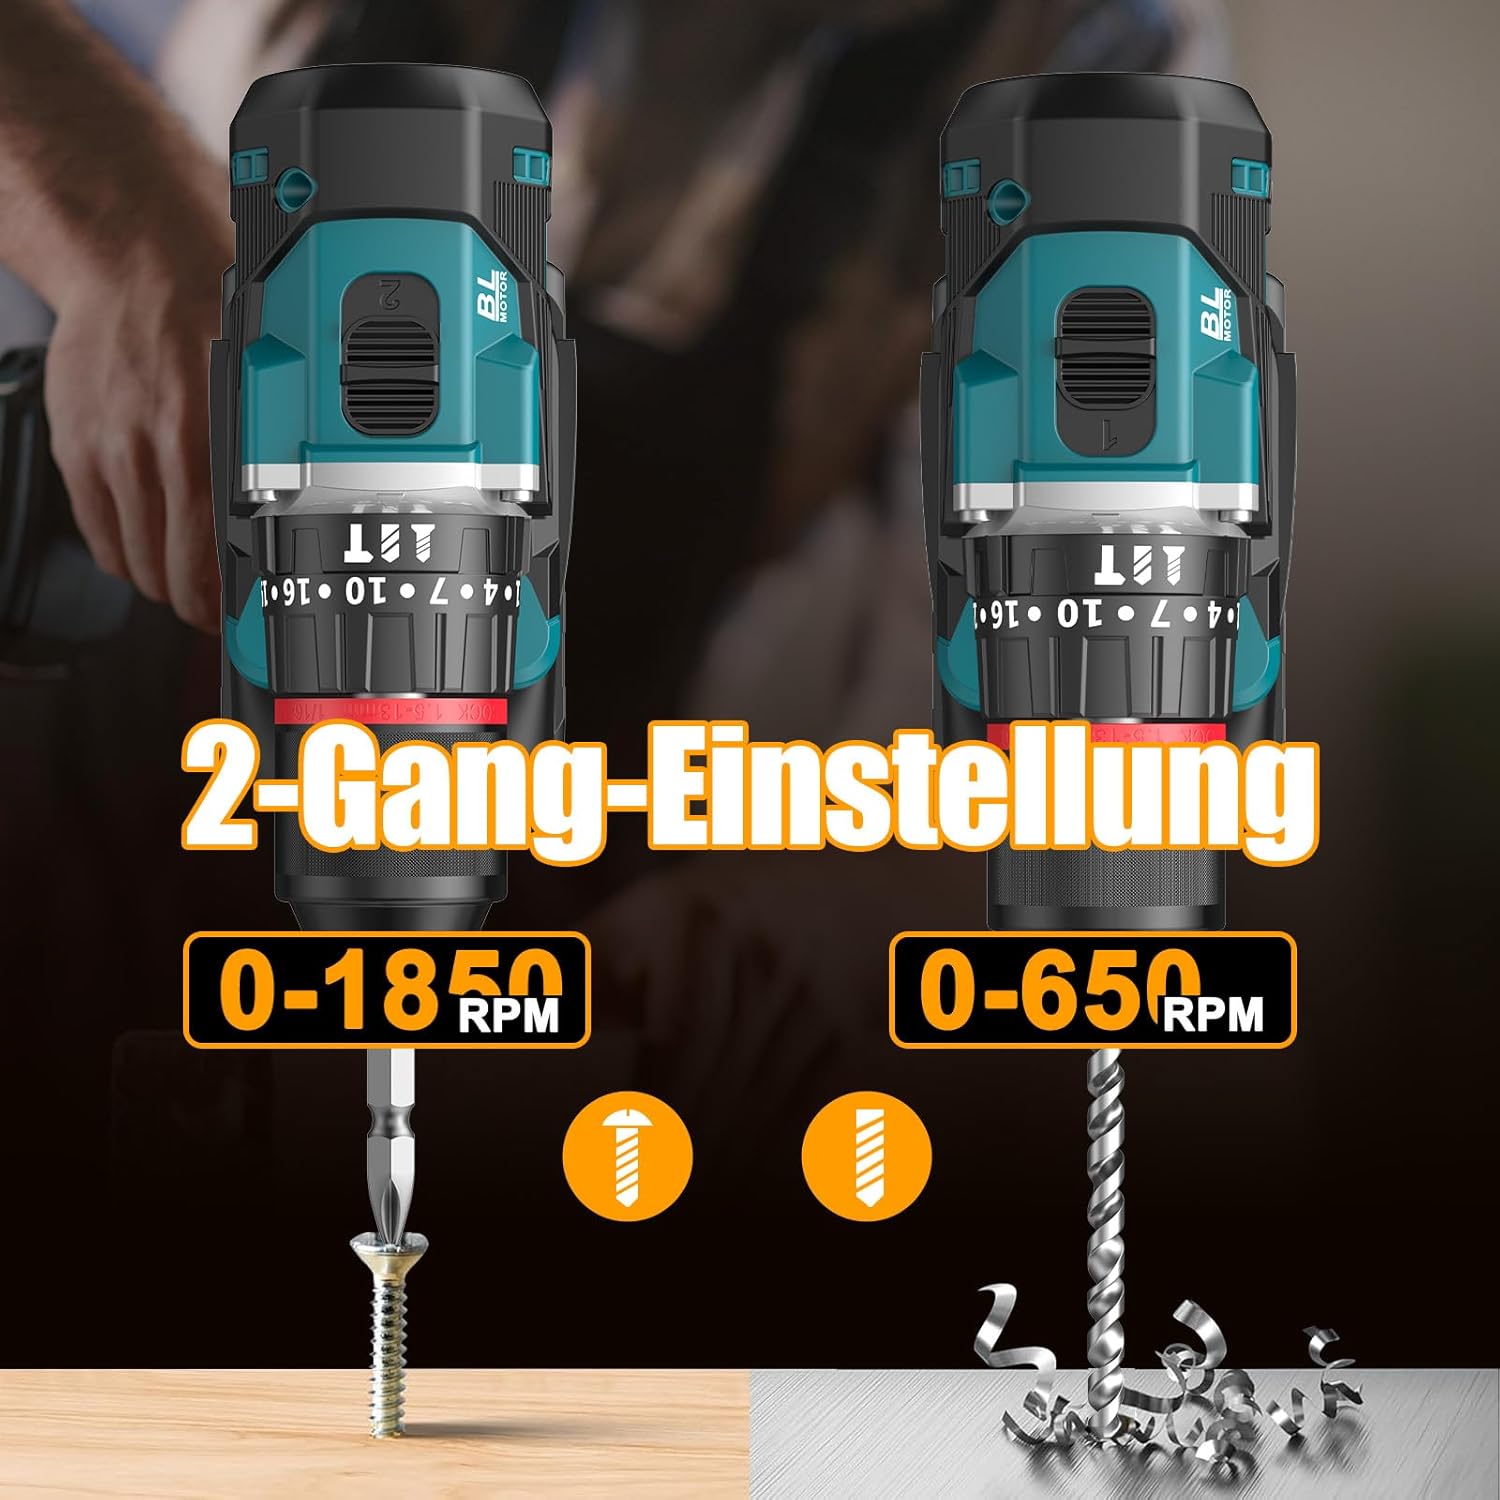
Image 6.1: An illustration demonstrating the two-speed gear settings: Gear 1 (0-650 RPM) for screwdriving and Gear 2 (0-1850 RPM) for drilling, allowing for optimal performance based on the application.
6.4 Sukimo momento reguliavimas ir režimo pasirinkimas
The torque adjustment ring allows you to set the desired torque for screwdriving applications, preventing overtightening or stripping screws. The mode selector ring allows you to switch between different operating modes.
- Screwdriving Mode (Torque Settings 1-35): Use these settings to match the torque to the screw size and material. Lower numbers for smaller screws/softer materials, higher numbers for larger screws/harder materials.
- Gręžimo režimas (Grąžto piktograma): For general drilling without impact. The clutch is disengaged, providing maximum torque.
- Smūginio gręžimo režimas (Plaktuko piktograma): For drilling into masonry or concrete, providing a hammering action in addition to rotation.
The drill offers 35+3 settings, including 35 torque settings for screwdriving and 3 modes (screwdriving, drilling, impact drilling).

Image 6.2: A visual representation of the 35+3 torque and mode settings, indicating precise power control and a maximum torque of 55 N.m, suitable for various materials like wood, brick, plastic, and metal.
7. Priežiūra
7.1 Valymas
- Prieš atlikdami bet kokius valymo ar techninės priežiūros darbus, visada atjunkite akumuliatorių.
- Įrankio ventiliacijos angas laikykite švarias, kad neperkaistų.
- Naudokite minkštą, damp šluostė įrankiui valyti casing. Nenaudokite stiprių cheminių medžiagų ar abrazyvinių valiklių.
7.2 Saugykla
- Įrankį ir baterijas laikykite vėsioje, sausoje vietoje, toliau nuo tiesioginių saulės spindulių ir drėgmės.
- Store the tool in its carrying case to protect it from dust and damage.
- Laikyti vaikams nepasiekiamoje vietoje.

Image 7.1: A person carrying the Conentool drill kit in its durable black carrying case, designed for convenient storage and transport of the tool and its accessories.
7.3 Akumuliatoriaus priežiūra
- Do not store batteries in a discharged state. Recharge them regularly, especially if not used for extended periods.
- Venkite baterijų laikymo ekstremaliose temperatūrose.
- Nebandykite ardyti ar modifikuoti akumuliatoriaus.
8. Problemų sprendimas
| Problema | Galima priežastis | Sprendimas |
|---|---|---|
| Įrankis neįsijungia | Baterija neįkrauta arba netinkamai įdėta. | Įsitikinkite, kad akumuliatorius yra visiškai įkrautas ir teisingai įdėtas. |
| Sumažinta galia arba greitis | Akumuliatoriaus įkrova žema. | Įkraukite akumuliatorių. |
| Antgalis slysta griebtuve | Griebtuvas nepakankamai priveržtas. | Tighten the chuck firmly around the bit. Ensure the bit shank is clean. |
| Perkaitimas | Užblokuotos ventiliacijos angos; nuolatinis intensyvus naudojimas. | Išvalykite ventiliacijos angas. Ilgai naudojant, leiskite įrankiui atvėsti. |
9. Specifikacijos
| Funkcija | Specifikacija |
|---|---|
| Modelio numeris | ebvc-sd-de |
| ttage | 21 voltų |
| Baterijos tipas | Ličio jonų |
| Baterijos talpa | 2500 mAh (kiekvienas) |
| Max torque | 55 Nm |
| Sukimo momento nustatymai | 35 + 3 Modes (Screwdriving, Drilling, Impact Drilling) |
| Tuščiosios eigos greitis (1 pavara) | 0-650 aps./min |
| Tuščiosios eigos greitis (2 pavara) | 0-1850 aps./min |
| Chuck dydis | 13 mm (3/8 inch) Keyless |
| Gaminio matmenys | 35 x 31 x 10 cm |
| Svoris (su baterija) | 1.5 kilogramo |
10. Garantija ir palaikymas
Conentool products are manufactured to high-quality standards. In the unlikely event of a defect due to material or manufacturing fault, please contact your retailer or Conentool customer service. Please retain your proof of purchase for warranty claims.
For further assistance, technical support, or to inquire about spare parts, please refer to the contact information provided with your purchase or visit the official Conentool websvetainę.


