1. Įvadas
This manual provides essential instructions for the safe and efficient operation of your GROVIEW Mini Projector Bluetooth, Model Groview-B2D-US. Please read this manual thoroughly before using the projector and retain it for future reference.
Groview-B2D-US is a compact and portable projector featuring electric focus, Bluetooth 5.1 connectivity, and a fully sealed optical engine designed for reduced noise and extended lifespan. It supports Full HD 1080P input with a native 720P resolution and offers a digital zoom function.
2. Saugos informacija
- Nežiūrėkite tiesiai į projektoriaus objektyvą, kai lamp yra įjungtas.
- Užtikrinkite tinkamą vėdinimą aplink projektorių, kad jis neperkaistų. Neužblokuokite ventiliacijos angų.
- Naudokite tik prie projektorijaus pridėtą maitinimo adapterį.
- Saugokite projektorių nuo lietaus, drėgmės ar ekstremalių temperatūrų.
- Nestatykite projektoriaus ant nestabilių paviršių.
- Nebandykite patys ardyti ar remontuoti projektoriaus. Pagalbos kreipkitės į kvalifikuotus techninės priežiūros darbuotojus.
- Projektorių laikykite toliau nuo vaikų ir naminių gyvūnėlių.
3. Kas yra dėžutėje
Patikrinkite, ar pakuotėje yra visi daiktai:
- 1 x Groview Electric Focus Projector
- 1x HDMI laidas
- 1 x maitinimo laidas
- 1x nuotolinio valdymo pultas
- 1 x Naudotojo vadovas (šis dokumentas)
4. Produktas baigtasview
4.1 Projektoriaus komponentai
The following image illustrates the main components of the Groview Mini Projector.

4.2 Įvesties / išvesties prievadai
The rear panel of the projector features various ports for connecting external devices.
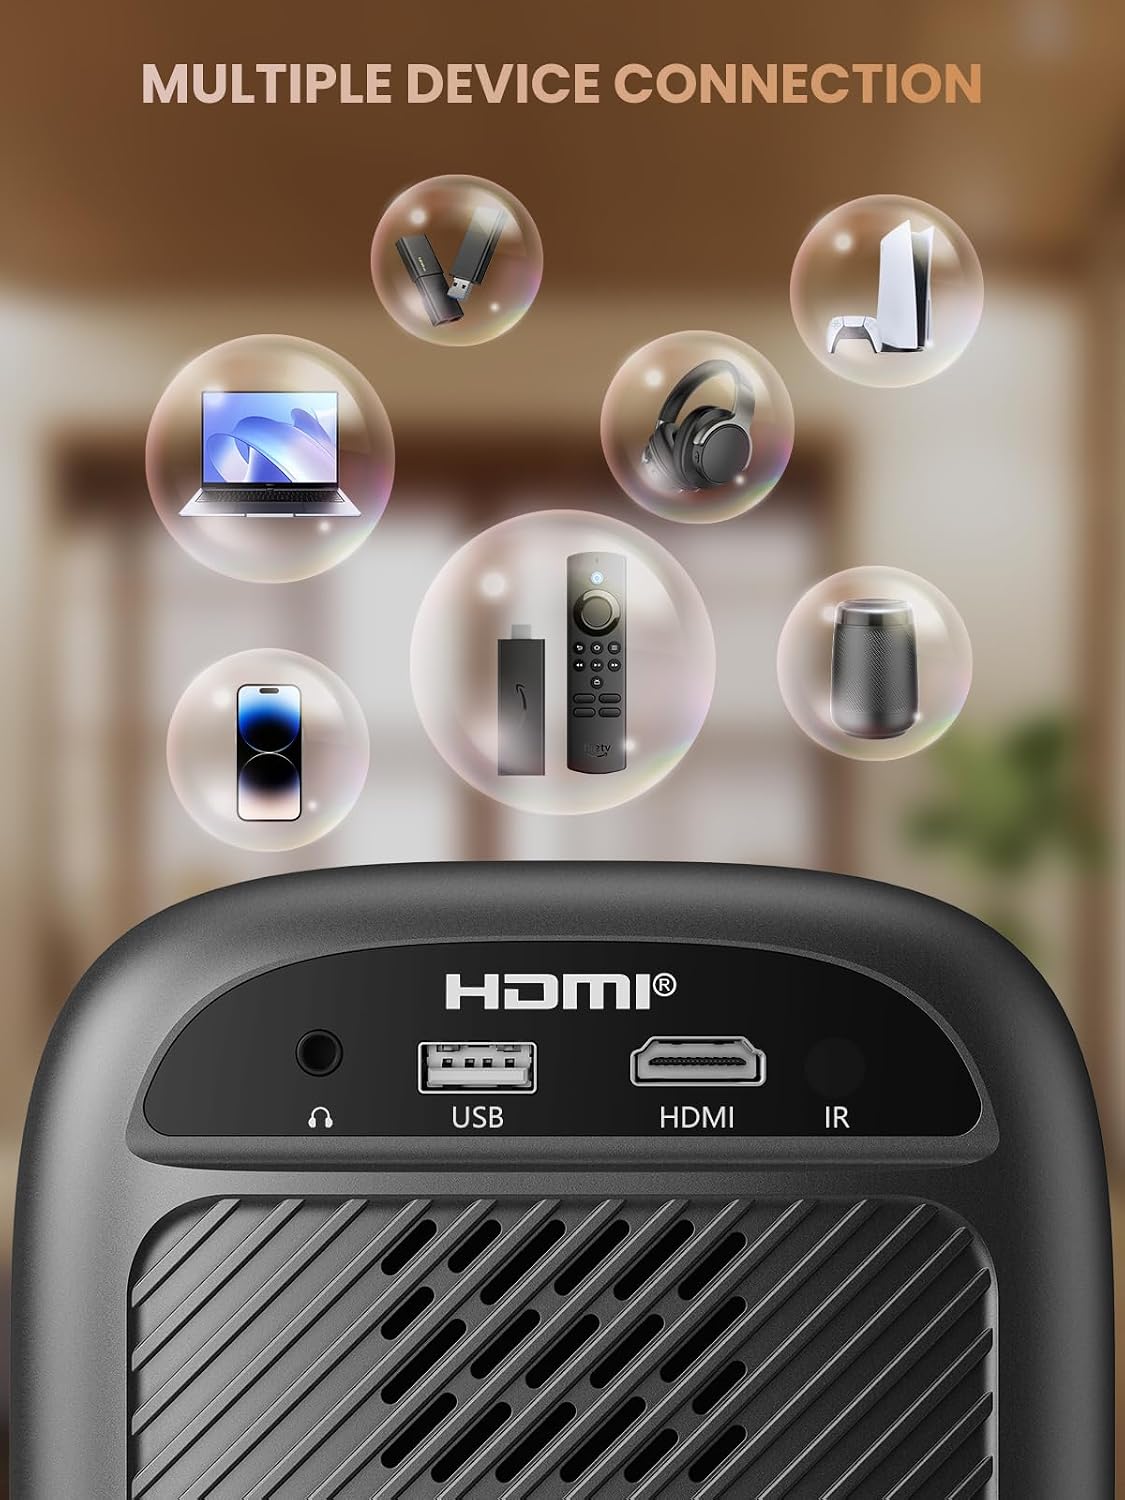
- HDMI prievadas: Connects to devices such as TV sticks, laptops, game consoles, and Blu-ray players.
- USB prievadas: Prijungiama prie USB atmintinių, kad būtų galima atkurti medijos failus.
- Audio Port (3.5mm Jack): Prijungiama prie išorinių garsiakalbių arba ausinių.
- IR imtuvas: Nuotolinio valdymo signalams.
5. Sąranka
5.1 Maitinimo jungtis
- Prijunkite maitinimo laidą prie projektoriaus maitinimo įvesties.
- Kitą maitinimo laido galą įkiškite į elektros lizdą.
5.2 Projektoriaus išdėstymas
Place the projector on a stable, flat surface. For optimal image quality, position the projector perpendicular to the projection surface (wall or screen). The projector can create a large image from a relatively short distance.
5.3 Fokuso reguliavimas
Groview-B2D-US features electric focus, allowing for precise image clarity adjustment using the remote control.

- Įjunkite projektorių.
- Nukreipkite nuotolinio valdymo pultą į projektorių.
- Press the dedicated focus buttons (usually marked with 'F+' and 'F-' or similar icons) on the remote until the projected image is sharp and clear.
5.4 Keystone koregavimas
The projector includes a keystone adjustment slider on the rear panel. This allows you to correct trapezoidal distortion if the projector is not perfectly aligned with the screen. Adjust the slider until the image appears rectangular.
5.5 Pradinis įjungimas
Press the power button on the projector or the remote control to turn on the device. The projector will boot up and display the main interface.
6. Naudojimo instrukcijos
6.1 Įrenginių prijungimas
Projektorius siūlo kelias prijungimo galimybes:
- HDMI: Connect an HDMI cable from your source device (e.g., TV Stick, laptop, game console) to the projector's HDMI port. Select the HDMI input source from the projector's menu.
- USB: Insert a USB flash drive into the USB port. The projector's media player will typically detect the drive automatically, allowing you to browse and play supported media files.
- "Bluetooth 5.1": Prijunkite išorinius „Bluetooth“ garsiakalbius arba ausines, kad garsas būtų geresnis.

- Įjunkite „Bluetooth“ savo išoriniame garso įrenginyje ir nustatykite jį į susiejimo režimą.
- Projektoriuje eikite į „Bluetooth“ nustatymų meniu.
- Pasirinkite savo įrenginį iš galimų įrenginių sąrašo, kurį norite susieti.
Note: Bluetooth does not support smartphone mirroring.
6.2 Smartphone Connection Methods
To connect a smartphone, an adapter is required:

- iOS įrenginiai: Naudokite „Lightning“–HDMI adapterio laidą.
- Android įrenginiai: Use a Micro USB/Type C to HDMI adapter cable or a Google Chromecast.
6.3 Navigacija ir meniu
Use the arrow buttons on the remote control to navigate through the projector's on-screen menu. The 'OK' or 'Enter' button confirms selections, and the 'Back' or 'Return' button goes back to the previous menu.
6.4 Digital Zoom Function
The projector features a digital zoom function, allowing you to adjust the image size from 75% to 100% without moving the projector.

Access the zoom settings through the projector's menu and use the remote control to adjust the desired size.
6.5 Nuotolinio valdymo pulto naudojimas
The included remote control operates the projector's functions. Ensure batteries are correctly installed. Note: A coin may be needed to open the battery compartment.
7. Priežiūra
7.1 Valymas
- Objektyvas: Švelniai nuvalykite lęšį minkštu, nepūkuotu audiniu, specialiai skirtu optiniams paviršiams. Nenaudokite abrazyvinių valiklių.
- Išorė: Projektoriaus išorę nuvalykite minkšta, sausa šluoste. Įsisenėjusioms dėmėms šiek tiek nuvalykite.amp galima naudoti šluostę, po to – sausą.
7.2 Dust-proof Design
Groview-B2D-US features a fully sealed optical engine, which helps prevent dust and debris from entering the projector and affecting image quality or lifespan.

7.3 Saugykla
Kai nenaudojate projektoriaus, laikykite jį vėsioje, sausoje vietoje, toliau nuo tiesioginių saulės spindulių ir ekstremalių temperatūrų. Naudokite objektyvo dangtelį, kad apsaugotumėte objektyvą nuo dulkių ir įbrėžimų.
8. Problemų sprendimas
- Nėra paveiksliuko: Check power connection, input source selection, and ensure the lens cap is removed. Verify the connected device is powered on and outputting a signal.
- Neryškus vaizdas: Adjust the electric focus using the remote control. Ensure the projector is placed at an appropriate distance from the screen.
- Nėra garso: Check the volume settings on both the projector and the connected source device. If using Bluetooth, ensure the external audio device is properly paired and its volume is up.
- Nuotolinio valdymo pultas neveikia: Patikrinkite nuotolinio valdymo pulto baterijas ir įsitikinkite, kad tarp nuotolinio valdymo pulto ir projektoriaus IR imtuvo nėra jokių kliūčių.
- Įspėjimas apie perkaitimą: Ensure ventilation openings are not blocked. Turn off the projector and allow it to cool down before restarting.
For further assistance, please contact Groview klientų aptarnavimas.
9. Specifikacijos
| Funkcija | Specifikacija |
|---|---|
| Prekės ženklas | Groview |
| Modelio numeris | Groview-B2D-US |
| Gimtoji raiška | 1280 x 720 pikselių |
| Palaikoma rezoliucija | 1080P „Full HD“ |
| Ryšio technologija | 3.5 mm lizdas, „Bluetooth 5.1“, HDMI, USB |
| Ypatingos savybės | Electric Focus, Fully Sealed Optical Engine, Mini size & Lightweight, 150" Display, Digital Zoom (75%-100%) |
| Rekomenduojami naudojimo būdai | Viduje/lauke |
| Prekės svoris | 2.99 svaro |
| Gaminio matmenys | 4.8 x 5.7 x 6.9 colio |
| Spalva | Pilka |
10. Garantija ir palaikymas
Groview products are designed for reliability and performance. For information regarding warranty coverage and customer support, please refer to the warranty card included with your purchase or visit the official Groview website. Our service team is available to assist with any product-related inquiries.