1. Įvadas ir sistemos perjungimasview
This manual provides detailed instructions for the installation, operation, and maintenance of your GRSICO Wireless Home Alarm System 15-Piece Kit. This system is designed to enhance home security with easy DIY setup, remote control via a smartphone application, and compatibility with smart home assistants.
Pagrindinės funkcijos:
- Lengvas „pasidaryk pats“ montavimas: Set up the system in minutes without the need for complex wiring or drilling.
- Nėra mėnesinių mokesčių: Enjoy comprehensive 24-hour home security protection with a one-time purchase.
- Nuotolinis valdymas: Arm, disarm, and monitor your system anytime, anywhere using the Smart Life App.
- Momentiniai įspėjimai: Receive immediate notifications on your smartphone and deter intruders with a 120dB alarm siren.
- Išmaniųjų namų integracija: Veikia su „Alexa“ ir „Google Assistant“, kad būtų patogu valdyti balsu.
2. What's Included in Your Kit
Your GRSICO Wireless Home Alarm System 15-Piece Kit includes the following components:
- 1x Base Station (Alarm Siren)
- 2x Keypads
- 2x nuotolinio valdymo pultai
- 2x Motion Sensors
- 8x Contact Sensors (for doors/windows)
- 1x maitinimo adapteris
- „1x“ USB įkrovimo laidas
- Mounting accessories (e.g., double-sided tape)
- Vartotojo vadovas

Image: All components included in the GRSICO 15-Piece Home Alarm System Kit, including the base station, keypads, remote controls, motion sensors, and contact sensors.
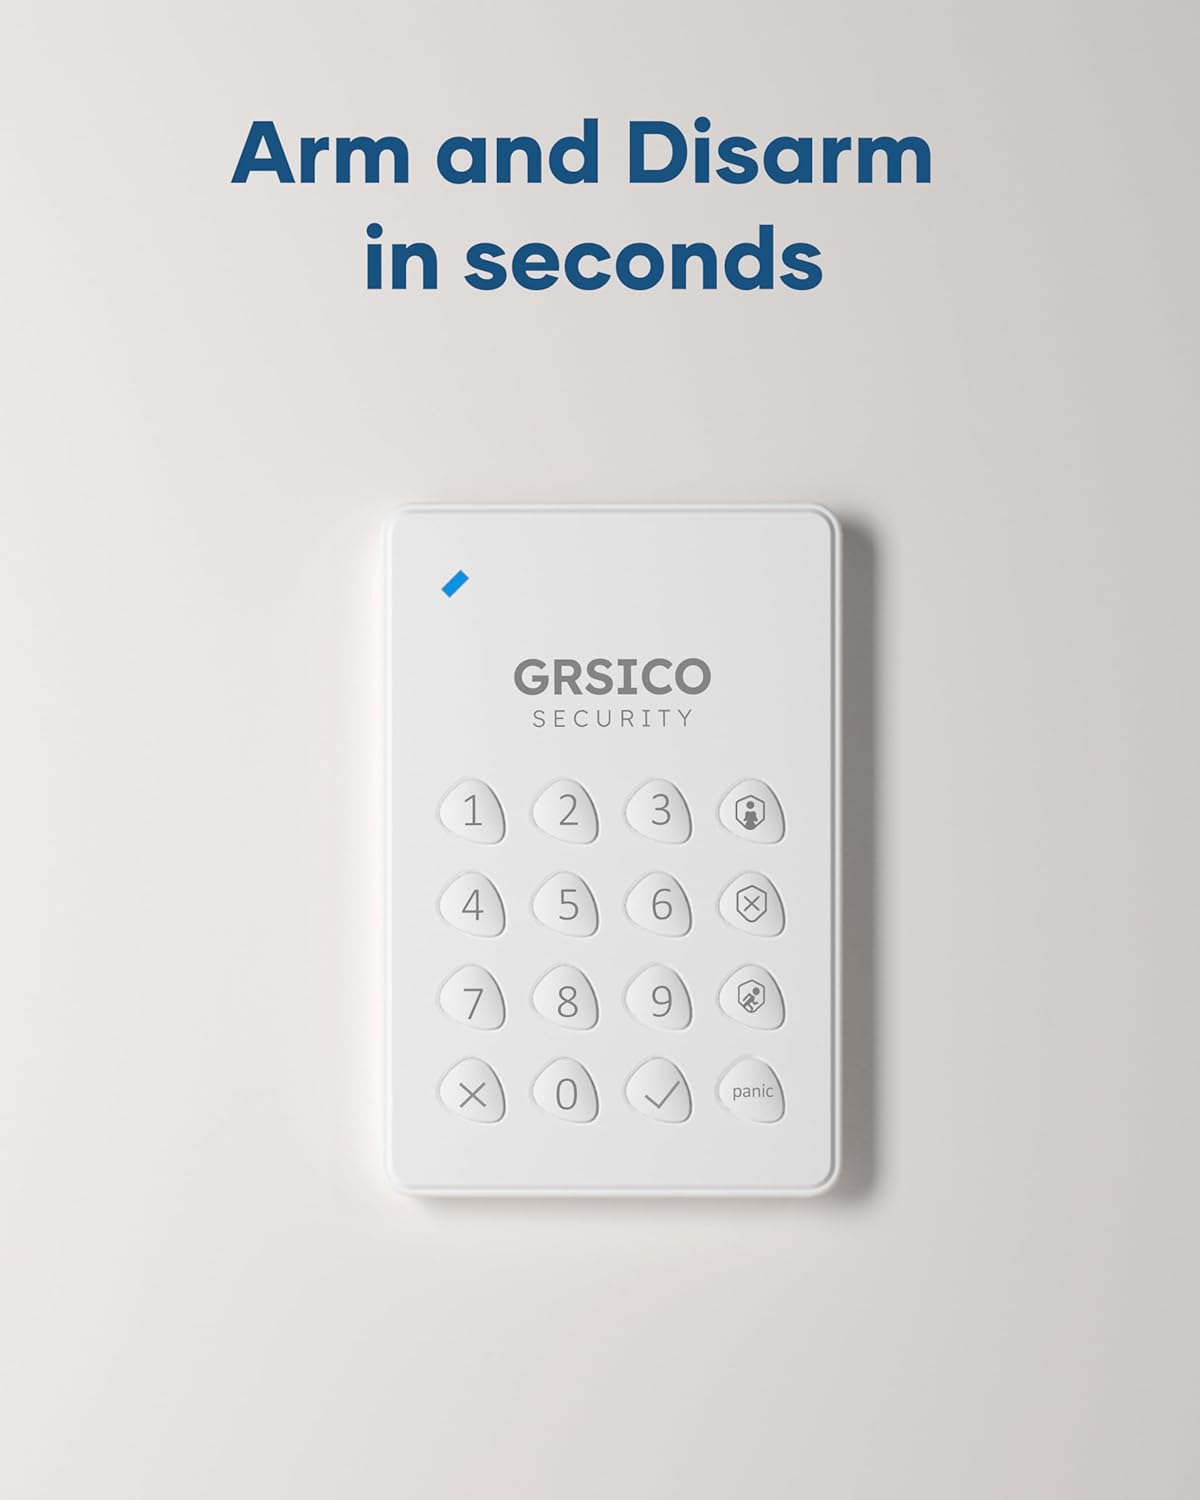
Image: Close-up of the GRSICO keypad and two remote controls, used for arming and disarming the system.

Image: A GRSICO motion sensor, designed to detect movement within a room.

Image: A GRSICO contact sensor, consisting of two parts that detect when a door or window is opened.
3. Sąranka ir diegimas
The GRSICO Wireless Home Alarm System is designed for easy, do-it-yourself installation. Follow these steps to set up your system:
3.1. Bazinės stoties maitinimas
- Connect the power adapter to the base station and plug it into a wall outlet.
- The base station has an internal backup battery that provides up to 8 hours of power during outages.

Image: The GRSICO base station, which serves as the central hub for the alarm system.
3.2. Jutiklių montavimas
All sensors come with pre-installed batteries and can be easily mounted using the provided double-sided tape. No drilling is required.
Judesio jutikliai:
- Choose a location where the motion sensor can cover a wide area, such as a corner of a room or a hallway.
- Ensure the sensor is placed at an appropriate height (typically 6-8 feet from the floor) to optimize detection.
- Peel off the backing from the double-sided tape and firmly press the motion sensor onto a clean, dry surface.
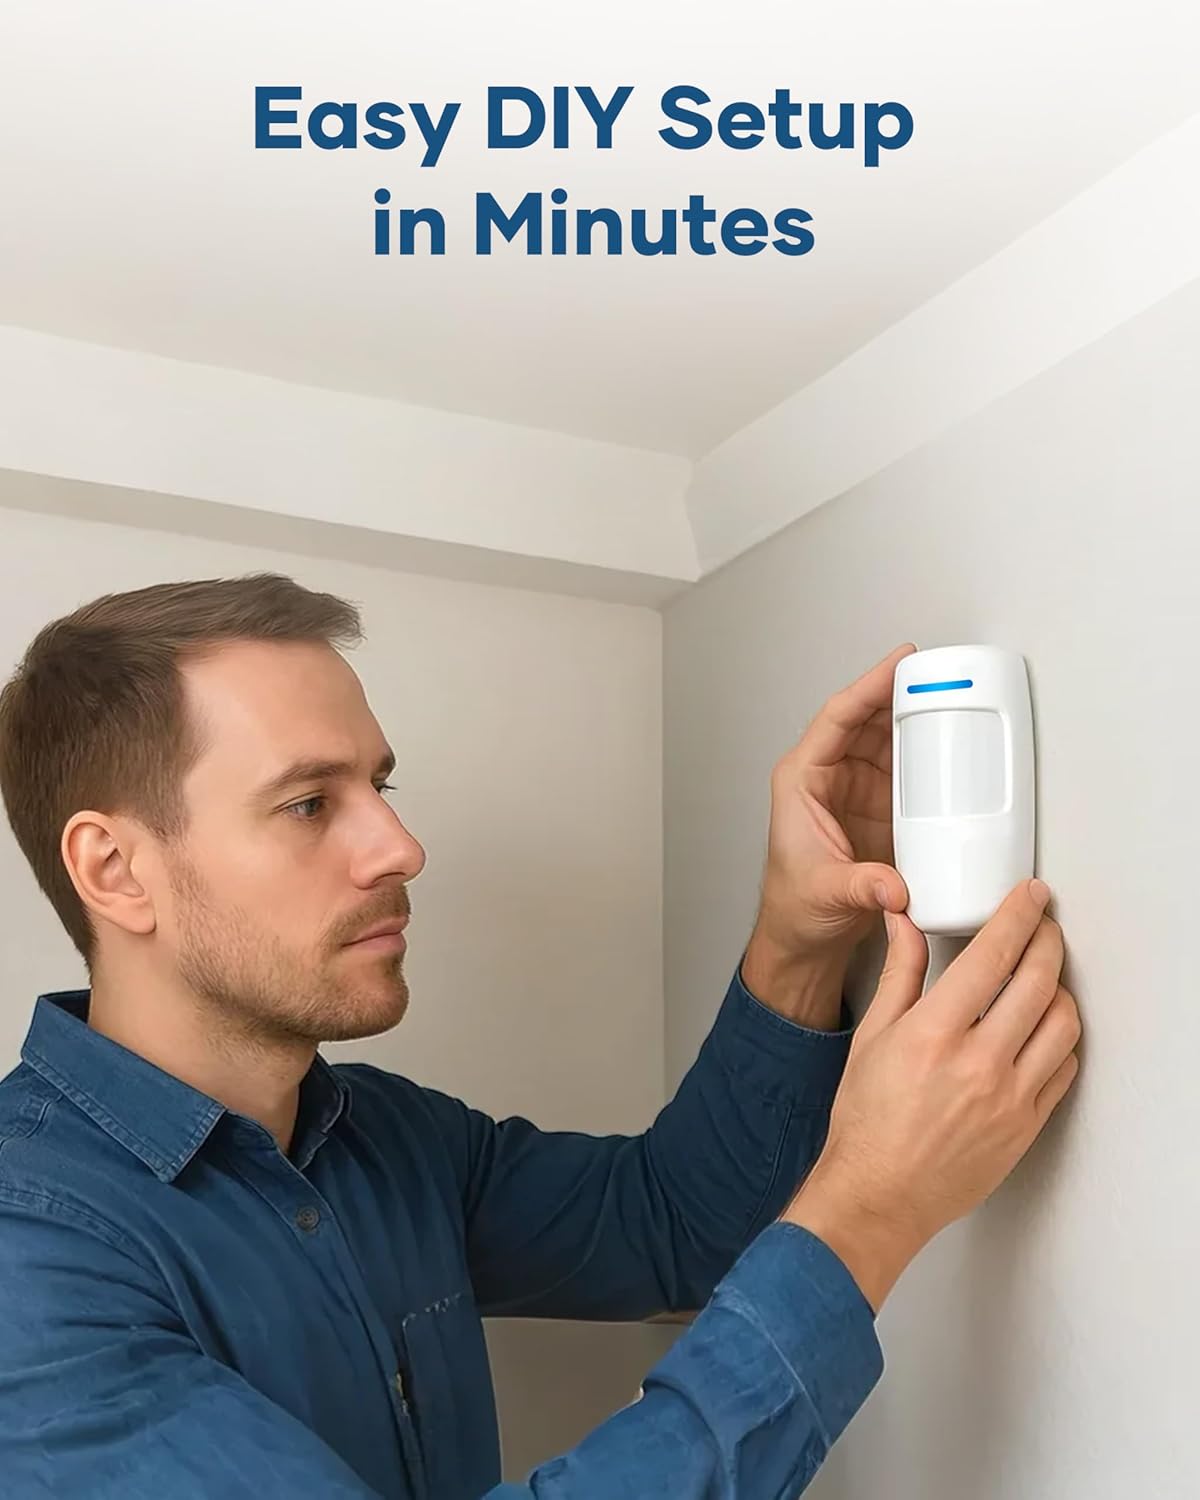
Image: A person demonstrating the easy installation of a GRSICO motion sensor on a wall.
Contact Sensors (Door/Window Sensors):
- Attach one part of the contact sensor to the door or window frame and the other part to the moving door or window.
- Ensure the two parts are aligned and are no more than 1 cm apart when the door/window is closed.
- Use the provided double-sided tape for secure attachment.

Image: A GRSICO door sensor installed on a window, designed to trigger an alarm if the window is opened.
3.3. Pairing Devices and App Setup
- Atsisiųskite „Smart Life“ programa iš savo išmaniojo telefono programėlių parduotuvės (galima naudoti „iOS“ ir „Android“).
- Follow the in-app instructions to create an account and add your GRSICO Home Alarm System.
- The app will guide you through pairing the base station, keypads, remote controls, and all sensors.
- Ensure your home Wi-Fi network is stable for optimal performance.
4. Naudojimo instrukcijos
Your GRSICO Home Alarm System offers multiple ways to arm and disarm, providing flexibility for your security needs.
4.1. Sistemos įjungimas ir išjungimas
Klaviatūros naudojimas:
- Enter your personalized PIN code.
- Press the appropriate button for your desired mode:
• Nuimkite ranką: Įjungia visus jutiklius.
• Rankų namai: Activates perimeter sensors (e.g., doors/windows) while allowing movement inside.
• Išjungti ginklus: Išjungia signalizacijos sistemą.
Image: A GRSICO keypad with numerical buttons and mode selection for arming and disarming the system.
Nuotolinio valdymo pulto naudojimas:
The remote control allows for quick arming and disarming with dedicated buttons:
- Paspauskite Užraktas button to Arm Away.
- Paspauskite Pradžia button to Arm Home.
- Paspauskite Atrakinti button to Disarm.
4.2. Panikos funkcija
Avarijos atveju paspauskite Panika button on the keypad or remote control to immediately trigger the 120dB alarm siren and send instant alerts to your smartphone.
4.3. Programos valdymas
The Smart Life App provides full control over your alarm system from anywhere with an internet connection. You can:
- Arm or disarm the system.
- Switch between Home and Away modes.
- View real-time status of all sensors.
- Receive instant notifications for triggered alarms or system status changes.
- Set schedules for arming and disarming.

Image: A smartphone showing the Smart Life App interface, allowing remote control of the home security system.
5. Išmaniųjų namų integracija
The GRSICO Home Alarm System is compatible with popular smart home platforms, allowing for convenient voice control.
5.1. Balso valdymas su „Alexa“ ir „Google Assistant“
Integrate your alarm system with Amazon Alexa or Google Assistant for hands-free operation:
- Enable the Smart Life skill/action in your Alexa or Google Home app.
- Link your Smart Life account.
- Use voice commands such as "Alexa, arm my system" or "Hey Google, disarm the alarm."

Image: A woman interacting with an Alexa device to arm her GRSICO home alarm system using voice commands.
6. Priežiūra
Reguliarus aptarnavimas užtikrina optimalų jūsų signalizacijos sistemos veikimą ir ilgaamžiškumą.
6.1. Baterijos keitimas
- Sensors, keypads, and remote controls are battery-powered. The Smart Life App will notify you when batteries are low.
- Refer to the individual sensor/device instructions for specific battery types and replacement procedures.
6.2. Base Station Charging
- The base station has a built-in backup battery. Ensure it is regularly connected to power to keep the backup battery charged.
- Use the provided USB-C charging cable and power adapter for charging.
7. Problemų sprendimas
If you encounter any issues with your GRSICO Home Alarm System, please refer to the following common solutions:
- Įrenginys nereaguoja: Check battery levels and ensure the device is within range of the base station. Re-pair the device if necessary.
- Programos ryšio problemos: Ensure your smartphone has a stable internet connection and that the Smart Life App is updated to the latest version. Restart the app or your phone.
- Klaidingi pavojaus signalai: Verify that motion sensors are not placed in areas with pets or moving objects. Ensure contact sensors are securely attached and properly aligned.
- Signalizacija nesuveikia: Check if the system is armed in the correct mode (e.g., Arm Away for motion sensors). Verify sensor battery levels.
For further assistance, please contact GRSICO customer support.
8. Specifikacijos
| Funkcija | Detalė |
|---|---|
| Prekės ženklas | GRSICO |
| Modelio numeris | GRA15 |
| Maitinimo šaltinis | Maitinamas baterijomis |
| Suderinami įrenginiai | Smartphone (Smart Life App), Alexa, Google Assistant |
| Prekės matmenys (I x P x A) | 10 x 7 x 4 colio |
| Ryšio technologija | Bevielis |
| Diegimo tipas | Lipnios |
| Įspėjimo tipas | Motion, Siren (120 Decibels) |
| Kontrolės metodas | App, Keypad, Remote Control, Voice |
| Baterijos elementų sudėtis | Šarminis |
| Įtraukti komponentai | 1* Base Station, 2* Keypads, 2* Remote Controls, 2*Motion Sensors, 8* Contact Sensors |
| Triukšmo lygis | 120 decibelų |
| Prekės svoris | 2.55 svaro |
9. Produktų vaizdo įrašai
Vaizdo įrašas: Viršijimasview of the GRSICO Home Alarm System components and a demonstration of its easy installation and features.
Video: A detailed look at the GRSICO Home Alarm System, showcasing the keypad, motion sensor, and contact sensors, along with their simple setup.
10. Garantija ir palaikymas
For warranty information or technical support, please refer to the contact details provided in your product packaging or visit the official GRSICO websvetainė. Mūsų palaikymo komanda pasirengusi jums padėti išspręsti visus klausimus ar problemas, su kuriomis galite susidurti.
