1. Įvadas
This manual provides detailed instructions for the setup, operation, and maintenance of your Pisichen 16-inch 1920x1200P Touch Panel Portable Monitor. Please read this manual thoroughly before using the product to ensure proper functionality and to prevent damage.

Image 1.1: The Pisichen 16-inch Portable Monitor, showcasindėl savo ryškaus ekrano ir plono dizaino.
2. Saugos informacija
- Do not expose the monitor to rain or moisture to avoid electric shock or fire hazards.
- Neatidarykite monitoriaus c.asing. Visus techninės priežiūros darbus patikėkite kvalifikuotiems darbuotojams.
- Stenkitės nestatyti monitoriaus tiesioginiuose saulės spinduliuose arba šalia šilumos šaltinių.
- Use only the power adapter and cables provided or approved by the manufacturer.
- Clean the screen with a soft, lint-free cloth. Do not use liquid cleaners or aerosol sprays directly on the screen.
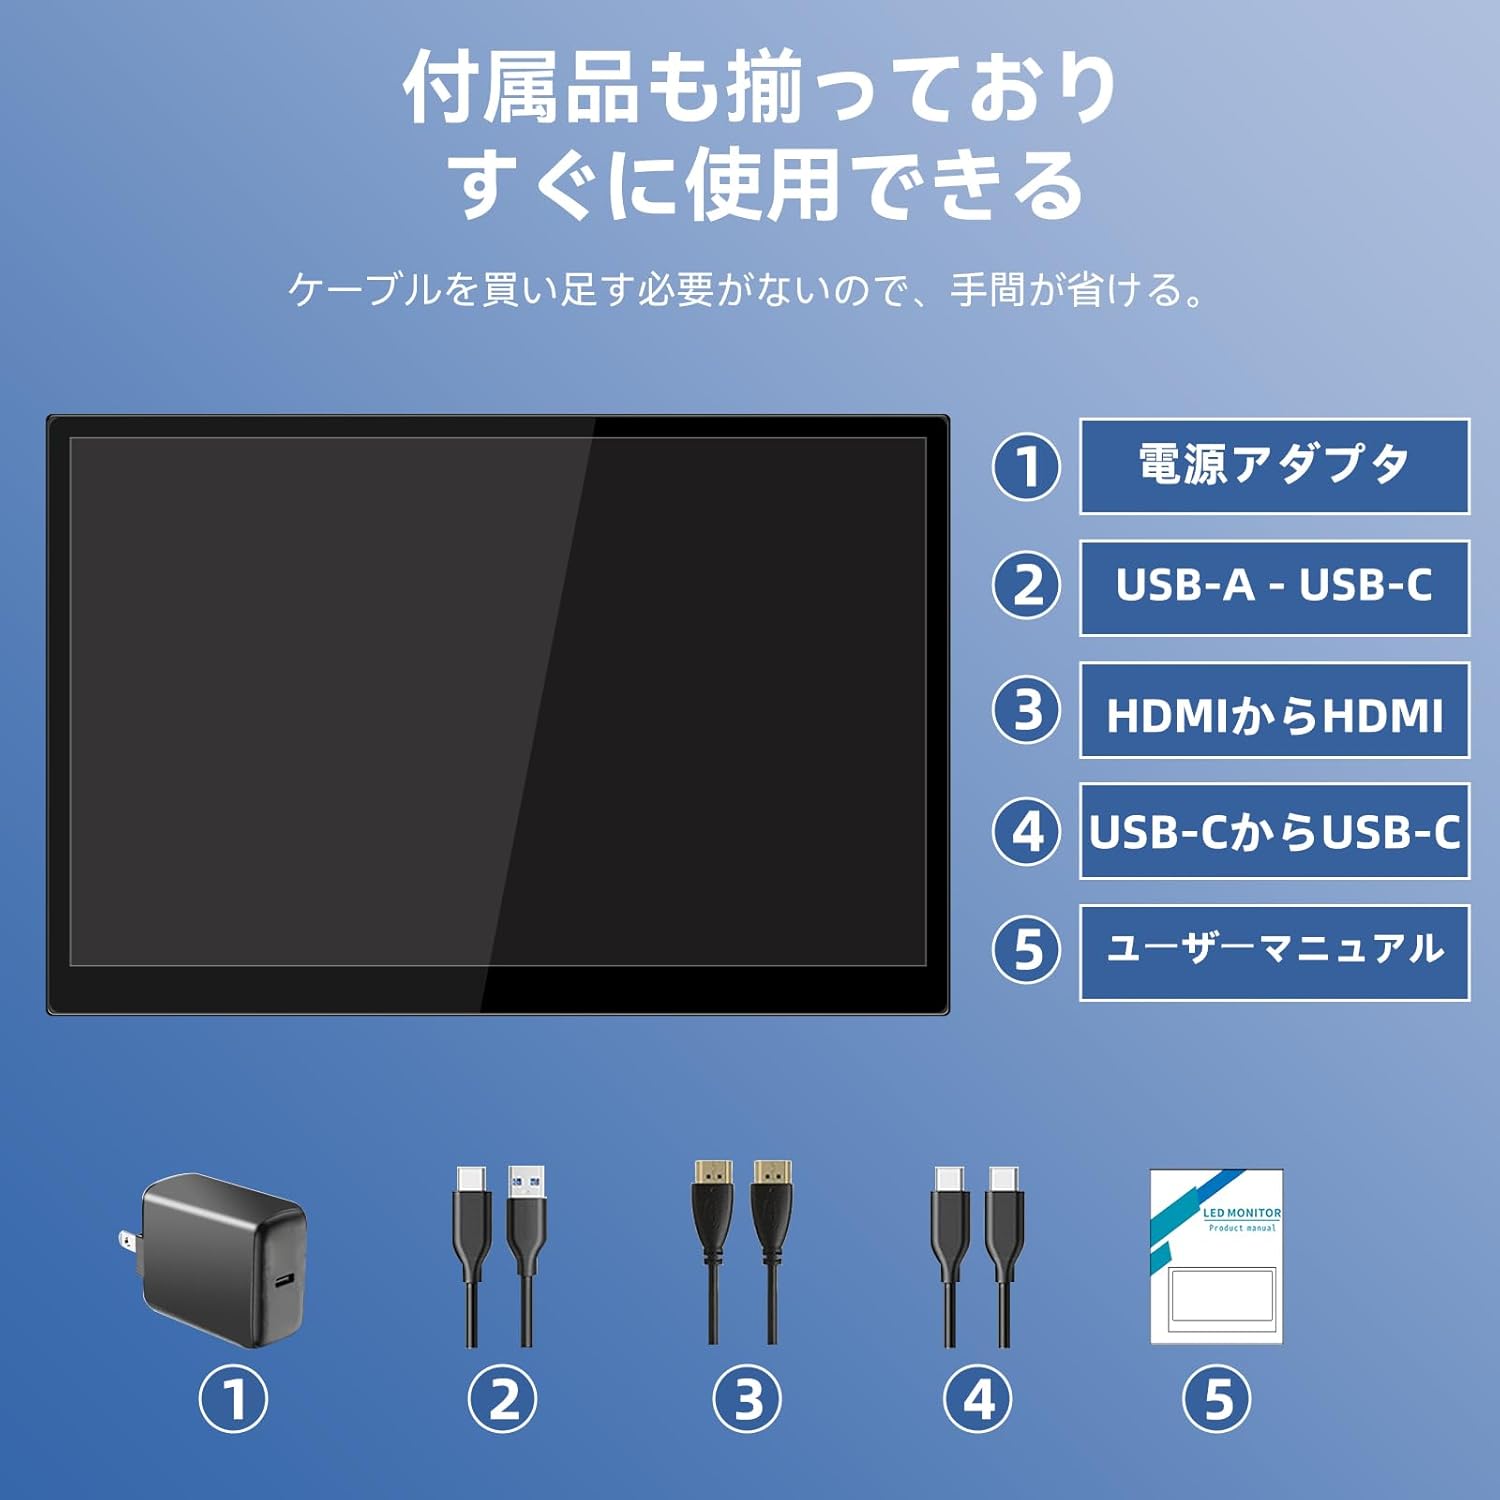
3. Pakuotės turinys
Patikrinkite pakuotę, ar joje yra šie daiktai:
- Pisichen 16-inch Portable Monitor
- Maitinimo adapteris
- USB-A į USB-C laidas
- HDMI – HDMI kabelis
- USB-C į USB-C laidas
- Vartotojo vadovas (šis dokumentas)

Image 3.1: All items included in the product package, ready for immediate use.
4. Produktas baigtasview
The monitor features multiple ports for versatile connectivity and control buttons for easy navigation of settings.
4.1. Prievadai ir mygtukai
4.1 pav.: Išsamus view of the monitor's interfaces, including audio port, USB-C ports, HDMI port, brightness controls, menu/OK button, volume/down button, and USB-A port.
- 3.5 mm garso prievadas: Skirta ausinėms arba išoriniams garsiakalbiams prijungti.
- USB-C Port 1 (Full-function): Supports power, video, and touch signal transmission.
- USB-C Port 2 (Full-function): Supports power, video, and touch signal transmission.
- HDMI prievadas: For video signal input from devices.
- Brightness Up / Power Button: Short press to increase brightness, long press to power on/off.
- Menu / OK Button: Press to open OSD menu, press again to confirm selection.
- Volume Down / Back Button: Short press to decrease volume, long press to go back in OSD menu.
- USB-A Port (OTG): Pelės ar klaviatūros prijungimui.
5. Sąranka
Follow these steps to connect your portable monitor to various devices.
5.1. Single Cable Connection (USB-C)
For devices with a full-function USB-C port (supporting DisplayPort Alternate Mode and power delivery), a single USB-C to USB-C cable can transmit video, audio, touch signals, and power.
- Connect one end of the USB-C to USB-C cable to a full-function USB-C port on your device (e.g., laptop, smartphone).
- Connect the other end to either USB-C Port 1 or USB-C Port 2 on the monitor.
- The monitor should automatically power on and display the content. Touch functionality will also be active.
5.2. Dual Cable Connection (HDMI + USB-C for Power/Touch)
For devices with an HDMI output, or if your USB-C port does not support power delivery, you will need two cables.
- Connect one end of the HDMI to HDMI cable to your device's HDMI output.
- Connect the other end to the HDMI Port on the monitor.
- Connect the power adapter to one of the monitor's USB-C ports (Port 1 or Port 2) for power.
- For touch functionality, connect the USB-A end of the USB-A to USB-C cable to your device's USB-A port, and the USB-C end to the other available USB-C port on the monitor.

Image 5.1: Illustration of different connection methods: single USB-C cable for power, video, and touch, and dual cable setup using HDMI for video and USB-C for power and touch.
6. Naudojimo instrukcijos
6.1. Maitinimo įjungimas/išjungimas
Long press the Brightness Up / Power Button (5) for approximately 3 seconds to power the monitor on or off.
6.2. Ekrano ekrano (OSD) meniu
Press the Menu / OK Button (6) to access the OSD menu. Use the Brightness Up / Power Button (5) and Volume Down / Back Button (7) to navigate through options. Press the Menu / OK Button (6) to confirm selections. Long press the Volume Down / Back Button (7) to exit the menu.
6.3. Palieskite funkcionalumą
The monitor supports 10-point capacitive multi-touch. Ensure a USB connection (via full-function USB-C or USB-A to USB-C cable) is established for touch input to work. The touch screen allows for intuitive interaction, including swiping, writing, and annotating.
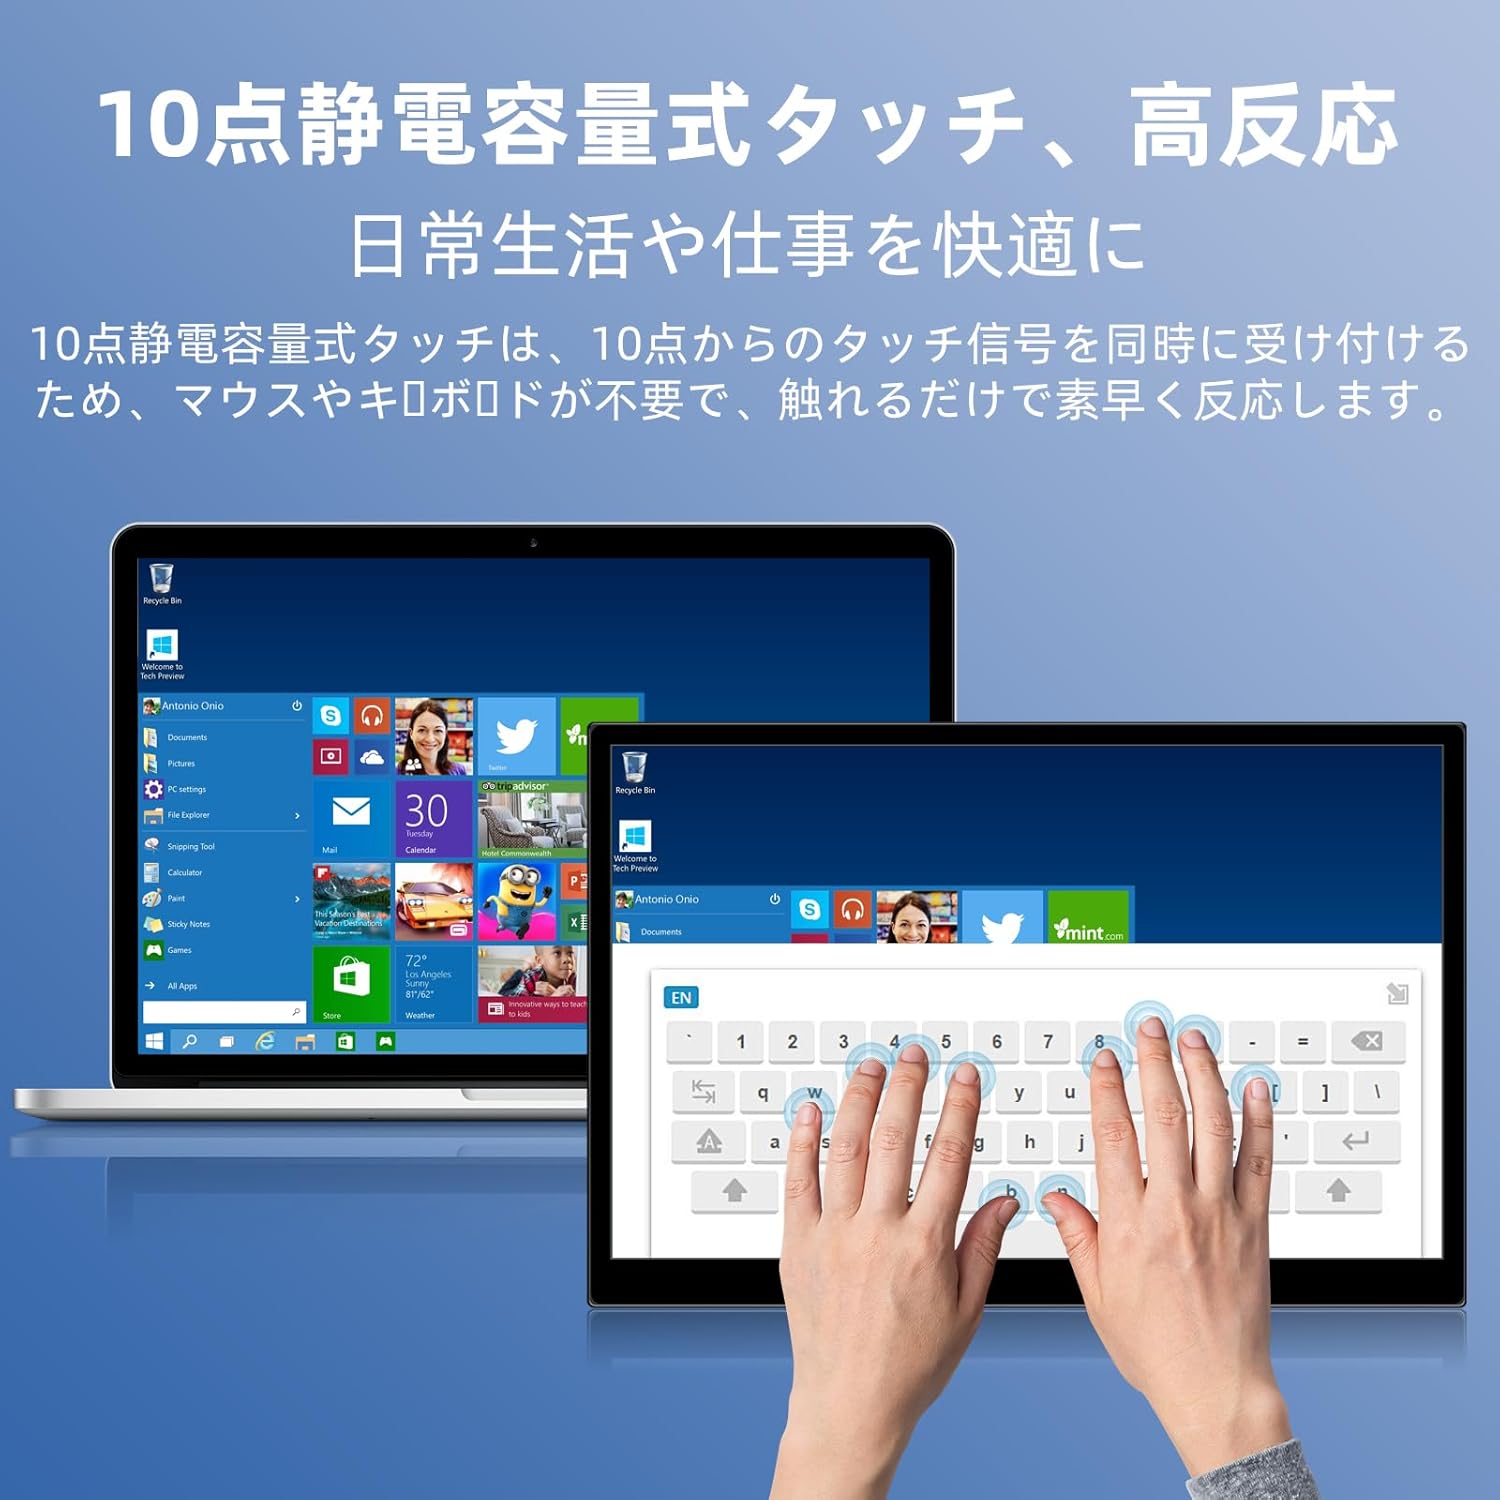
Image 6.1: A user demonstrating the responsive 10-point capacitive touch functionality on the portable monitor, enabling smooth interaction with on-screen content.
6.4. Ekrano režimai
Prijungtas prie kompiuterio, monitorius palaiko įvairius rodymo režimus:
- Dubliavimo režimas: Atkuria pagrindinio ekrano turinį.
- Išplėsti režimą: Extends your desktop, providing more screen real estate for multitasking.
- Antrojo ekrano režimas: Naudoja tik nešiojamąjį monitorių kaip ekraną.
6.5. Ekrano orientacija
The monitor supports both landscape and portrait orientations. You can adjust the display settings on your connected device (e.g., Windows Display Settings, macOS Display Preferences) to change the orientation as needed for different tasks like document viewing or design work.
6.6. HDR Technology
The monitor features HDR (High Dynamic Range) mode, which provides deeper and more realistic colors for an enhanced visual experience. This setting can typically be toggled within the OSD menu or your device's display settings.

6.2 pav.: pvz.amples of the monitor's versatility, showing its use for entertainment, mobile productivity, and as an extended display for a home office.
7. Priežiūra
- Ekrano valymas: Švelniai nuvalykite ekraną minkštu, sausu, nepūkuotu skudurėliu. Įsisenėjusias dėmes šiek tiek nuvalykite.ampen the cloth with water or a screen-specific cleaner (apply to cloth, not directly to screen).
- C valymasasing: Monitorių nuvalykite minkštu, sausu skudurėliu.asing. Venkite abrazyvinių valiklių.
- Saugykla: When not in use for extended periods, store the monitor in a cool, dry place, preferably in its original packaging or a protective sleeve.
- Kabelių valdymas: Kad nepažeistumėte laidų, venkite jų per daug sulenkti ar susukti.
8. Problemų sprendimas
| Problema | Galima priežastis | Sprendimas |
|---|---|---|
| Nėra ekrano / pranešimas „Nėra signalo“ | Incorrect cable connection, insufficient power, incorrect input source. | Ensure cables are securely connected. Verify the device's USB-C port supports video output. Connect the power adapter if using HDMI or if USB-C power is insufficient. Check OSD menu for correct input source. |
| Jutiklinis režimas neveikia | No USB connection for touch, driver issue (rare). | Ensure the USB-C cable is full-function or that the USB-A to USB-C cable is connected for touch data. Restart the monitor and connected device. |
| Ekrano mirgėjimas | Unstable power, faulty cable, refresh rate mismatch. | Use the provided power adapter. Try a different cable. Adjust the refresh rate in your device's display settings. |
| Image is distorted or stretched | Incorrect aspect ratio settings. | Adjust the aspect ratio in the OSD menu or your device's display settings to match the monitor's native resolution (1920x1200). |

Image 8.1: Demonstrating the importance of correct aspect ratio settings to avoid image distortion.
9. Specifikacijos
| Funkcija | Specifikacija |
|---|---|
| Prekės ženklas | Pisichen |
| Modelio numeris | 16QTHCM-1200P |
| Ekrano dydis | 16 colių |
| Rezoliucija | 1920 x 1200 pikselių (Full HD) |
| Skydelio tipas | IPS |
| Viewing kampas | 178° |
| Atnaujinimo dažnis | 60 Hz |
| Kontrasto santykis | 1000:1 |
| Ryškumas | 300 cd/m² |
| Spalvų gama | 100% sRGB |
| Spalvos gylis | 16.7 milijono spalvų |
| Jutiklinis ekranas | 10 taškų talpinis lietimas |
| Ryšys | 2x Full-function USB-C 3.1, 1x HDMI, 1x USB-A (OTG), 1x 3.5mm Audio Jack |
| HDR palaikymas | Taip |
| Suderinamas su VESA laikikliu | Taip |
| Produkto matmenys (P x A x G) | 350 x 230 x 10 mm |
| Svoris | 1.62 kg |
10. Garantija ir palaikymas
For warranty information and technical support, please refer to the warranty card included in your product package or contact Pisichen customer service through their official website or the retailer where the product was purchased. Please have your model number (16QTHCM-1200P) and purchase details ready when contacting support.


