1. Įvadas
Thank you for choosing the Aveek Mini Karaoke Machine V9. This portable Bluetooth speaker with wireless microphones is designed to provide an enjoyable and interactive audio experience. This manual provides detailed instructions for setup, operation, and maintenance to ensure optimal performance and longevity of your device.
2. Pakuotės turinys
Išpakuodami patikrinkite, ar yra visi toliau išvardyti daiktai:
- 1 x Aveek Mini Karaoke Speaker
- 2x belaidžiai mikrofonai
- 1x USB įkrovimo laidas
- 1 x Naudotojo vadovas (šis dokumentas)

Image: Contents of the Aveek Mini Karaoke Machine V9 package, showing the speaker, two wireless microphones, a charging cable, and the user manual.
3. Produktas baigtasview
The Aveek Mini Karaoke Machine V9 combines a portable Bluetooth speaker with two wireless microphones, offering versatile entertainment options. It features vibrant LED lights, multiple voice changing effects, and broad compatibility with various audio sources.
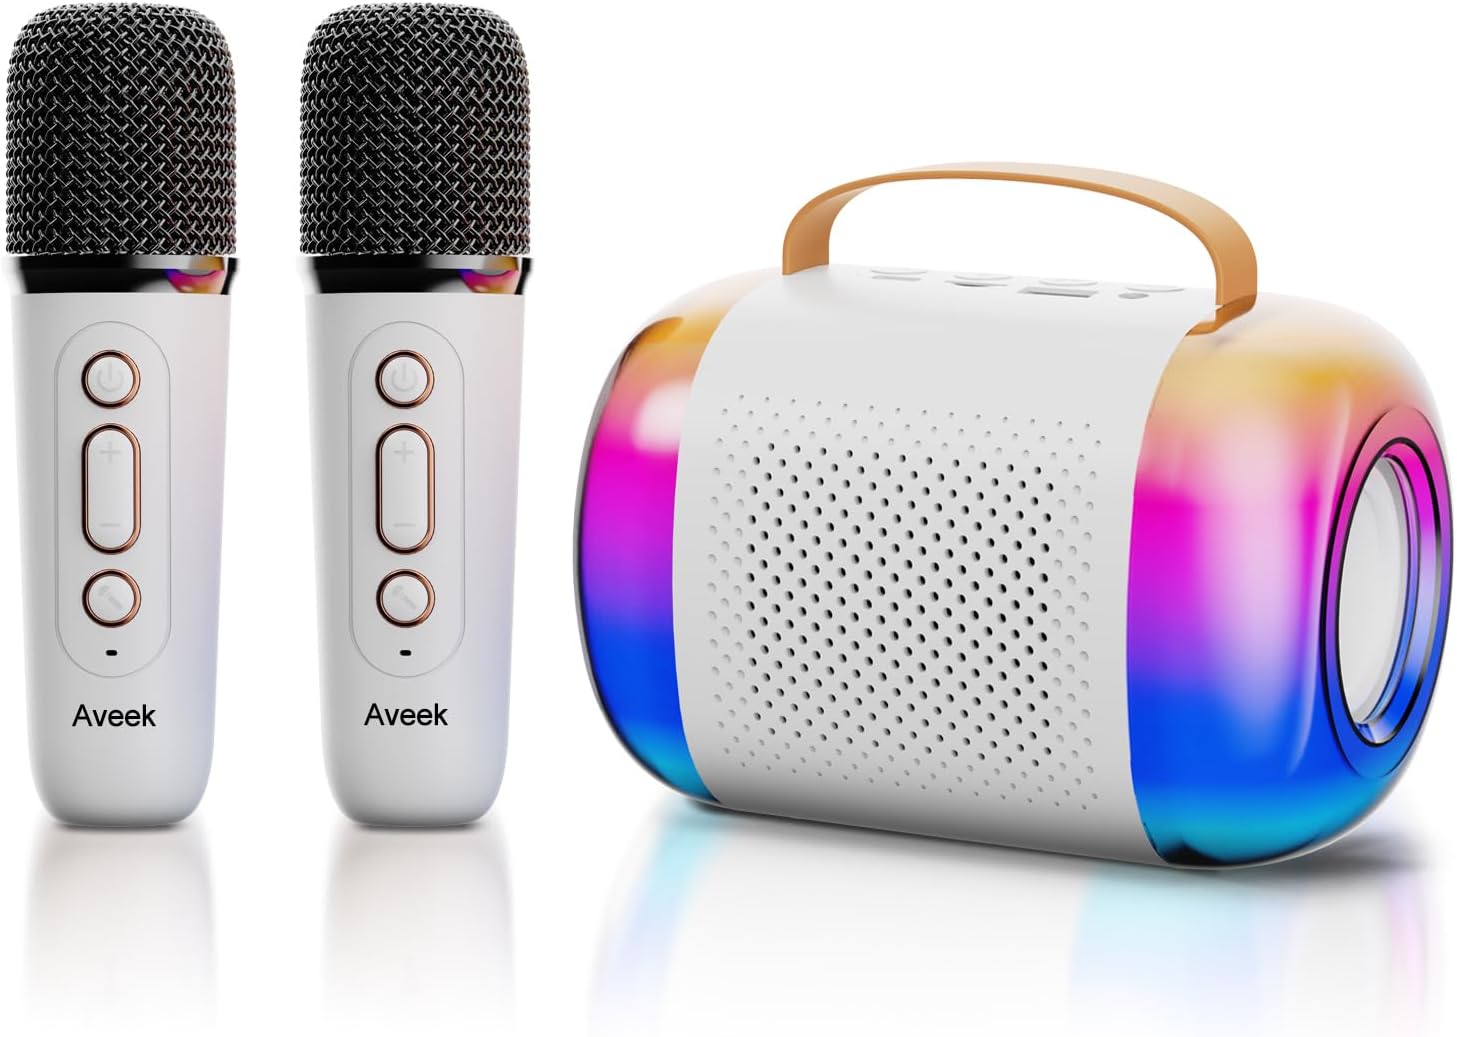
Image: The Aveek Mini Karaoke Machine V9, featuring the main speaker unit with colorful LED lights and two accompanying white wireless microphones.
Garsiakalbio savybės:
- Bluetooth 5.3 ryšys: Ensures stable wireless connection up to 50 feet.
- Kelios atkūrimo parinktys: Supports Bluetooth, TF card, USB drive, and AUX input.
- Dinaminiai LED žibintai: 5 ambient light modes that synchronize with music rhythm.
- Nešiojamas dizainas: Lightweight with a convenient handle for easy transport.
- Aukštos kokybės garsas: Equipped with 2 x 52 tweeters and a 4060 bass diaphragm for clear stereo sound.

Paveikslėlis: sprogęs view of the Aveek Mini Karaoke Machine V9 speaker, illustrating its internal audio components including tweeters and a bass diaphragm.
Mikrofono savybės:
- Belaidis veikimas: Provides freedom of movement during performances.
- Balso keitiklis: Includes 4 magic voice effects (Original, Female, Male, Baby, Monster).
- Įkraunamas: Built-in Lithium Polymer batteries.

Image: A visual representation of the five voice changing options available on the Aveek Mini Karaoke Machine V9, including original, female, male, baby, and monster voices.
4. Sąrankos instrukcijos
4.1 Įrenginio įkrovimas
The karaoke machine speaker and microphones are equipped with rechargeable Lithium Polymer batteries. Use the provided USB charging cable to charge them.
- Connect the USB charging cable to the Type-C charging port on the speaker and microphones.
- Kitą USB laido galą prijunkite prie suderinamo USB maitinimo adapterio (nepridedamas) arba kompiuterio USB prievado.
- The indicator light will show charging status (Red for charging, Blue for Bluetooth connection).
- Įkrovimo laikas: Speaker: 3.5-4 hours; Microphones: 2.5 hours.
- Darbo laikas: Speaker: 5-6 hours; Microphones: 3-4 hours.
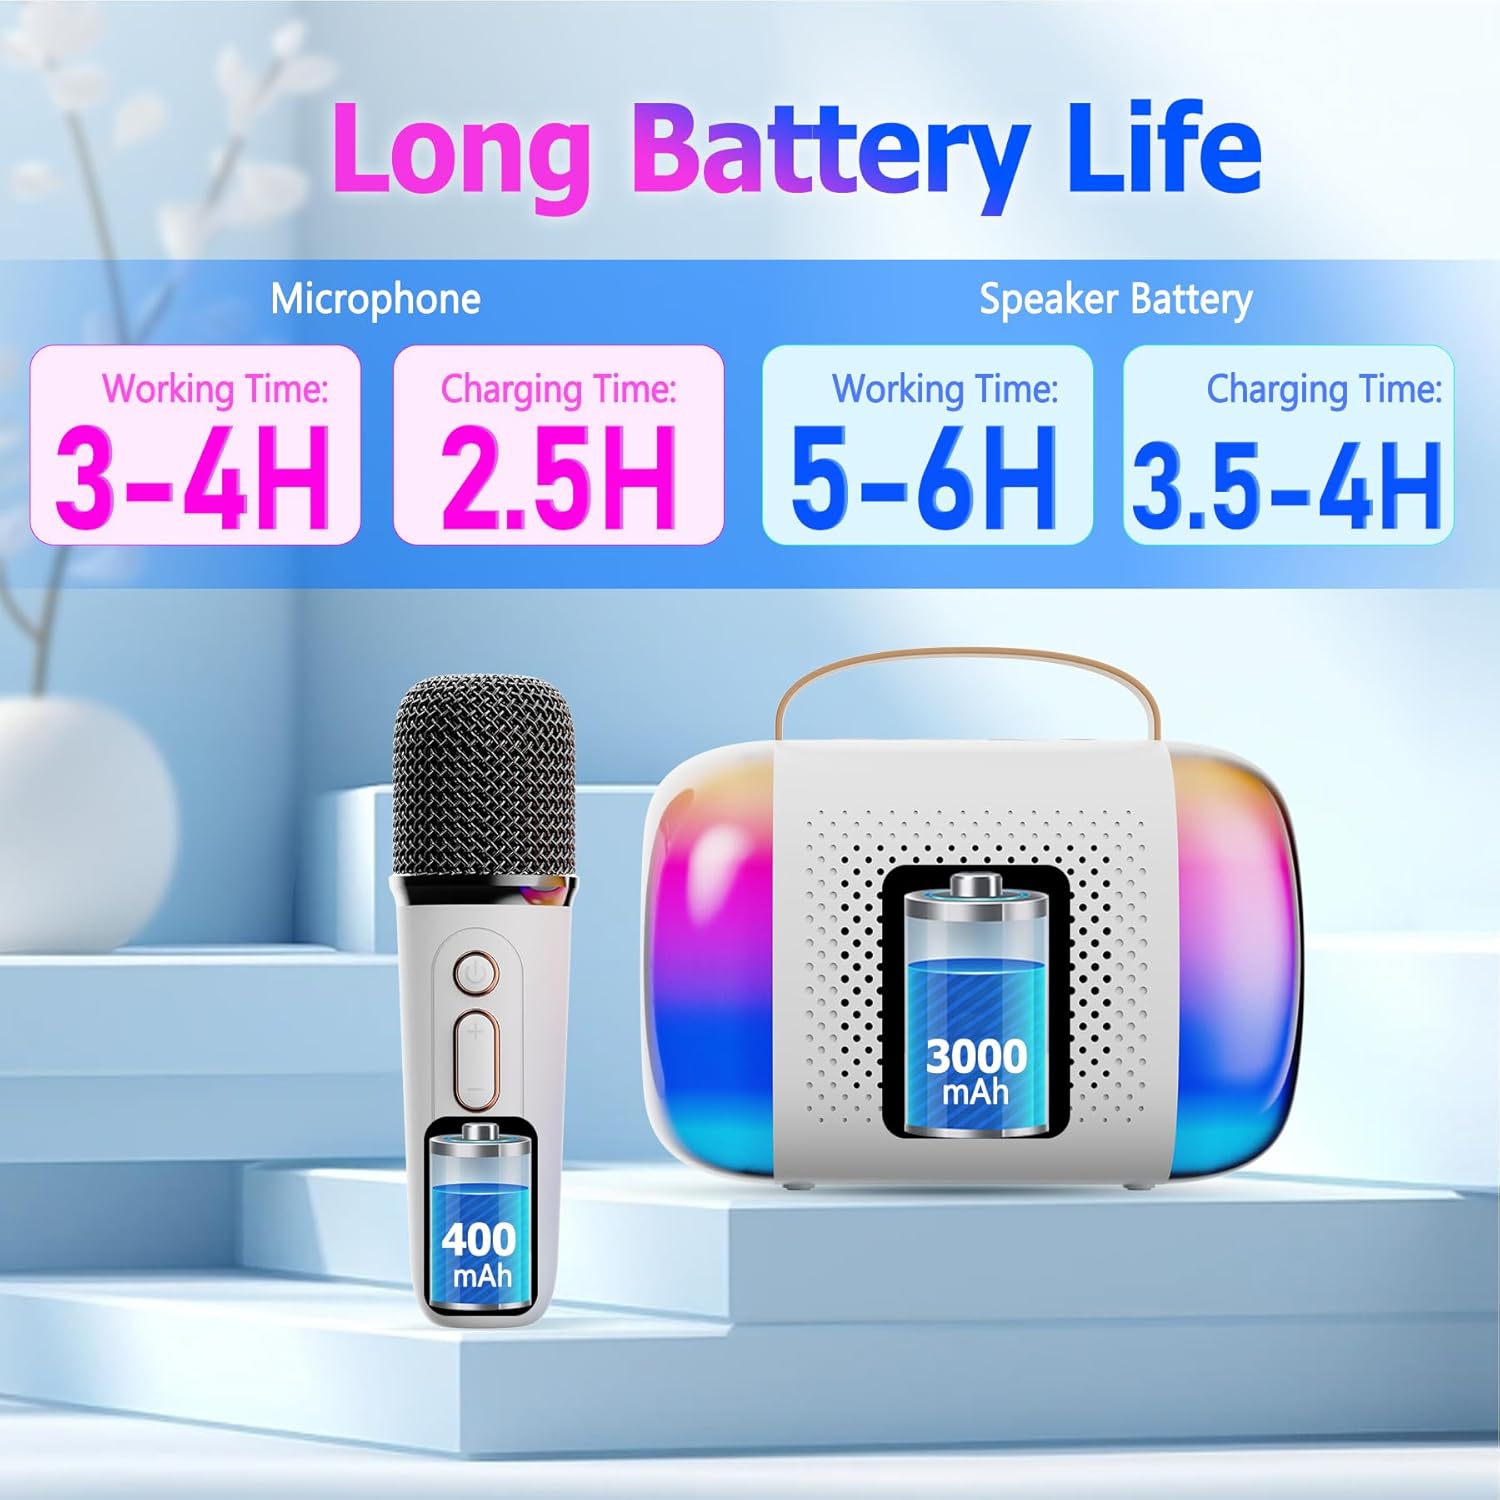
Image: A diagram illustrating the working and charging times for both the Aveek Mini Karaoke Machine V9 speaker and its wireless microphones.
4.2 Pairing Microphones with Speaker
The microphones are designed to automatically pair with the speaker when both are powered on. Ensure both devices are charged before attempting to pair.
- Power on the speaker by long pressing the Power ON/OFF Key.
- Power on each microphone by long pressing its Microphone ON/OFF button.
- The microphones should automatically connect to the speaker. A blue indicator light on the microphone signifies a successful Bluetooth connection.
4.3 Connecting to a Bluetooth Device (Phone, Tablet, PC)
To play music through the speaker, connect it to your preferred Bluetooth-enabled device.
- Ensure the karaoke speaker is powered on and in Bluetooth pairing mode (usually indicated by a flashing light).
- On your device (phone, tablet, PC), navigate to Bluetooth settings.
- Ieškokite available devices and select "Aveek V9" (or similar name) to connect.
- Once connected, you can play music from your device through the karaoke speaker.

Image: The Aveek Mini Karaoke Machine V9 demonstrating its Bluetooth 5.3 connectivity and various input options including USB Drive, TF Card, Bluetooth, and Headphone/AUX.
5. Naudojimo instrukcijos
5.1 Garsiakalbių valdikliai

Image: Detailed diagram of the Aveek Mini Karaoke Machine V9 speaker, labeling its indicator light, Type-C charging port, TF card slot, USB-A drive interface, AUX 3.5mm audio input, and control buttons (-, +, Mode, Power ON/OFF).
- Power ON/OFF Key: Long press to turn on/off. Short press to play/pause music.
- Režimo klavišas: Double click to switch light modes. Long press to turn on/off the color lights.
- - Raktas: Long press for previous music. Short press to decrease volume (3 levels).
- + Raktas: Long press for next music. Short press to increase volume (3 levels).
- Indikatoriaus lemputė: Red for charging, Blue for Bluetooth connection.
- C tipo įkrovimo prievadas: Garsiakalbio įkrovimui.
- TF kortelės lizdas: Insert a TF card for music playback.
- USB-A USB Drive Interface: Įdėkite USB atmintinę, kad galėtumėte atkurti muziką.
- AUX 3.5mm Audio Input: Prijunkite išorinius garso įrenginius per AUX kabelį.
5.2 Mikrofono valdikliai

Image: Detailed diagram of the Aveek Mini Karaoke Machine V9 wireless microphone, labeling its Microphone ON/OFF button, Bluetooth/Charging Indicator, Type-C Charging Port, and control buttons (Power ON/OFF, +, -).
- Mikrofono įjungimas/išjungimas: Long press to turn the mic on/off. Short press to change voice mode. Double click to open/close accompaniment.
- Power ON/OFF Key: Long press to turn on/off. Short press to adjust microphone/reverberation/accompaniment. Double click playback pause.
- + Raktas: Long press to play the next music. Short press to increase volume + / reverb volume +.
- - Raktas: Short press to decrease reverb volume - / accompaniment volume -. Long press to play the previous music.
- Bluetooth/Charging Indicator: Blue light for Bluetooth connection, Red light for charging.
- C tipo įkrovimo prievadas: Mikrofono įkrovimui.
5.3 balso keitiklio funkcijos
The microphones feature 4 unique voice changing effects in addition to the original voice. To cycle through these modes, short press the Microphone ON/OFF button.
- Originalus Balsas
- Moteriškas balsas
- Vyriškas balsas
- Kūdikio balsas
- Monstrų balsas
5.4 šviesos režimai
The speaker features 5 ambient LED light modes that can be changed by double-clicking the Mode Key on the speaker. Long press the Mode Key to turn the lights on or off.
6. Priežiūra
- Valymas: Use a soft, dry cloth to clean the speaker and microphones. Do not use liquid cleaners or abrasive materials.
- Saugykla: Laikykite prietaisą vėsioje, sausoje vietoje, apsaugotoje nuo tiesioginių saulės spindulių ir ekstremalių temperatūrų.
- Akumuliatoriaus priežiūra: To prolong battery life, avoid fully discharging the batteries frequently. Charge the device regularly, even if not in use for extended periods.
- Vandens ekspozicija: Šis prietaisas nėra atsparus vandeniui. Venkite sąlyčio su vandeniu ar didele drėgme.
7. Problemų sprendimas
| Problema | Galima priežastis | Sprendimas |
|---|---|---|
| Įrenginys neįsijungia. | Senka baterija. | Charge the speaker/microphones fully using the provided USB cable. |
| Microphones not connecting to speaker. | Microphones are not powered on or out of range. | Ensure microphones are powered on and within 50 feet of the speaker. Re-pair if necessary. |
| Iš garsiakalbio nėra garso. | Volume too low, device not connected, or incorrect input mode. | Increase volume on both speaker and connected device. Verify Bluetooth/AUX/TF/USB connection. |
| Poor sound quality/static. | Interference, low microphone battery, or distance. | Move away from other electronic devices. Charge microphones. Reduce distance between mic and speaker. |
| Voice changer not working. | Neteisingas mygtuko paspaudimas. | Short press the Microphone ON/OFF button to cycle through voice modes. |
8. Specifikacijos
| Funkcija | Detalė |
|---|---|
| Prekės ženklas | Aveek |
| Modelio pavadinimas | V9 |
| Ryšio technologija | Bluetooth 5.3 (Speaker), VHF (Microphones) |
| Maitinimo šaltinis | Maitinamas su baterijomis (pridedamos 2 ličio polimerų baterijos) |
| Garsiakalbio matmenys (I x P x A) | 10.5 x 2.1 x 3.5 colio |
| Prekės svoris | 0.353 uncijos (apie 10 gramų) |
| Medžiaga | Metalas, Plastikas |
| Signalo ir triukšmo santykis | 96 dB |
| Kanalų skaičius | 2 |
| Ypatingos savybės | Battery Indicator Light, Voice Changer, RGB Lights |
| Suderinami įrenginiai | Amplifier, Audio Interface, Audio Mixer, Karaoke Machine, Speaker (via various inputs) |
| Įvesties prievadai | TF Card Slot, USB-A Drive Interface, AUX 3.5mm Jack |
9. Garantija ir palaikymas
For warranty information and customer support, please refer to the product packaging or contact Aveek customer service directly. Keep your purchase receipt for any warranty claims.


