1. Įvadas
Thank you for choosing the Primo Touch Compact Tabletop Water Dispenser. This manual provides essential information for the safe and efficient operation of your new appliance. Please read these instructions thoroughly before installation and use, and retain them for future reference.
2. Saugos informacija
- Always connect the dispenser to a grounded electrical outlet.
- Do not immerse the dispenser, power cord, or plug in water or other liquids.
- Laikykite dozatorių atokiau nuo tiesioginių saulės spindulių ir šilumos šaltinių.
- Užtikrinkite tinkamą vėdinimą aplink įrenginį.
- Prieš valydami ar atlikdami bet kokią techninę priežiūrą, atjunkite dozatorių nuo elektros tinklo.
- Šis prietaisas nėra skirtas naudoti asmenims su ribotais fiziniais, jutiminiais ar protiniais gebėjimais arba asmenims, kuriems trūksta patirties ir žinių, nebent juos prižiūrėtų arba instruktuotų, kaip naudoti prietaisą, už jų saugumą atsakingas asmuo.
- Vaikus reikia prižiūrėti, kad jie nežaistų su prietaisu.
- Hot water can cause severe burns. Exercise caution when dispensing hot water.
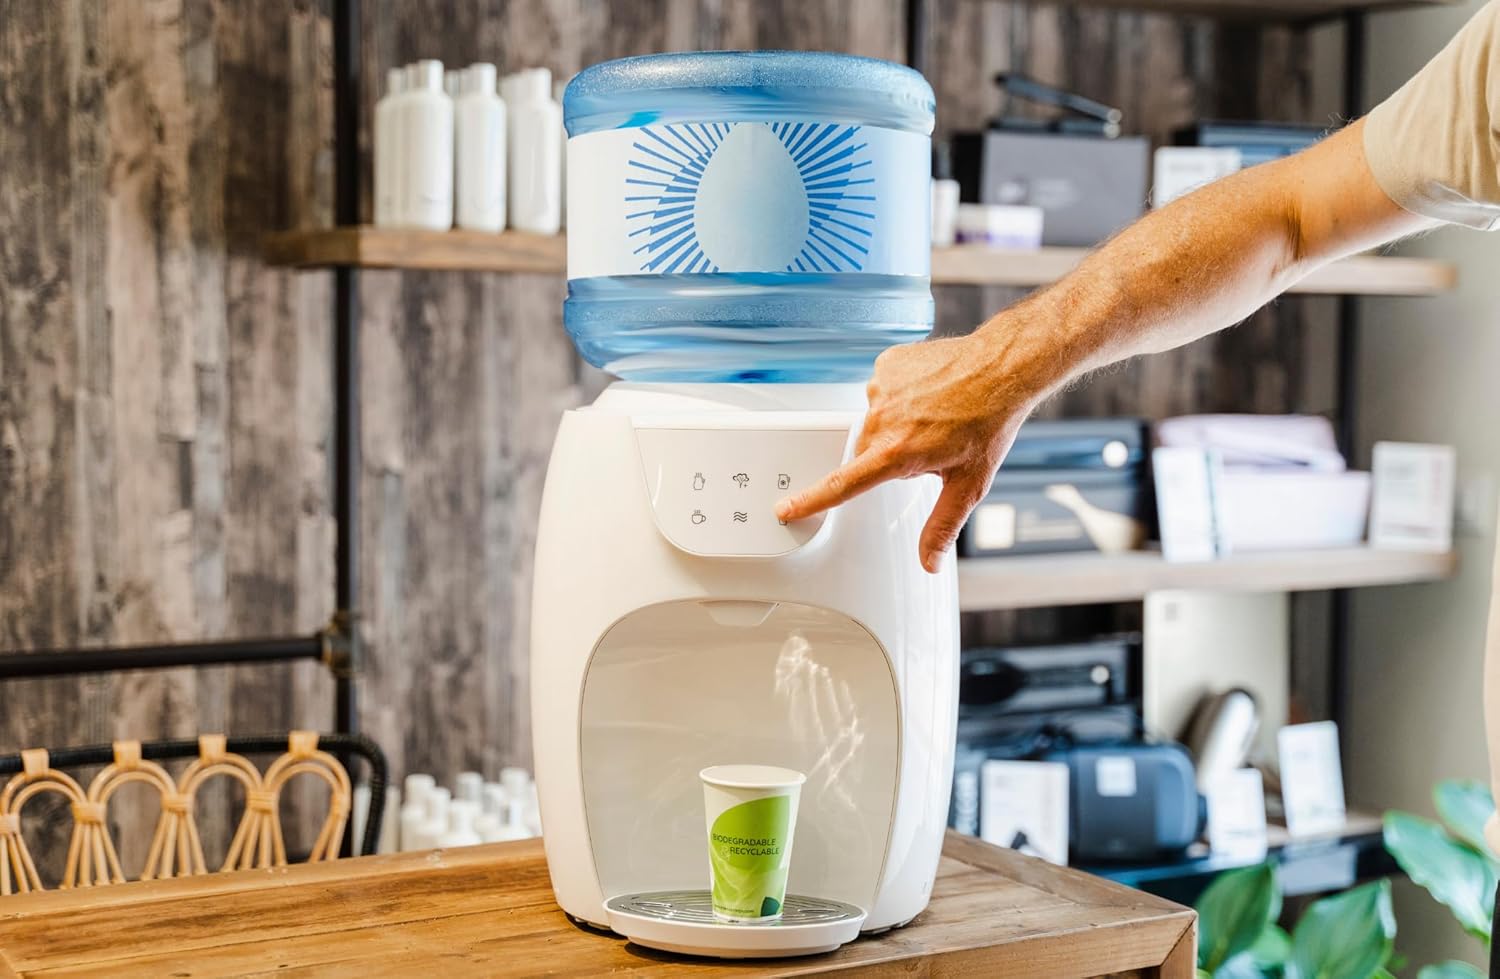
3. Produktas baigtasview
The Primo Touch Compact Tabletop Water Dispenser provides convenient access to cold, hot, and ambient temperature water. It features an intuitive control panel and a compact design suitable for various environments.

1 pav.: priekis view of the Primo Touch Compact Tabletop Water Dispenser.
Valdymo skydelis
The control panel allows you to select your desired water temperature. An LED display indicates the status of the water cooling and heating functions.

2 pav. Išsamus view of the control panel with temperature selection icons.
4. Sąranka
- Išpakavimas: Atsargiai išimkite dozatorių iš pakuotės. Patikrinkite, ar nėra pažeidimų.
- Vieta: Place the dispenser on a flat, stable, and level surface. Ensure there is adequate space around the unit for ventilation (at least 10 cm from walls). Avoid placing it in direct sunlight or near heat sources.
- Maitinimo jungtis: Įsitikinkite, kad dozatorius yra išjungtas.
- Vandens butelio įrengimas: Remove the protective seal from a standard 3 or 5-gallon (11 or 19-liter) water bottle. Invert the bottle and carefully place it onto the support collar on top of the dispenser. Push down firmly until the bottle is seated and water begins to flow into the dispenser's reservoir. The anti-leak system ensures a secure fit.
- Pradinis gruntavimas: Before plugging in, dispense water from both the cold and hot taps until water flows steadily. This removes air from the system.
- Prijunkite: Prijunkite dozatorių prie įžeminto elektros lizdo.
5. Naudojimo instrukcijos
The dispenser is designed for easy operation, providing cold, hot, and ambient water with a simple touch.
3 pav.: Vandens išleidimas iš įrenginio.
- Maitinimas: Once plugged in, the dispenser will begin cooling and heating water. The LED display will indicate when the cold water has reached its optimal cooling temperature (approximately 5°C) and when the hot water has reached its optimal heating temperature (approximately 95°C).
- Šalto vandens išpylimas: Place your cup under the cold water tap. Press the cold water button (typically indicated by a snowflake icon). Release the button to stop dispensing.
- Karšto vandens išpylimas: Place your cup under the hot water tap. Press the hot water button (typically indicated by a teacup or steam icon). Caution: Hot water can cause burns. Norėdami sustabdyti dozavimą, atleiskite mygtuką.
- Dispensing Ambient Water: Place your cup under the ambient water tap. Press the ambient water button (typically indicated by a wave icon). Release the button to stop dispensing.
6. Priežiūra ir valymas
Reguliarus valymas užtikrina optimalų vandens dozatoriaus veikimą ir higieną.
- Išorinis valymas: Išorinius paviršius nuvalykite minkšta, damp audinys. Nenaudokite abrazyvinių valiklių ar tirpiklių.
- Lašėjimo padėklas: The drip tray should be emptied and cleaned regularly to prevent overflow and bacterial growth. Remove the tray, wash it with mild soap and water, rinse thoroughly, and dry before replacing.
- Water Reservoir (Internal): For thorough cleaning, it is recommended to periodically sanitize the internal water reservoirs. Consult the manufacturer's website or customer support for detailed sanitization procedures, which may involve specific cleaning solutions. Always unplug the unit and drain all water before attempting internal cleaning.
- Vandens butelio keitimas: When the water bottle is empty, lift it off the dispenser. Place a new, full water bottle onto the dispenser as described in the Setup section.
7. Problemų sprendimas
Jei kyla problemų dėl dozatoriaus, žr. šias dažniausiai pasitaikančias problemas ir jų sprendimus:
| Problema | Galima priežastis | Sprendimas |
|---|---|---|
| Nėra vandens išpylimo | Empty water bottle; Airlock in system; Dispenser unplugged. | Replace water bottle; Prime the system by dispensing from all taps; Check power connection. |
| Vanduo nepakankamai šaltas/karštas | Dispenser recently plugged in; Ventilation blocked; Heating/cooling element malfunction. | Allow 1-2 hours for water to reach temperature; Ensure proper ventilation; Contact customer support if problem persists. |
| Vandens nutekėjimas | Water bottle not seated correctly; Damaged water bottle; Internal leak. | Re-seat water bottle firmly; Check bottle for cracks; Unplug and contact customer support. |
| Neįprastas triukšmas | Normal operation (compressor); Unit not level. | Some noise is normal during cooling/heating cycles; Ensure dispenser is on a level surface. |
8. Specifikacijos
| Funkcija | Detalė |
|---|---|
| Modelio numeris | HC03-ARI |
| Gaminio matmenys | 37.3 x 30.8 x 37.6 cm |
| Spalva | Baltas |
| Medžiaga | Plastikiniai |
| Diegimo tipas | Stalviršis |
| Vandens prieigos vieta | Viršutinis pakrovimas |
| Nustatymų skaičius | 5 (Hot, Cold, Ambient, Hot for cooking, Cold jug - based on image interpretation) |
| Karšto vandens temperatūra | Iki 95°C |
| Šalto vandens temperatūra | Down to 5°C |
| Maitinimo šaltinis | Su laidu elektra |
9. Garantija ir palaikymas
For warranty information or technical support, please refer to the documentation included with your purchase or visit the official Primo websvetainėje. Išsaugokite pirkimo įrodymą garantiniams reikalavimams.


