1. Įvadas
Ačiū, kad pirkoteasing the ECHTPower Wireless Pro Controller. This manual provides detailed instructions on how to set up, operate, and maintain your controller. Please read this manual carefully before use to ensure optimal performance and longevity of your device.

Vaizdas: priekis view of the ECHTPower Wireless Pro Controller. The controller is black with illuminated joysticks, standard ABXY buttons, a D-pad, and central function buttons.
2. Produkto ypatybės
- Kelių platformų suderinamumas: Palaiko „Nintendo Switch“, asmeninius kompiuterius, „Android“ ir „iOS“ įrenginius.
- Ryškus RGB apšvietimas: Customizable RGB light effects around the joysticks.
- TURBO funkcija: Enables rapid-fire for selected buttons, reducing finger fatigue.
- Programuojami grįžimo mygtukai: Two customizable M1/M2 buttons on the rear for enhanced control.
- 4-Level Vibration Adjustment: Adjustable dual motor vibration for immersive feedback.
- 6 ašių giroskopinis jutiklis: Provides precise motion control for compatible games.
- Didelės talpos baterija: Built-in 1000mAh rechargeable battery for extended playtime.
- Holo efekto trigeriai: Offers smooth and durable trigger performance.
- Žadinimo funkcija: Allows waking up the console from sleep mode.

Paveikslėlis: Valdiklio demonstracijaasing its colorful RGB lights around the joysticks, enhancing the gaming atmosphere.

Vaizdas: Galinis view of the controller, highlighting the M1 and M2 programmable back buttons and their mapping capabilities.

Image: An illustration of the controller's internal vibration motors, demonstrating the 4-level vibration adjustment feature.

Paveikslėlis: detalus view of the controller's Hall Effect Triggers, emphasizing their smooth operation and durability.
3. Pakuotės turinys
- ECHTPower Wireless Pro Controller x 1
- USB-C įkrovimo laidas x 1
- Vartotojo vadovas x 1
4. Sąranka
4.1 Prijungimas prie „Nintendo Switch“
- On the Nintendo Switch HOME Menu, select "Controllers" > "Change Grip/Order".
- Press and hold the Home button on the ECHTPower controller for 3-5 seconds until the LED indicators start flashing rapidly.
- Prijungus, atitinkamas(-i) grotuvo šviesos diodas(-iai) ant valdiklio ims šviesti nuolat.
- To wake up the Switch console from sleep mode, press the Home button on the controller.
4.2 Prijungimas prie kompiuterio („Windows“)
- Laidinis ryšys: Connect the controller to your PC using the USB-C cable. The controller will be recognized as an XInput device.
- Belaidis ryšys („Bluetooth“):
- Įsitikinkite, kad jūsų kompiuteryje įjungtas „Bluetooth“ ryšys.
- Press and hold the Home button on the controller for 3-5 seconds until the LED indicators flash rapidly.
- On your PC, go to Bluetooth settings and search for new devices. Select "Pro Controller" or similar from the list.
- Once paired, the LED indicators will become solid.
4.3 Prisijungimas prie „Android“ / „iOS“ įrenginių
- Įsitikinkite, kad jūsų „Android“ / „iOS“ įrenginyje įjungtas „Bluetooth“.
- Press and hold the Home button on the controller for 3-5 seconds until the LED indicators flash rapidly.
- On your device, go to Bluetooth settings and search for new devices. Select "Pro Controller" or similar from the list.
- Once paired, the LED indicators will become solid.
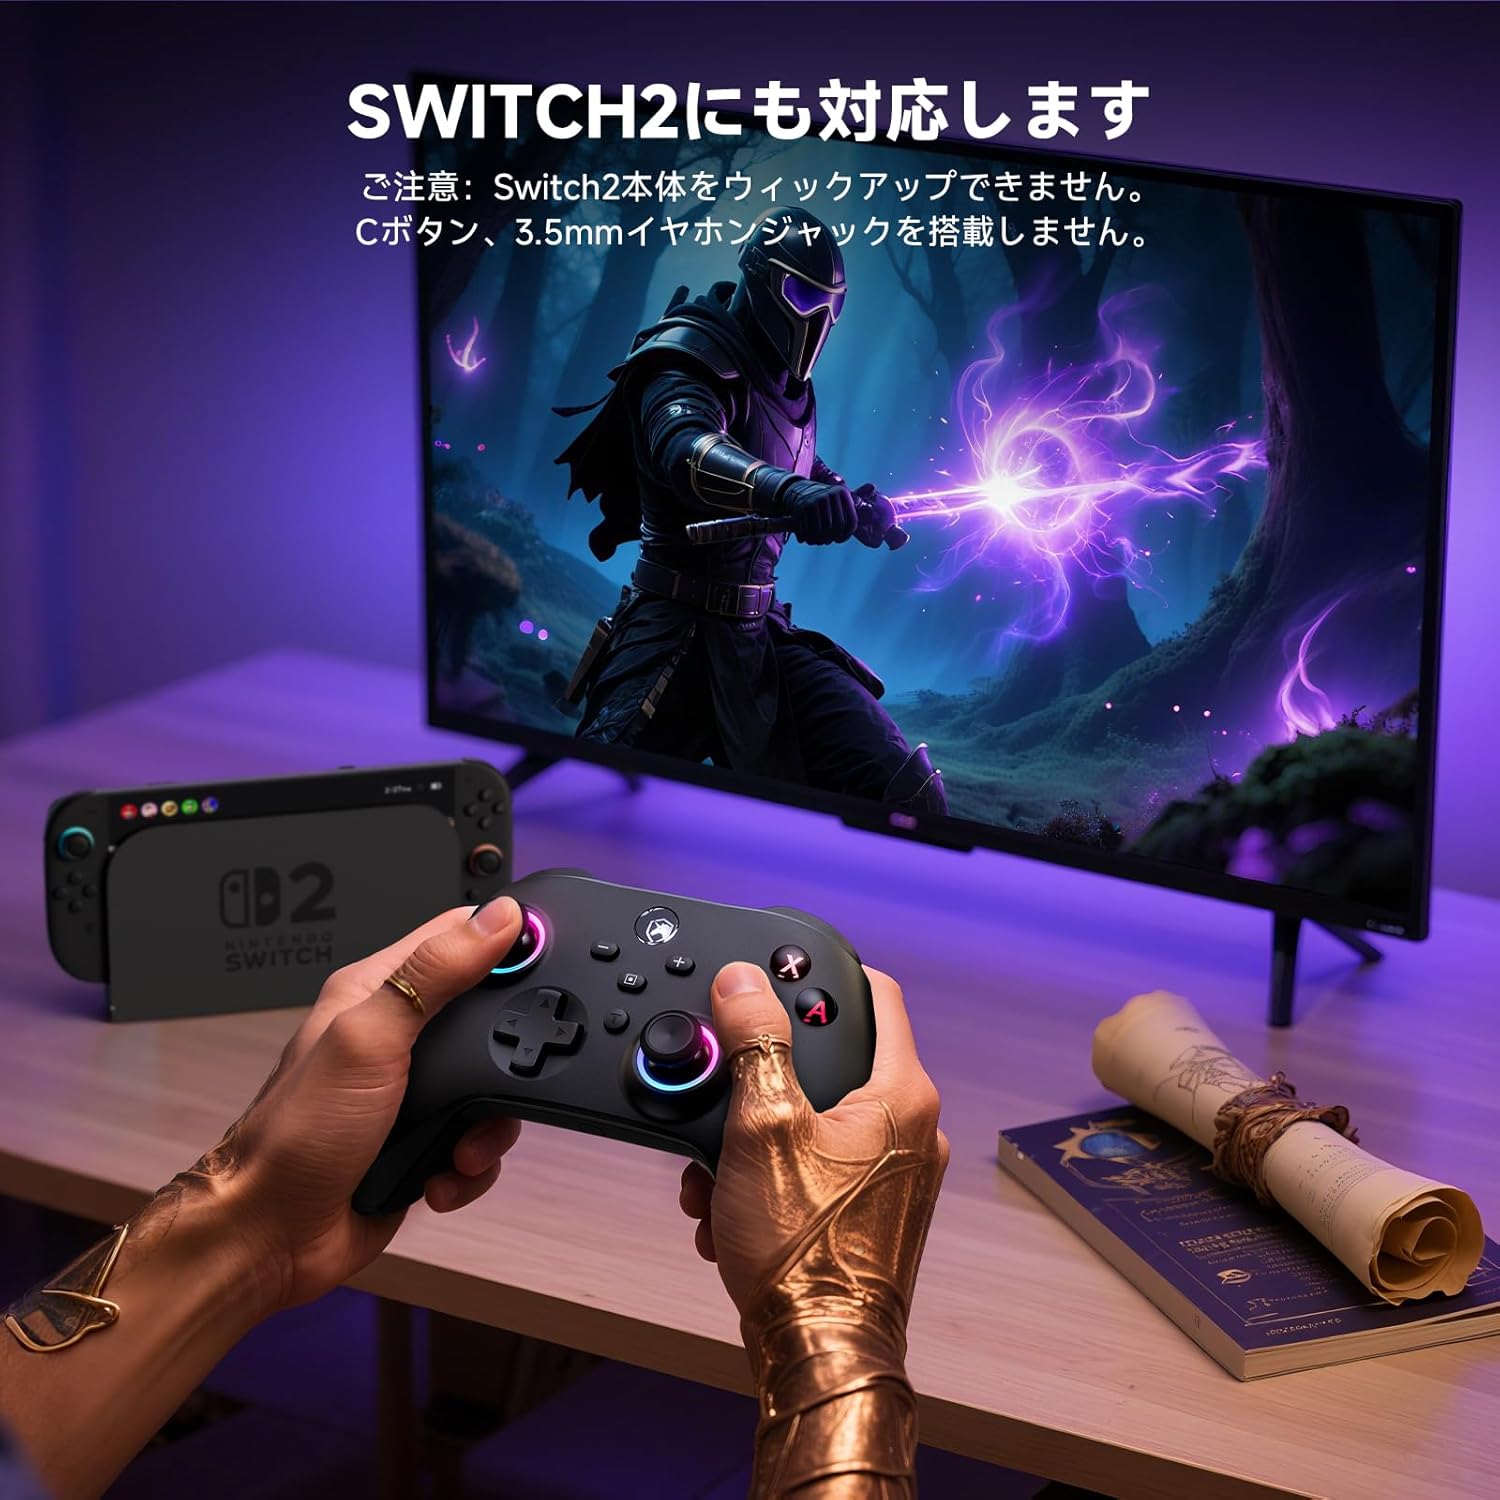
Image: A user playing a game with the controller, demonstrating its compatibility with various platforms, including the Switch 2. Note: This controller does not feature a C button or a 3.5mm headphone jack.
5. Naudojimo instrukcijos
5.1 Pagrindiniai valdikliai
The controller features standard gaming buttons including ABXY, D-pad, Left/Right Joysticks, L/R, ZL/ZR, Home, Screenshot, Plus (+), Minus (-), and T (TURBO) buttons.
5.2 TURBO funkcija
The TURBO function allows a button to be pressed repeatedly as long as it is held down, which can be useful in certain games to reduce manual input.
- Setting TURBO: Press and hold the button you wish to set for TURBO (e.g., A button), then press the 'T' button once. The button will now activate TURBO mode.
- Adjusting TURBO Speed: While holding the 'T' button, move the Right Joystick Up or Down to cycle through different TURBO speeds (Slow, Medium, Fast).
- Clearing TURBO: To clear TURBO for a specific button, press and hold the TURBO-enabled button, then press the 'T' button twice. To clear all TURBO settings, press and hold the 'T' button for 5 seconds.

Image: A close-up of the controller's 'T' (TURBO) button, illustrating its rapid-fire capability to reduce operational fatigue during gameplay.
5.3 Programming Back Buttons (M1/M2)
The M1 and M2 back buttons can be programmed to replicate other button inputs for convenience.
- Įeikite į programavimo režimą: Press and hold the 'M' button (located between M1 and M2) for 3 seconds until the LED indicators start flashing slowly.
- Select Back Button: Press either M1 or M2. The LED will flash rapidly.
- Assign Input: Press the button you want to assign (e.g., A, B, X, Y, L, LT, R, RT, +).
- Išeiti iš programavimo režimo: Press the 'M' button again. The LED will stop flashing and return to solid, indicating the setting is saved.
- Clear Back Button Assignment: To clear a specific back button, enter programming mode, select the back button (M1 or M2), then press the 'M' button again.
5.4 Vibracijos reguliavimas
The controller offers 4 levels of vibration intensity: 0% (off), 30%, 70%, and 100%.
- To adjust vibration intensity, press and hold the 'T' button, then press the Left Joystick Up or Down.
- The vibration intensity will cycle through the four levels. Release the buttons when the desired level is reached.
5.5 RGB šviesos reguliavimas
The RGB lights around the joysticks can be adjusted.
- To change the RGB light mode or color, press and hold the 'T' button, then press the Right Joystick Left or Right.
- The lights will cycle through different colors and effects.
- To turn off the RGB lights, continue cycling until they are off.
6. Įkrovimas ir akumuliatorius
Valdiklis aprūpintas 1000 mAh įkraunama baterija.
- Baterijos talpa: 1000 mAh
- Įkrovimo laikas: Maždaug 2-3 valandų
- Naudojimo laikas: Up to 8 hours on a full charge (may vary based on vibration and RGB light usage).
To charge the controller, connect it to a USB power source (e.g., Switch dock, PC, USB wall adapter) using the provided USB-C cable. The LED indicators will flash during charging and turn off or become solid when fully charged, depending on the controller's state.

Image: An illustration showing the controller's internal 1000mAh battery and its charging/usage specifications.
7. Priežiūra
- Valymas: Use a soft, dry cloth to clean the controller. Do not use chemical solvents or abrasive cleaners.
- Saugykla: Laikykite valdiklį vėsioje, sausoje vietoje, apsaugotoje nuo tiesioginių saulės spindulių ir ekstremalių temperatūrų.
- Akumuliatoriaus priežiūra: To prolong battery life, avoid fully discharging the controller frequently. If not used for an extended period, charge it at least once every three months.
8. Problemų sprendimas
- Controller does not connect:
- Įsitikinkite, kad valdiklis įkrautas.
- Make sure the console/device's Bluetooth is enabled and in pairing mode.
- Try resetting the controller by inserting a pin into the small reset hole on the back.
- Pašalinkite ankstesnius susiejimus iš savo įrenginio „Bluetooth“ nustatymų ir bandykite susieti dar kartą.
- Įvesties delsa arba atjungimas:
- Įsitikinkite, kad šalia nėra stiprių elektromagnetinių trukdžių.
- Priartėkite prie konsolės / įrenginio.
- Įsitikinkite, kad valdiklio baterija nėra išsikrovusi.
- Mygtukai arba valdymo svirtys nereaguoja:
- Try resetting the controller.
- Įsitikinkite, kad valdiklis tinkamai prijungtas.
- Jei problema išlieka, susisiekite su klientų aptarnavimo tarnyba.
9. Specifikacijos
| Parametras | Vertė |
|---|---|
| Modelis | ECHTPower Wireless Pro Controller |
| Ryšys | „Bluetooth“, USB-C (laidinis) |
| Suderinamumas | „Nintendo Switch“, asmeninis kompiuteris, „Android“, „iOS“ |
| Baterijos talpa | 1000 mAh |
| Įkrovimo laikas | 2-3 valandas |
| Naudojimo laikas | Iki 8 valandų |
| Vibracija | Dual Motor, 4-level adjustable |
| Judesio jutiklis | 6 ašių giroskopas |
| Ypatingos savybės | RGB Lights, TURBO Function, Programmable Back Buttons, Hall Effect Triggers, Wake-up Function |
10. Garantija ir palaikymas
ECHTPower products come with a standard warranty. For detailed warranty information, please refer to the warranty card included in your package or visit our official website. If you encounter any issues or have questions regarding your ECHTPower Wireless Pro Controller, please contact our customer support team:
- El. paštas: support@echtpower.com
- Websvetainė: www.echtpower.com
Kreipdamiesi į palaikymo tarnybą, turėkite paruoštą savo produkto modelį ir pirkimo informaciją.


