1. Įvadas
This manual provides detailed instructions for the safe and effective use of your xTool Mini Heat Press Machine. Please read this manual thoroughly before operating the device and retain it for future reference. The xTool Mini Heat Press is designed for heat transfer applications on various materials, including fabrics, wood, and ceramics.
2. Saugos informacija
Norėdami užtikrinti saugų veikimą, laikykitės šių atsargumo priemonių:
- Always place the heat press on a heat-resistant surface.
- Do not touch the hot plate during or immediately after use. Use the insulated safety base provided.
- Laikyti vaikams ir naminiams gyvūnėliams nepasiekiamoje vietoje.
- Atjunkite prietaisą nuo elektros tinklo, kai jo nenaudojate arba prieš valydami.
- Nemerkite prietaiso į vandenį ar kitus skysčius.
- Ensure the power cord is not damaged and avoid placing heavy objects on it.
- The device features an automatic shut-off function after 11 minutes of inactivity for enhanced safety.
- Naudokite gerai vėdinamoje vietoje.

Vaizdas: The xTool Mini Heat Press highlights its safety features, including an 11-minute auto-off, V0 flame-retardant materials, an insulated safety base, and overheat protection, ensuring safe operation for users.
3. Pakuotės turinys
Patikrinkite, ar pakuotėje yra visi reikalingi daiktai:
- xTool Mini Heat Press Machine
- Izoliuota saugos bazė
- Maitinimo laidas
- Vartotojo vadovas (šis dokumentas)
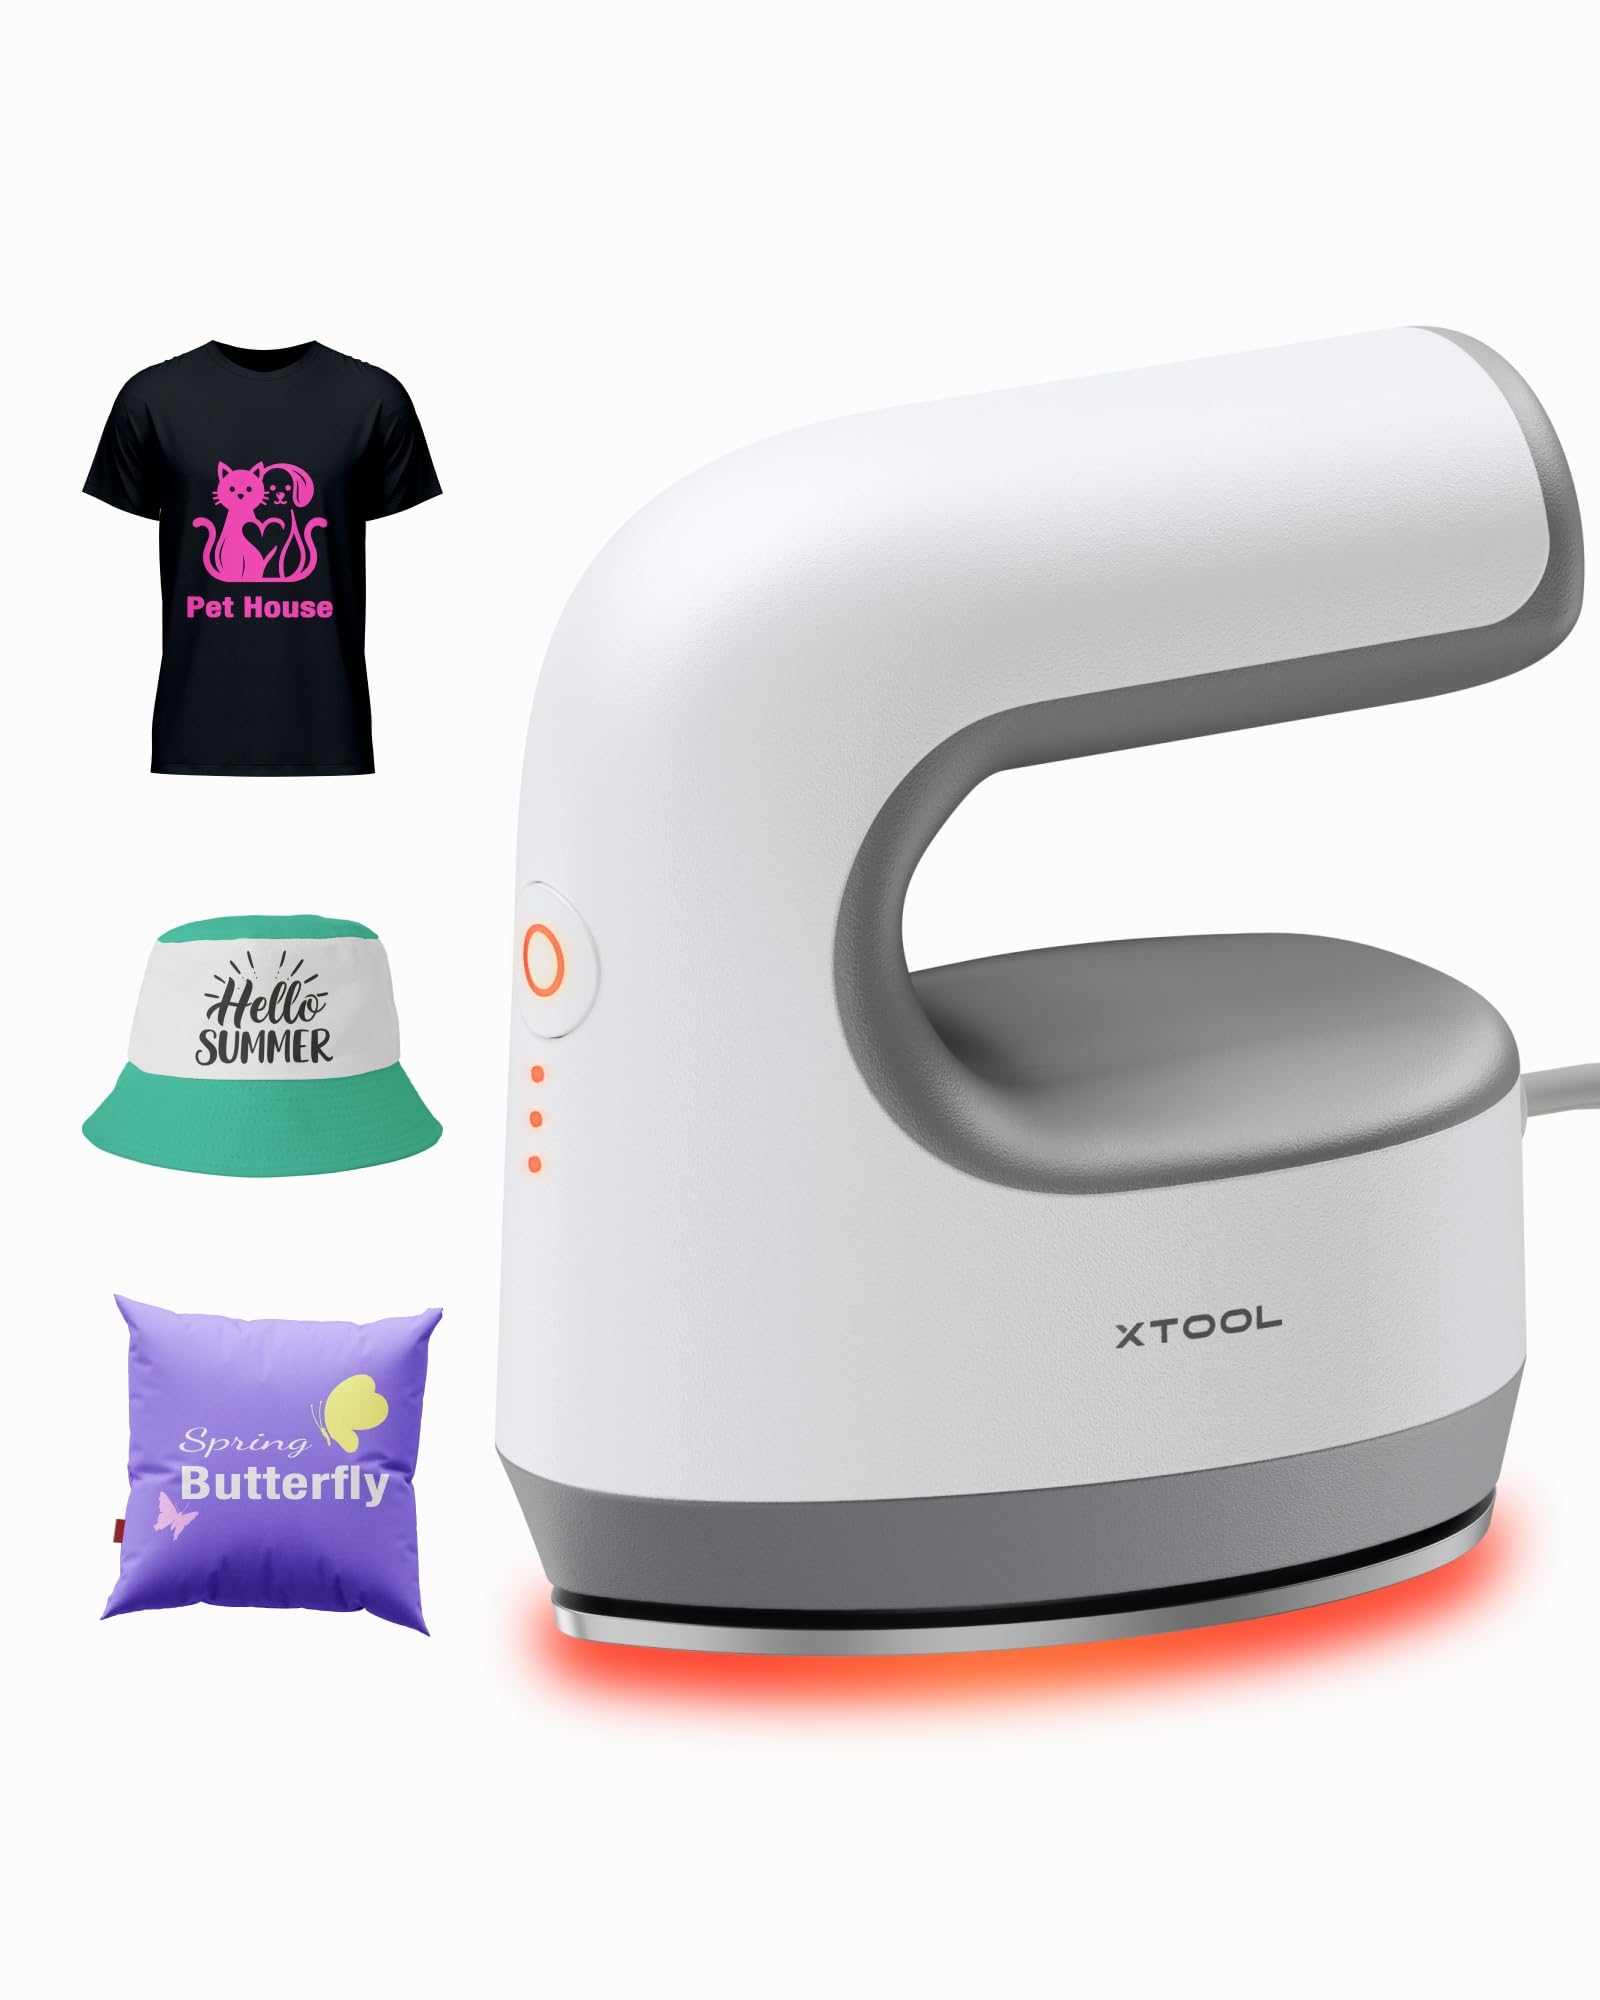
4. Produktas baigtasview
Familiarize yourself with the components of your xTool Mini Heat Press:
- Šildymo plokštė: The heating surface for transfers.
- Rankena: Ergonomically designed for comfortable grip and pressure application.
- Maitinimo mygtukas: Controls power on/off and temperature settings.
- Indikacinės lemputės: Display current temperature level and heating status.
- Izoliuotas saugos pagrindas: Provides a safe resting place for the hot press.
Vaizdas: The xTool Mini Heat Press Machine shown resting on its insulated safety base, highlighting its compact design.

Vaizdas: A visual comparison illustrating the ergonomic open handle of the xTool Mini Heat Press, designed for easier and more comfortable holding compared to a closed-handle design.

Vaizdas: A visual comparison showing the xTool Mini Heat Press with a larger heat plate (platen) compared to another mini press, indicating its suitability for a wider range of project sizes.
5. Sąranka
Follow these steps to set up your xTool Mini Heat Press:
- Unpack the xTool Mini Heat Press and its accessories.
- Place the insulated safety base on a stable, heat-resistant surface.
- Plug the power cord into the heat press and then into a standard electrical outlet. The device will beep once, and the power indicator light will illuminate.
- If using the optional Control Pod (not included), insert the transceiver from the Control Pod into the designated port on the Mini Heat Press. The Control Pod allows for precise temperature and time control.
Vaizdo įrašas: This video demonstrates the compatibility of the xTool Mini Heat Press with an optional Control Pod (not included), showing how to connect the transceiver for advanced temperature and time control.
6. Naudojimo instrukcijos
6.1. Power On and Temperature Selection
- Press the Power Button once to turn on the device. The orange indicator light will show, indicating low-level preheating.
- Press the Power Button repeatedly to cycle through the three temperature settings:
- Žemas lygis: 295 °F (145 °C)
- Middle Level: 355 °F (180 °C)
- Aukštas lygis: 400 °F (205 °C)
- The indicator lights will change to green when the selected temperature is reached.

Vaizdas: A visual representation of the xTool Mini Heat Press's three heat settings, indicating the corresponding temperatures for Low, Medium, and High levels.
Vaizdo įrašas: This video demonstrates the rapid heating capability of the xTool Mini Heat Press, showing it reaches operating temperature in approximately 2 minutes.
6.2. Heat Transfer Application
The xTool Mini Heat Press is suitable for various heat transfer materials, including HTV, DTF, and sublimation projects. Always refer to the specific instructions for your transfer material for optimal temperature and time settings.
- Prepare your material (e.g., T-shirt, shoe, hat) by ensuring it is clean and wrinkle-free.
- Place your transfer design onto the material in the desired position.
- Cover the design with a protective sheet (e.g., parchment paper, Teflon sheet).
- Once the Mini Heat Press reaches the desired temperature, place it firmly over the design. Apply even pressure.
- Hold the press in place for the recommended time (typically 10-60 seconds, depending on the material and transfer type). For larger designs, move the press in sections, overlapping slightly to ensure full coverage.
- Carefully lift the heat press and place it back on its safety base.
- Allow the material to cool according to your transfer material's instructions (cold peel or warm peel).
- Gently peel off the protective sheet and transfer film.

Vaizdas: A visual guide illustrating the simple three-step process for heat transfer using the xTool Mini Heat Press: Set the design, Press with the device, and achieve a successful transfer on a plush toy.

Vaizdas: Koliažo parodaasing the wide range of applications for the xTool Mini Heat Press, including customizing shoes, acrylic keychains, canvas bags, socks, stuffed toys, t-shirts, and earrings.
Vaizdo įrašas: Šiame vaizdo įraše pateikiamas pakartotinisview of the xTool Mini Heat Press, demonstrating its ease of use and effectiveness for various heat transfer projects.
Vaizdo įrašas: This video illustrates the process of using the xTool Mini Heat Press to create custom fall-themed shirts, showcasing its application on fabric.
7. Priežiūra
Proper maintenance ensures the longevity and performance of your heat press:
- Valymas: After the device has cooled completely, wipe the heat plate with a soft, damp audinys. Nenaudokite abrazyvinių valiklių ar tirpiklių.
- Saugykla: Store the Mini Heat Press on its insulated safety base in a dry, cool place, away from direct sunlight and moisture.
- Laido priežiūra: Venkite maitinimo laido tvirtai vynioti aplink įrenginį. Laikykite jį laisvai, kad nepažeistumėte.
8. Problemų sprendimas
Jei kyla problemų, žr. toliau pateiktas dažniausiai pasitaikančias problemas ir sprendimus:
| Problema | Galima priežastis | Sprendimas |
|---|---|---|
| Įrenginys neįsijungia. | Maitinimo laidas netinkamai prijungtas; iš lizdo nėra elektros. | Patikrinkite maitinimo laido jungtį; išbandykite lizdą su kitu įrenginiu. |
| Heat plate not heating up. | Incorrect temperature setting; device malfunction. | Ensure correct temperature level is selected; contact customer support if issue persists. |
| Perkėlimo medžiaga netinkamai prilimpa. | Insufficient heat or pressure; incorrect time; material incompatibility. | Increase temperature/time/pressure as per transfer material instructions; ensure material is suitable for heat transfer. |
| Įrenginys automatiškai išsijungia. | 11-minute inactivity safety feature activated. | This is normal operation. Press the power button to restart. |
9. Specifikacijos
| Funkcija | Detalė |
|---|---|
| Modelio numeris | xTool Mini Heat Press |
| Prekės ženklas | xTool |
| Maksimali temperatūra | 400 °F (205 °C) |
| Šilumos nustatymai | 3 (Low: 295°F, Mid: 355°F, High: 400°F) |
| Šildymo laikas | Approx. 2 minutes to 400°F |
| Prekės svoris | 0.77 lbs (1.94 lbs with packaging) |
| Gaminio matmenys | 7.48 x 5.12 x 8.66 colio |
| Saugos ypatybės | 11-min Auto-off, V0 Flame-retardant materials, Overheat Protection, Insulated Safety Base |
| Rekomenduojami naudojimo būdai | T-shirts, bags, ceramic coasters, wood, acrylic, hats, shoes, keychains, socks, stuffed toys |
10. Garantija ir palaikymas
Dėl garantijos informacijos ir techninės pagalbos žr. oficialią „xTool“ svetainę. websvetainėje arba susisiekite tiesiogiai su jų klientų aptarnavimo tarnyba. Išsaugokite pirkimo kvitą kaip pirkimo įrodymą garantijos pretenzijoms.
- Palaikymas internetu: Visit the xTool official website for FAQs, tutorials, and contact information.
- Pagalba el. paštu: Reach out via email for assistance with product issues.
- Pagalba telefonu: Contact the dedicated support line for immediate help.


