Įvadas
Ačiū, kad pasirinkote O.urlife WiFi Extender. This device is designed to expand your existing Wi-Fi network coverage, eliminate dead spots, and provide a stable, high-speed internet connection throughout your home or office. With a data transfer rate of up to 300Mbps on the 2.4GHz band, it is ideal for streaming, online gaming, and general internet use. This manual provides detailed instructions for setup, operation, and troubleshooting.
Saugos informacija
- Saugokite prietaisą nuo vandens ar drėgmės.
- Nebandykite patys išardyti ar taisyti įrenginio.
- Naudokite tik gamintojo pateiktą arba rekomenduojamą maitinimo adapterį.
- Saugokite prietaisą nuo šilumos šaltinių ir tiesioginių saulės spindulių.
- Užtikrinkite tinkamą vėdinimą aplink prietaisą, kad išvengtumėte perkaitimo.
Pakuotės turinys
Atidžiai patikrinkite pakuotės turinį. Jei kurio nors elemento trūksta arba jis pažeistas, susisiekite su pardavėju.
- Ourlife WiFi Extender (repeater body)
- Vartotojo vadovas
Produktas baigtasview
Ourlife WiFi Extender features a compact design with four high-gain external antennas for enhanced signal penetration and coverage. It includes an Ethernet port for wired connections.
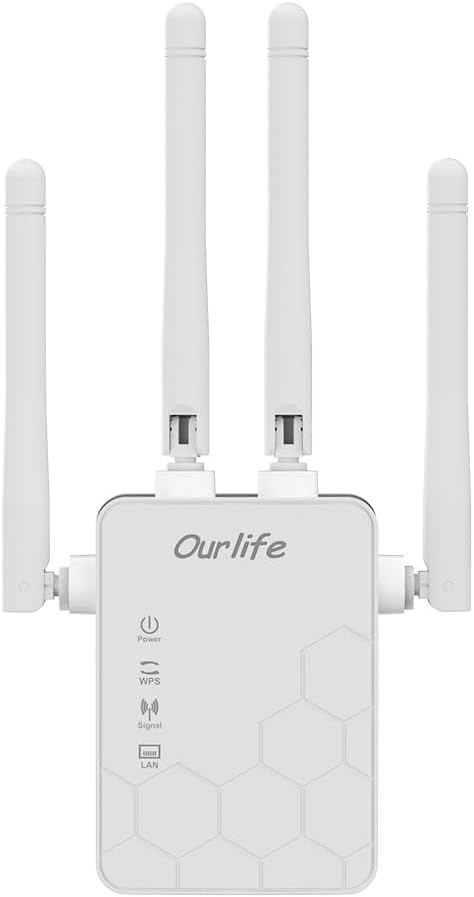
Vaizdas: priekis view O raidėsurlife WiFi Extender, showing the Ourlife logo, power indicator, WPS button, signal strength indicator, and LAN port indicator. Four external antennas are visible.
Pagrindiniai komponentai:
- Maitinimo indikatorius: Užsidega, kai įrenginys įjungtas.
- WPS mygtukas: Naudojamas greitam, vieno mygtuko paspaudimu atliekamam nustatymui su suderinamais maršrutizatoriais.
- Signalo indikatorius: Shows the strength of the Wi-Fi signal received from the main router.
- LAN prievadas: An Ethernet port for connecting wired devices or for setting up the extender in Access Point (AP) mode.
- Išorinės antenos: Four adjustable antennas to optimize signal reception and transmission.

Vaizdas: Šoninė view O raidėsurlife WiFi Extender with dimensions. The device measures approximately 17.2cm/6.8in in height, 5.4cm/2.1in in width, and 3.3cm/1.3in in depth.
Sąranka
Ourlife WiFi Extender offers two primary setup methods: WPS (Wi-Fi Protected Setup) for quick connection, and manual setup via a web naršyklė.
1 būdas: WPS sąranka (rekomenduojama greitam nustatymui)
- Maitinimas: Prijunkite Ourlife WiFi Extender into an electrical outlet near your main Wi-Fi router. Wait for the Power indicator to light up.
- Paspauskite WPS ant ilgintuvo: Press the WPS button on the Ourlife WiFi Extender. The WPS indicator light will start blinking.
- Maršrutizatoriuje paspauskite WPS: Within 2 minutes, press the WPS button on your main Wi-Fi router.
- Palaukite ryšio: The WPS indicator on the extender will stop blinking and remain solid when the connection is established. The Signal indicator will also light up, indicating a successful connection.
- Perkelkite plėstuvą: Once connected, unplug the extender and move it to a location halfway between your router and the Wi-Fi dead zone. Ensure the Signal indicator shows a strong signal (usually green or multiple bars) for optimal performance.

Image: Visual representation of the four simple setup steps: 1. Unbox, 2. Plug it in, 3. Press the button (WPS), 4. And Pair (with router).
Method 2: Manual Setup via Web Naršyklė
- Maitinimas: Prijunkite Ourlife WiFi Extender into an electrical outlet near your computer or mobile device.
- Prisijunkite prie plėtinio „Wi-Fi“: On your computer or mobile device, connect to the Wi-Fi network named "Ourlife_Extender" (or similar, check the label on the device). No password is required for the initial connection.
- Atidaryti Web Naršyklė: Atidarykite a web browser (e.g., Chrome, Firefox, Safari) and enter the default IP address or domain name (e.g., 192.168.10.1 or reapeter.net) into the address bar. Refer to the device label or included mini-manual for the exact address.
- Prisijungimas: Įveskite numatytąjį vartotojo vardą ir slaptažodį (paprastai admin/admin).
- Pasirinkite režimą: Choose "Repeater Mode" or "AP Mode" based on your needs.
- Kartotuvo režimas: Extends your existing Wi-Fi network wirelessly.
- AP režimas (prieigos taškas): Converts a wired internet connection into a wireless Wi-Fi hotspot. Connect an Ethernet cable from your router to the extender's LAN port.
- Konfigūruoti tinklą:
- Kartotuvo režimui: Select your main Wi-Fi network from the list, enter its password, and choose whether to keep the same SSID or create a new one for the extended network.
- AP režimui: Set a new SSID (network name) and password for the Wi-Fi hotspot.
- Taikyti nustatymus: Išsaugokite nustatymus ir palaukite, kol plėtiklis bus paleistas iš naujo.
- Perkelkite plėstuvą: Once configured, unplug and relocate the extender to an optimal position.
Veikiantis
After successful setup, the Ourlife WiFi Extender will operate automatically. The Signal indicator will provide visual feedback on the connection quality.
Įrenginių prijungimas:
- Belaidžiai įrenginiai: Connect your smartphones, tablets, laptops, and other Wi-Fi enabled devices to the extended Wi-Fi network (the SSID you configured during setup).
- Wired Devices (via LAN Port): If you are using the extender in Repeater mode, you can connect a wired device (e.g., desktop PC, smart TV, game console) to the extender's LAN port using an Ethernet cable to provide it with network access.
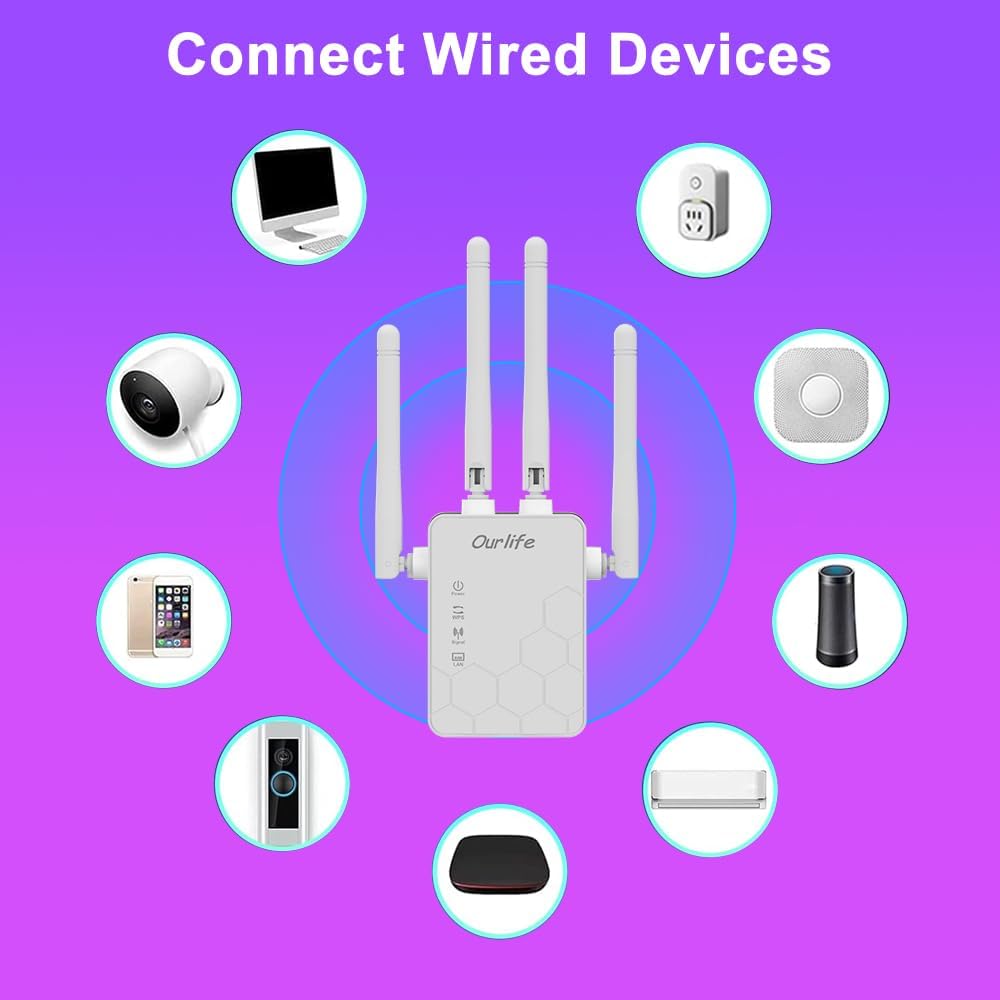
Image: Diagram showing various wired and wireless devices (e.g., desktop computer, smart plug, smart speaker, air conditioner, smart doorbell, security camera, smartphone) that can connect to the Ourlife WiFi Extender.

Paveikslėlis: Ourlife WiFi Extender plugged into a wall outlet, with an Ethernet cable connected to its LAN port, illustrating its capability to provide a wired connection.
Priežiūra
Regular maintenance helps ensure the longevity and optimal performance of your Ourlife WiFi Extender.
- Valymas: Įrenginiui valyti naudokite minkštą, sausą šluostę. Nenaudokite skystų valiklių ar aerozolių.
- Firmware atnaujinimai: Periodiškai tikrinkite gamintojo website for firmware updates. Updating firmware can improve performance, add features, and fix bugs.
- Paleidimas iš naujo: If you experience network issues, try restarting the extender by unplugging it from the power outlet for 10 seconds and then plugging it back in.
- Optimali vieta: Ensure the extender is placed in an open area, away from large metal objects, concrete walls, and other electronic devices that may cause interference.
Trikčių šalinimas
Jei kyla problemų dėl Ourlife WiFi Extender, refer to the following common problems and solutions:
| Problema | Galimas sprendimas |
|---|---|
| Ilgintuvas neįsijungia. | Įsitikinkite, kad ilgintuvas yra tvirtai prijungtas prie veikiančio elektros lizdo. Išbandykite kitą lizdą. |
| Cannot connect to the extender's Wi-Fi for setup. | Ensure you are connecting to the correct default SSID (e.g., "Ourlife_Extender"). Try restarting the extender and your device. |
| WPS sąranka nepavyko. | Ensure your router supports WPS. Press the WPS button on both devices within the 2-minute window. Try manual setup if WPS continues to fail. |
| No internet access after connecting to the extended network. | Check if your main router has internet access. Relocate the extender closer to your main router to ensure a strong signal (check Signal indicator). Reconfigure the extender. |
| Slow speeds on the extended network. | Relocate the extender to an optimal position where the Signal indicator shows a strong connection to the main router. Avoid placing it near interference sources. Ensure your main router is providing good speeds. |
| Pamiršote prisijungimo slaptažodį web valdymo puslapį. | Perform a factory reset on the extender (usually by pressing and holding a reset button for 5-10 seconds). This will revert all settings to default, including the login credentials. |
Specifikacijos
| Funkcija | Detalė |
|---|---|
| Prekės ženklas | Ourljei |
| Modelis | Ourlife WiFi Extender 300Mbps |
| ASIN | B0D7HB4DBC |
| Duomenų perdavimo sparta | 300 megabitai per sekundę (2.4 GHz) |
| Antenos | 4 didelio stiprinimo išorinės antenos |
| Ethernet prievadas | 1 x LAN prievadas |
| Spalva | Baltas |
| Ryšys | Wireless-N (802.11n/g/b) |
| Saugumo protokolai | Supports Wireless Security (WPA/WPA2) |
| Matmenys (apytiksliai) | 17.2 cm (A) x 5.4 cm (P) x 3.3 cm (A) |
Garantija ir palaikymas
For warranty information and technical support, please refer to the documentation included with your purchase or visit the official Ourljei website. You can also contact Ourlife customer service directly for assistance with product setup, troubleshooting, or warranty claims.
Ourlife Store Link: Apsilankykite O.url„ife“ parduotuvė „Amazon“ platformoje


