1. Įvadas
This manual provides detailed instructions for the assembly, operation, and maintenance of the Geekworm X1100 series accessories for Raspberry Pi 5. This kit includes the X1100 2.5" SATA HDD/SSD Shield, X1100-C1 Metal Case, Active Cooler H505, and a PD27W Power Supply, designed to enhance the functionality and cooling of your Raspberry Pi 5.

1.1 pav. Baigtaview of the Geekworm X1100 kit components.
2. Sąrankos vadovas
2.1 Pakuotės turinys
Prieš pradėdami surinkimą, patikrinkite, ar pakuotėje yra visi toliau išvardyti komponentai:
- 1 x X1100 2.5" SATA HDD/SSD Shield with accessories
- 1 x X1100-C1 Metal Case with Screws
- 1 x Active Cooler H505
- 1 x PD27W Power Supply (US Plug)
- Note: Raspberry Pi 5 board and SSD/HDD are NOT included.
2.2 Surinkimo instrukcijos
Follow these steps to assemble your Geekworm X1100 kit with Raspberry Pi 5:
- Paruoškite „Raspberry Pi 5“: Ensure your Raspberry Pi 5 is powered off and disconnected from any peripherals.
- Install the X1100 SATA Shield: Carefully align the X1100 2.5" SATA HDD/SSD Shield with the GPIO pins and mounting holes on your Raspberry Pi 5. Gently press down to secure the shield. Use the provided standoffs and screws to fasten the shield to the Raspberry Pi 5 board.
- Connect the 2.5" SATA HDD/SSD: Insert your 2.5-inch SATA hard disk drive (HDD) or solid-state drive (SSD) into the SATA connector on the X1100 shield. Ensure it is firmly seated. The X1100 supports up to 5TB 2.5-inch SATA drives.
- Install the Active Cooler H505: Attach the Active Cooler H505 to the Raspberry Pi 5's CPU. Connect the cooler's fan cable to the appropriate fan header on the Raspberry Pi 5 board.
- Enclose in the X1100-C1 Metal Case: Carefully place the assembled Raspberry Pi 5 with the X1100 shield and active cooler into the X1100-C1 Metal Case. Secure the case using the provided screws.
- Prijunkite maitinimo šaltinį: Connect the PD27W Power Supply to the USB-C power input of the Raspberry Pi 5. The system requires 5Vdc +/-5% 1.3A via the USB3 port for operation. No additional power adapter is needed for the X1100 shield itself.

Figure 2.1: Connecting a 2.5" SATA HDD/SSD to the X1100 Shield.

Figure 2.2: Installation guide for the Active Cooler H505 on Raspberry Pi 5.

Figure 2.3: Assembly of the X1100-C1 Metal Case with Raspberry Pi 5 and X1100 board.
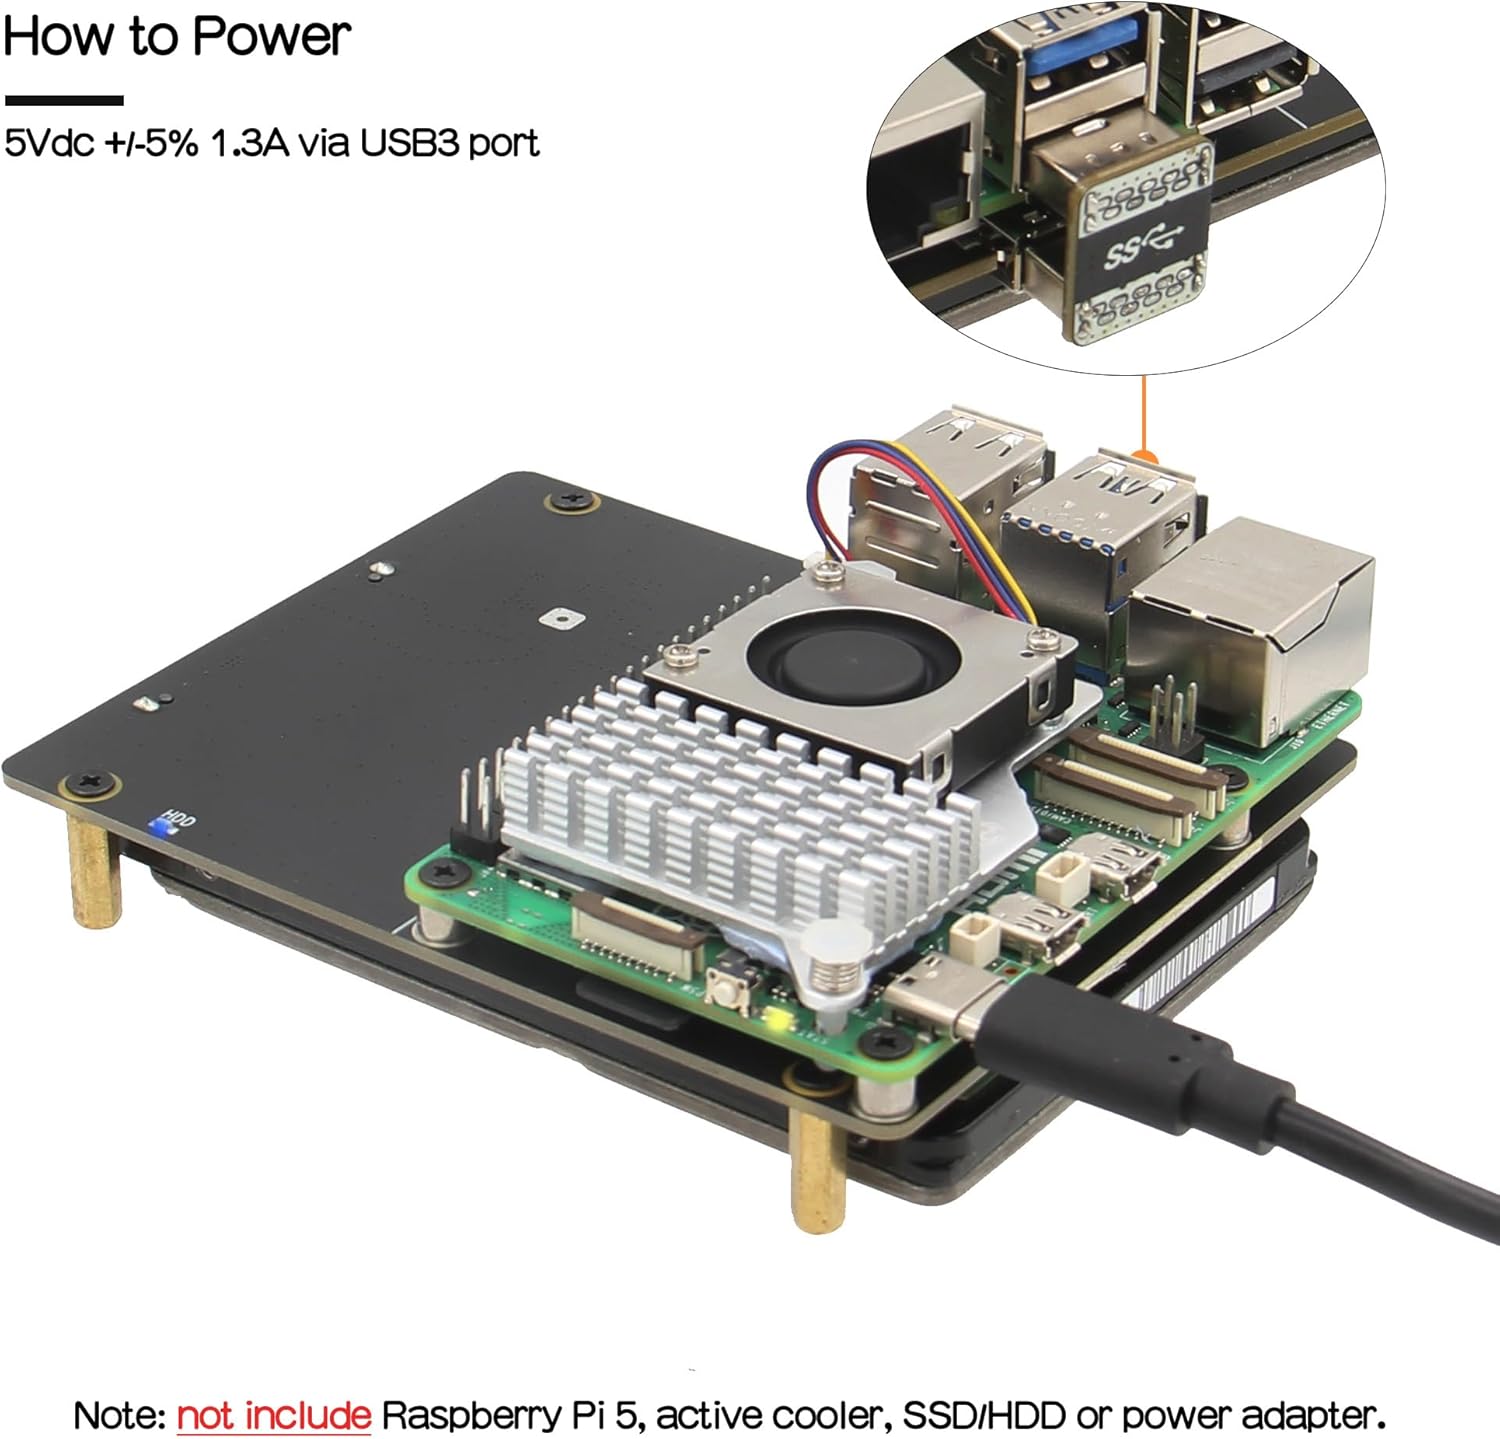
Figure 2.4: Powering the Raspberry Pi 5 via the USB3 port.
3. Naudojimo instrukcijos
3.1 Įjungimas
Once all components are assembled and the PD27W Power Supply is connected, the Raspberry Pi 5 will power on. Ensure your operating system (typically Linux-based) is properly configured to recognize and mount the connected 2.5" SATA HDD/SSD.
3.2 Prieiga prie saugyklos
The X1100 shield provides a USB 3.0 interface for the connected SATA drive. After booting your Raspberry Pi 5, the attached HDD/SSD should be accessible as a standard storage device. You may need to format and partition the drive if it is new or contains incompatible data.
4. Priežiūra
4.1 Aušinimo sistema
The Active Cooler H505 is designed to dissipate heat from the Raspberry Pi 5, ensuring stable performance. Regularly check that the fan is free from dust and debris to maintain optimal airflow. If necessary, gently clean the fan blades and heatsink fins with compressed air or a soft brush.

Figure 4.1: Active cooling mechanism with the H505 cooler.
4.2 Bendroji priežiūra
To ensure the longevity of your X1100 kit and Raspberry Pi 5, keep the device in a clean, dry environment. Avoid exposing it to extreme temperatures, humidity, or direct sunlight. Do not obstruct the ventilation holes on the X1100-C1 metal case.
5. Problemų sprendimas
If you encounter issues during setup or operation, please refer to the official Geekworm Wiki for detailed troubleshooting guides and frequently asked questions. Ieškokite "X1100" on the Geekworm Wiki to find relevant installation and support information.
Common issues may include:
- Diskas neaptiktas: Ensure the SATA drive is properly seated and the Raspberry Pi 5's operating system is configured to recognize USB storage devices. Check power supply.
- Maitinimo problemos: Verify the PD27W power supply is correctly connected and providing sufficient power (5Vdc +/-5% 1.3A).
- Perkaitimas: Ensure the active cooler fan is spinning and not obstructed.
6. Specifikacijos
| Funkcija | Specifikacija |
|---|---|
| Modelio numeris | X1100 |
| Suderinamumas | Raspberry Pi 5 (8GB/4GB/2GB/1GB) |
| Palaikoma saugykla | 2.5-inch SATA HDD/SSD (up to 5TB) |
| Techninės įrangos sąsaja | USB 3.0 |
| Maitinimo šaltinis | 5Vdc +/-5% 1.3A via USB3 port (PD27W Power Supply included) |
| Operacinė sistema | Linux (compatible with Raspberry Pi OS) |
| Korpuso matmenys (I x P x A) | 91.8 mm x 114 mm x 41.8 mm |

Figure 6.1: Physical dimensions of the X1100-C1 Metal Case.
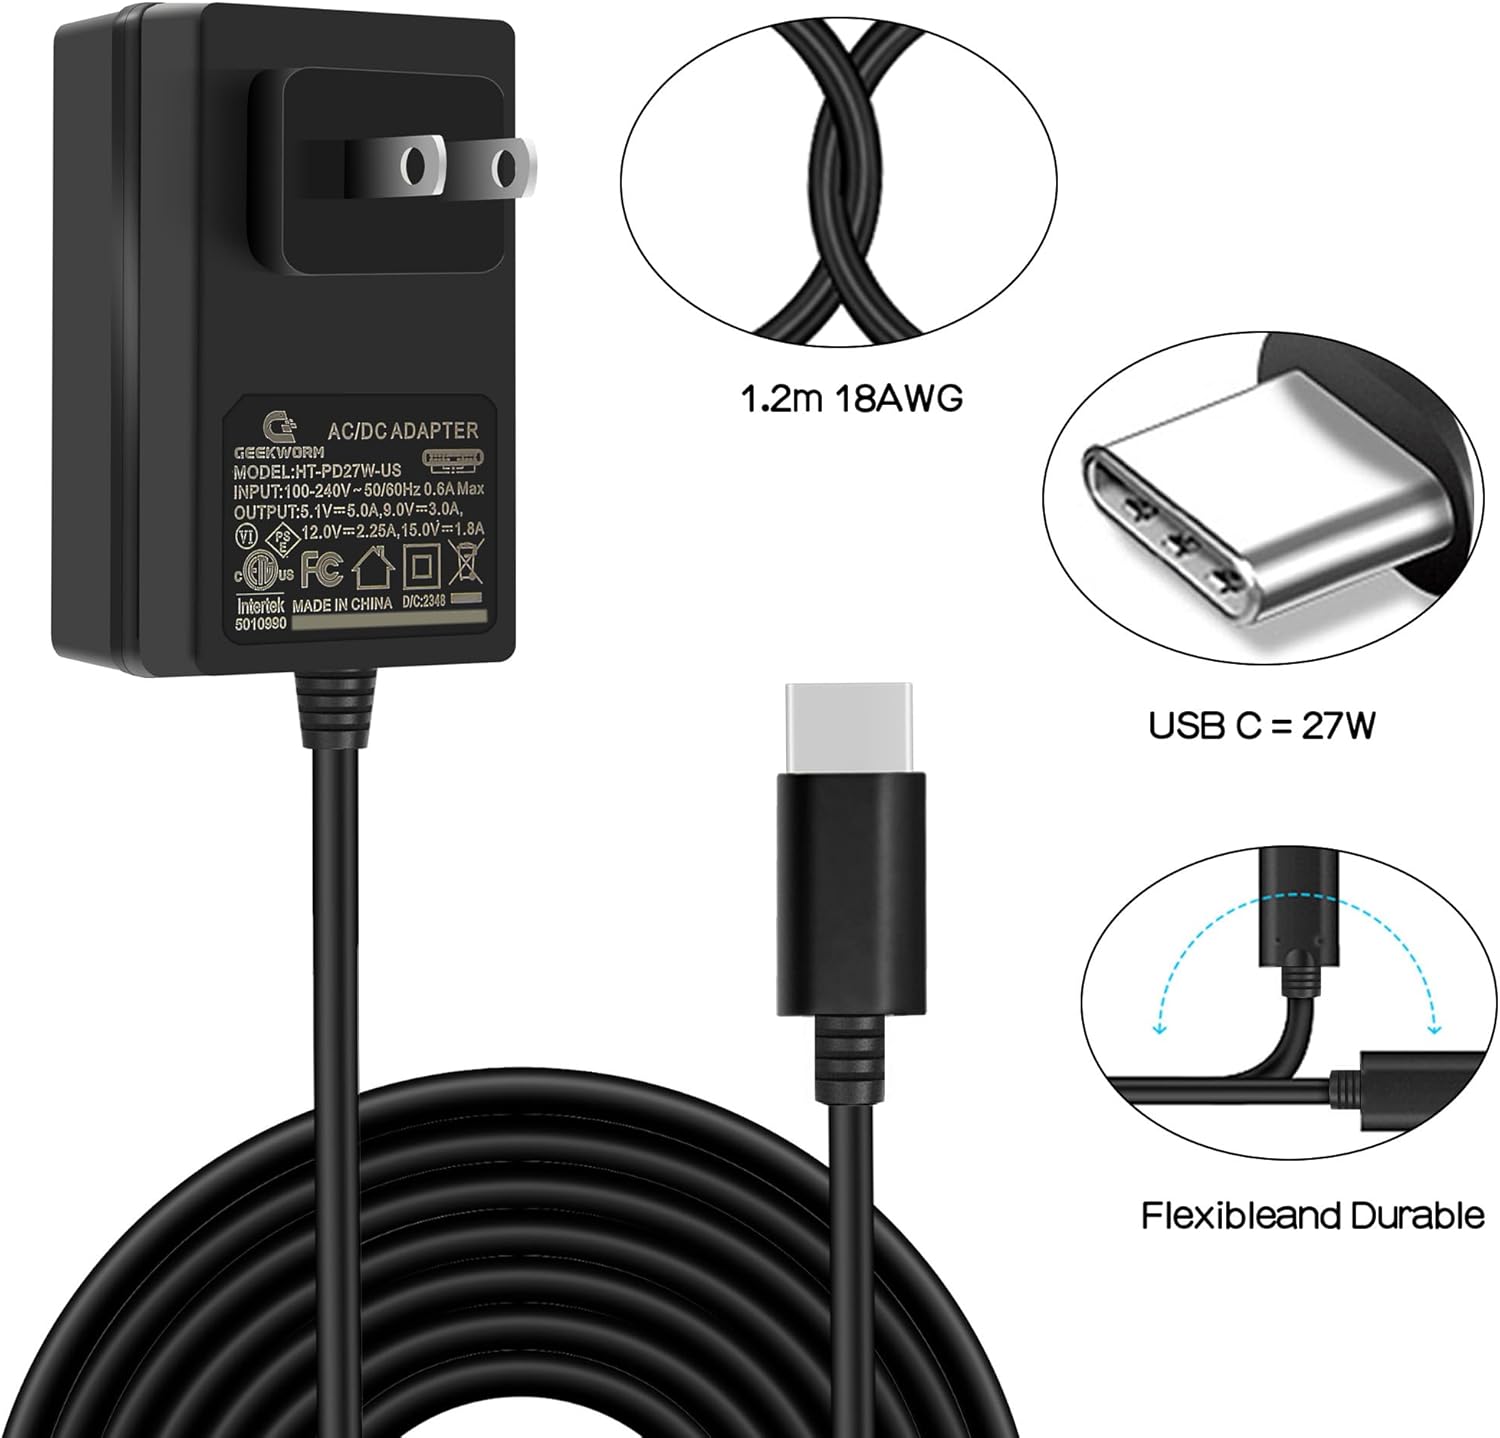
Figure 6.2: Specifications of the included PD27W Power Supply.
7. Pagalba ir ištekliai
For further assistance, detailed guides, and community support, please visit the official Geekworm Wiki:
Ieškokite "X1100" on the Wiki for product-specific documentation and troubleshooting tips.


