1. Įvadas
Welcome to the xTool F1 Ultra 20W Fiber & Diode Dual Laser Engraver. This advanced machine combines the power of a 20W fiber laser and a 20W diode laser, offering versatility for engraving and cutting a wide range of materials. Designed for efficiency and precision, the F1 Ultra features an Auto Conveyor system and a 16MP Smart Camera for streamlined production. This manual provides essential information for safe and effective operation of your device.

Figure 1.1: The xTool F1 Ultra 20W Fiber & Diode Dual Laser Engraver with its Auto Conveyor system.
2. Saugos informacija
The xTool F1 Ultra is a Class 4 laser engraver. Adherence to safety guidelines is crucial to prevent injury and damage to the device. Always operate the machine in a well-ventilated area.
2.1 Bendrosios saugos priemonės
- Always wear appropriate laser safety goggles when operating the machine, even with the enclosed design.
- Įsitikinkite, kad mašina pastatyta ant stabilaus, lygaus paviršiaus.
- Laikykite darbo vietą atokiau nuo degių medžiagų.
- Darbo metu nepalikite mašinos be priežiūros.
- Laikykite vaikus ir naminius gyvūnus toliau nuo darbo zonos.
2.2 Enclosed Design and Smoke Extraction
The F1 Ultra features a fully enclosed design and an effective smoke extraction system to enhance safety and maintain a clean working environment. The enclosed cover blocks harmful laser light from both the 455nm diode laser and the fiber laser.

Figure 2.1: The xTool F1 Ultra's safety features, including its fully enclosed design and integrated smoke extraction.

Figure 2.2: Key safety components of the xTool F1 Ultra.


Figure 2.3: The machine's efficient smoke extraction and laser-proof enclosure for user safety.
3. Pakuotės turinys
Išpakuodami patikrinkite, ar yra visi toliau išvardyti daiktai ir ar jie yra geros būklės:
- xTool F1 Ultra Laser Engraver Unit
- Auto Conveyor Module
- Maitinimo adapteris ir laidas
- USB kabelis
- Apsauginiai akiniai
- Medžiaga Samples (for testing)
- Vartotojo vadovas (šis dokumentas)
- Accessory Kit (includes tools for maintenance and setup)
4. Sąranka
4.1 Išpakavimas ir įdėjimas
Carefully remove all components from the packaging. Place the xTool F1 Ultra on a sturdy, flat surface with adequate space around it for ventilation and operation. Ensure the area is free from dust and direct sunlight.
4.2 Connecting the Auto Conveyor
Attach the Auto Conveyor module to the main engraver unit according to the diagrams provided in the quick start guide. Ensure all connections are secure.
4.3 Maitinimo ir duomenų jungtis
- Prijunkite maitinimo adapterį prie graviravimo aparato, o tada – prie tinkamo maitinimo lizdo.
- Prijunkite graverio įrenginį prie kompiuterio naudodami pridedamą USB laidą.
- Alternatively, the F1 Ultra features a 7GB offline-use control panel, allowing for operation without a direct computer connection once project files yra pakrautos.

Figure 4.1: The F1 Ultra's touchable control panel for offline operation.
4.4 Programinės įrangos diegimas
Download and install the latest version of the xTool software from the official xTool website. Follow the on-screen instructions for installation. The software is compatible with various operating systems and devices.
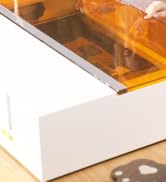
Figure 4.2: The xTool software interface, accessible on various devices.
5. Naudojimo instrukcijos
5.1 Medžiagų suderinamumas
The xTool F1 Ultra supports a wide array of materials thanks to its dual laser system:
- Fiber Laser (20W): Ideal for all metals (gold, silver, copper, stainless steel, brass, titanium, etc.).
- Diode Laser (20W): Suitable for wood, acrylic, leather, glass, rubber, fabric, and more.

5.1 pav. Baigtaview of materials compatible with the F1 Ultra's dual laser system.

Figure 5.2: The internal dual laser system of the xTool F1 Ultra.

5.3 pav. Pvzamples of metal engraving capabilities, including deep engraving, embossing, and color engraving.
5.2 Auto Streamline Production with Smart Camera
The Auto Streamline Production feature, powered by the 16MP Smart Camera and Auto Conveyor, simplifies batch engraving. The system automatically recognizes shapes, intelligently fills patterns, and processes items non-stop.
- Place materials on the Auto Conveyor.
- The Smart Camera will detect and map the items.
- The software will automatically arrange designs for efficient batch processing.
- The engraver will process items continuously.

Figure 5.4: The Smart Camera system in action, simplifying material placement and design alignment.

Figure 5.5: The three-step workflow for Auto Streamline Production.
5.3 Graviravimo ir pjovimo procesas
The F1 Ultra operates at speeds up to 10,000mm/s, significantly reducing production time.
- Design Creation: Use the xTool software or Artimind AI to create or import your designs. Artimind AI can generate word designs, images, and 3D embossing.
- Medžiagos nustatymai: Select the appropriate material from the Material EasySet Library within the software. This library contains optimized settings for over 400 materials.
- Preview and Adjust: Utilize the Smart Camera for a live preview of your design on the material. Adjust placement and size as needed.
- Start Engraving/Cutting: Initiate the process from the software or the control panel.

Figure 5.6: Artimind AI features for design generation.

Figure 5.7: Engraving on curved surfaces and with rotary attachments (RA2 Pro).

Figure 5.8: Demonstrations of the F1 Ultra's high-speed engraving capabilities.
6. Priežiūra
Regular maintenance ensures optimal performance and extends the lifespan of your xTool F1 Ultra.
6.1 Valymas
- Objektyvo valymas: Periodically clean the laser lens with a lint-free cloth and lens cleaning solution.
- Darbo zona: Keep the engraving platform and surrounding areas clean from debris and dust.
- Smoke Extraction System: Regularly check and clean the smoke extraction fan and filters to maintain efficiency.
6.2 Laser Care
Avoid touching the laser module directly. If any issues arise with laser performance, refer to the troubleshooting section or contact xTool support.
7. Problemų sprendimas
This section addresses common issues you might encounter. For more complex problems, please contact xTool customer support.
| Problema | Galima priežastis | Sprendimas |
|---|---|---|
| Lazeris nešauna | Power cable loose, emergency stop engaged, software error. | Check power connections, disengage emergency stop button, restart software and machine. |
| Prasta graviravimo kokybė | Incorrect material settings, dirty lens, material not flat. | Verify material settings in software, clean laser lens, ensure material is flat on the platform. |
| Auto Conveyor not moving | Connection issue, obstruction. | Check conveyor cable connection, remove any obstructions on the conveyor belt. |
| Programinė įranga neaptinka įrenginio | USB cable issue, driver problem, machine not powered on. | Try a different USB port/cable, reinstall software drivers, ensure machine is powered on. |
8. Specifikacijos
Key technical specifications of the xTool F1 Ultra:
- Lazerio tipas: 20W Fiber Laser & 20W Diode Laser (Dual Laser)
- Graviravimo greitis: Up to 10,000mm/s
- Darbo zona: 220mm x 220mm (expandable to 220mm x 500mm with Auto Conveyor)
- Fotoaparatas: 16MP Smart Camera (Auto Focus and Batch Fill)
- Ryšys: USB, Offline Control Panel (7GB storage)
- Saugos ypatybės: Fully Enclosed Design, Eye-Protection Cover, Effective Smoke Extraction, Fire Safety Alarm & Stop
- Palaikomos medžiagos: All metals (Fiber Laser), Wood, Acrylic, Leather, Glass, Rubber, Fabric (Diode Laser)
- Engraving Capabilities: 3D Embossing, Deep Engraving, HD Photo Engraving, Curved Surface Engraving

Figure 8.1: Illustration of the expandable working area.

Figure 8.2: The F1 Ultra offers the largest desktop fiber laser working area.
9. Garantija ir palaikymas
9.1 Informacija apie garantiją
The xTool F1 Ultra comes with a standard manufacturer's warranty. Please refer to the warranty card included in your package or visit the official xTool websvetainėje rasite išsamias garantijos sąlygas ir galiojimo laiką.
9.2 Pagalba klientams
For technical assistance, troubleshooting, or any inquiries regarding your xTool F1 Ultra, please contact xTool customer support through the following channels:
- Pagalba el. paštu: Refer to the xTool website for the official support email address.
- Tiesioginis pokalbis: Available on the xTool official websvetainę darbo valandomis.
- Pagalba telefonu: Contact numbers can be found on the xTool websvetainę.
- Online Community/Facebook Group: Join the xTool community for peer support and shared knowledge.

Figure 9.1: xTool provides dedicated technical support.


