1. Produktas baigtasview
The EDUP 2-in-1 Starlink PoE Injector 150W is designed to streamline the power and network connection for your Starlink Standard Internet Kit satellite. This device integrates the functions of a PoE injector, a DC Step Up Converter, and a power supply into a single unit, simplifying installation and optimizing space.
It provides up to 150W of power for stable operation of the Starlink satellite and supports 10/100/1000M Gigabit Ethernet for rapid data transmission. With its plug-and-play design, it offers effortless network integration for various applications, including RVs, boats, and remote outdoor setups.

Image 1.1: The EDUP 2-in-1 Starlink PoE Injector connected in a typical setup, showing its compact design and integration with Starlink and a network router.
2. Pagrindinės savybės
- 150W 2-in-1 Step Up PoE Injector: Combines PoE injection, DC step-up conversion, and power supply into one device for streamlined and space-saving installation.
- 150W GigE PoE Injector for Starlink Satellite Network: Ensures stable power supply for Starlink Standard Internet Kit satellite and supports 10/100/1000M network speed with four pairs of Gigabit Ethernet for faster data transfer.
- Flexible Connection & Efficient Power Management: Suitable for connecting Starlink Gen3 Internet Kit satellite network to routers or desktops/laptops. Optimizes power distribution with a maximum input/output capacity of 3A.
- Effortless Network Integration: Features a plug-and-play design and a single LAN output for straightforward connection to a Gigabit router or PC, maintaining optimal network speeds.
- Suderinami įrenginiai: Specifically designed for Standard Starlink Device, featuring comprehensive protection systems.
3. Pakuotės turinys
Patikrinkite, ar pakuotėje yra visi reikalingi daiktai:
- 1 x EDUP 2-in-1 Step Up PoE Injector 150W for Standard Starlink Device
4. Specifikacijos

Image 4.1: Physical dimensions and port identification of the EDUP Starlink PoE Injector.
| Parametras | Vertė |
|---|---|
| Sąsaja | LAN*1, POE*1, Power |
| Smeigtuko konfigūracija | +V: 1, 2, 3, 6; -V: 4, 5, 7, 8 |
| Tinklo greitis | 10/100/1000 Mbps („Gigabit Ethernet“) |
| Įvestis | DC 9~36V/15A |
| Išvestis | DC 56V / 3A Maks |
| Apsauga | Surge: ± 8KV (Differential), Class A; ESD: ± 8KV (Contact), ± 15KV(Air), Class A |
| Darbinė temperatūra | -20 ~ +55 °C |
| Darbinė drėgmė | 10–90 % (nesikondensuojantis) |
| Laikymo temperatūra | -40 iki +70 °C |
| Išėjimo galia | 150W maks |
| Pakuotės matmenys | 5.43 x 3.9 x 1.65 colio |
| Prekės svoris | 9.9 uncijos |
| Prekės modelio numeris | EP-SK0019 |
| Gamintojas | EDUP |
| Kilmės šalis | Kinija |
| Techninės įrangos sąsaja | Ethernet |
| Spalva | Pilka |
| Suderinami įrenginiai | Laptop, Desktop (with Starlink Standard Device) |
| Duomenų nuorodos protokolas | Ethernet |
| Duomenų perdavimo sparta | 1000 megabitų per sekundę |

Image 4.2: Detailed technical parameters of the EDUP Starlink PoE Injector.
5. Suderinamumas
This EDUP PoE Injector is specifically designed for use with the Standard Starlink Device (Gen 3). It is not compatible with other Starlink terminal models such as Standard Actuated, High Performance, or Flat High Performance.

Image 5.1: Visual guide to compatible and incompatible Starlink terminal models.
6. Sąrankos vadovas
Follow these steps to set up your EDUP Starlink PoE Injector:
- Prijunkite maršrutizatorių: Connect your Gigabit router or PC to the LAN port of the EDUP PoE Injector using a standard Ethernet cable.
- Connect the Starlink Dish: Connect the original Starlink cable from your Starlink Standard Device (Gen 3) to the POE port on the EDUP PoE Injector.
- Prijunkite maitinimą: Connect your DC 9-36V power supply to the power input terminals (+ and -) on the EDUP PoE Injector. Ensure correct polarity. The indicator light will turn on once power is supplied.
- Patikrinkite ryšį: Once all connections are made and power is supplied, the Starlink device should begin operating, providing internet access through your connected router or PC.

Image 6.1: Connection diagram for the EDUP Starlink PoE Injector.
Demonstracinio vaizdo įrašo sąranka
Video 6.1: An official video demonstrating the setup process and functionality of the EDUP 2-in-1 Starlink Gen 3 GigE PoE Injector 150W.
ATSARGIAI: Utilizing incorrect cables or PoE injectors may result in irreversible damage to equipment. Always ensure correct wiring and compatibility.
7. Naudojimo instrukcijos
Once properly installed and powered, the EDUP Starlink PoE Injector operates automatically to provide power and data connectivity to your Starlink Standard Device. It is designed for continuous operation in various environments.
Typical Usage Scenarios:

Image 7.1: Ideal for RV installations, providing efficient power and network for mobile Starlink setups.
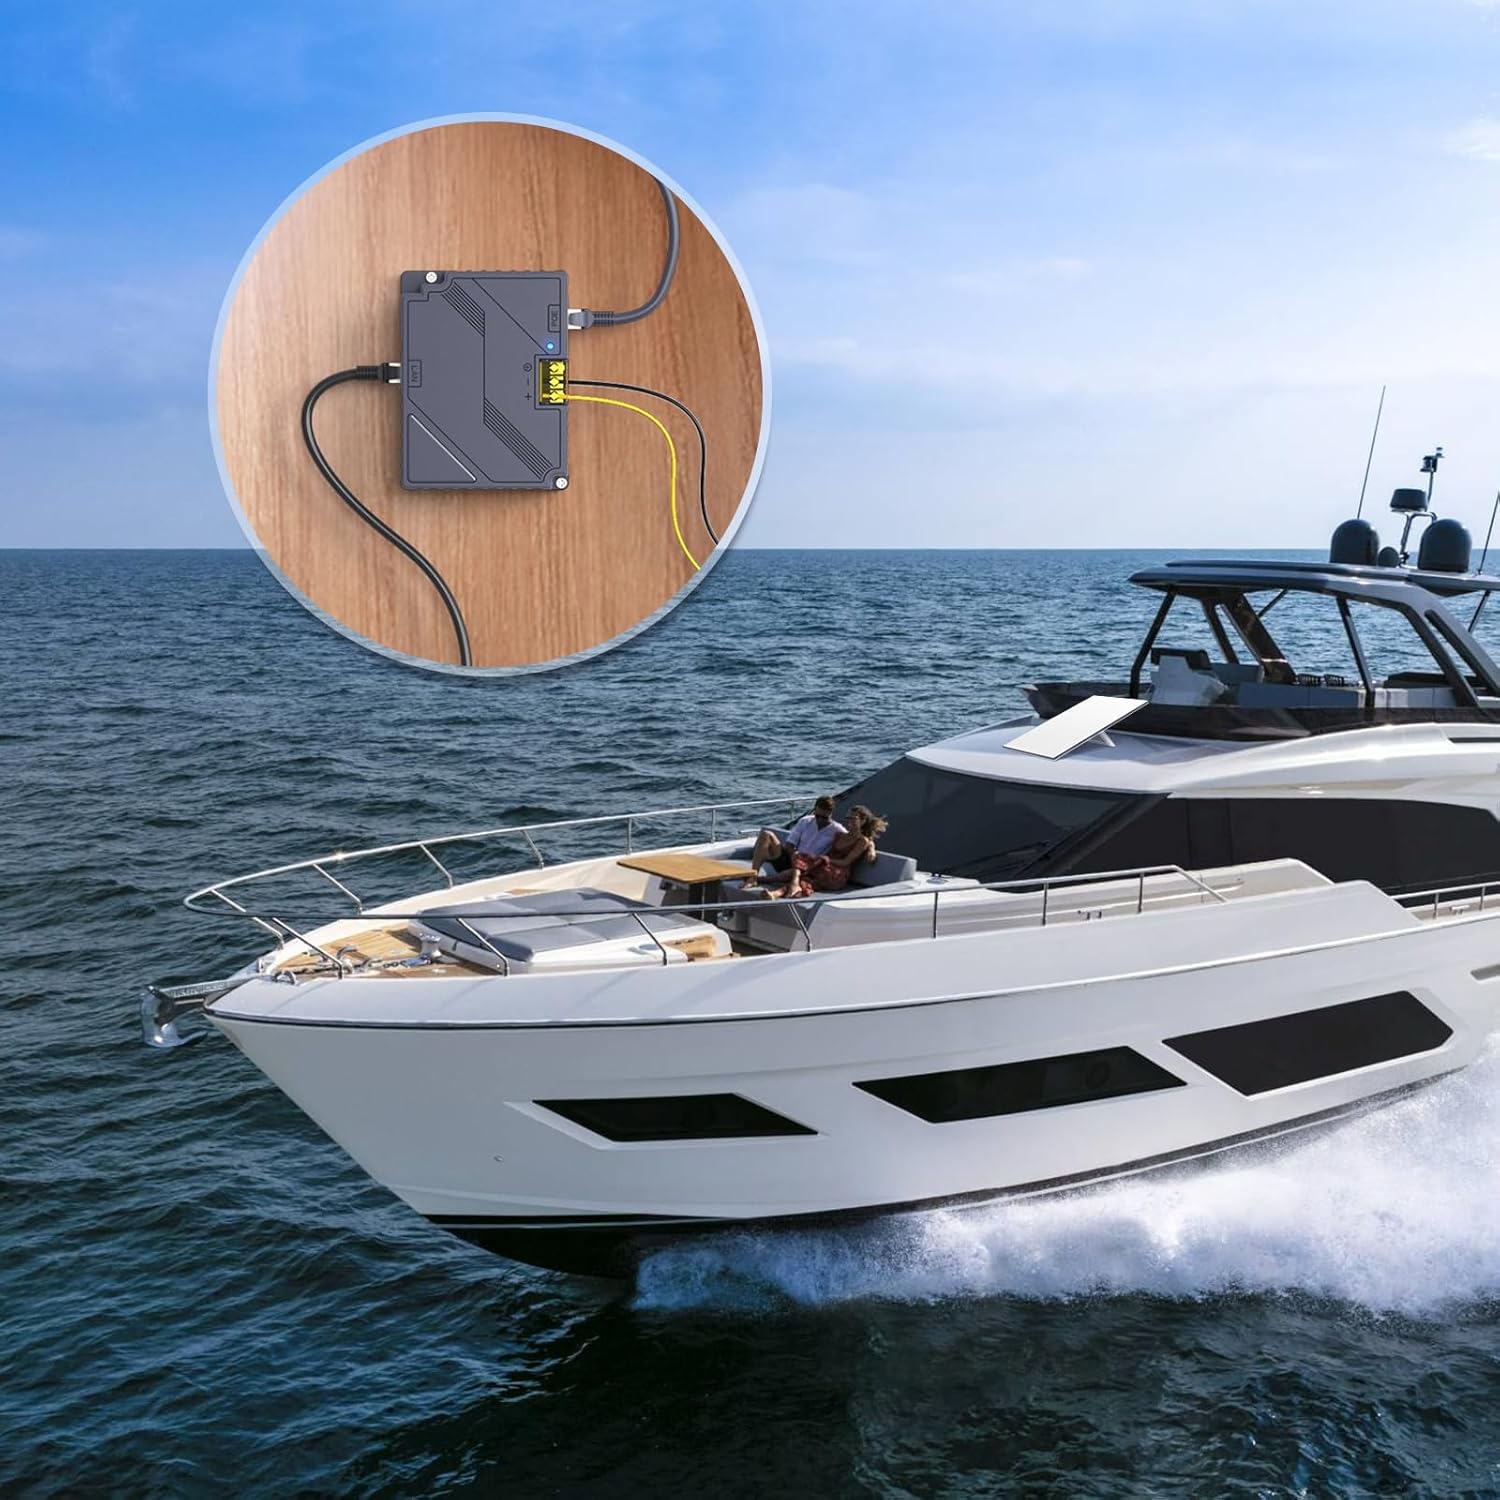
Image 7.2: Suitable for marine applications, enabling Starlink connectivity on boats and yachts.

Image 7.3: Perfect for remote outdoor settings, providing reliable internet where power access is limited.
The device is designed to operate within a wide DC input range (9-36V), making it versatile for various power sources commonly found in mobile or off-grid environments. The integrated indicator light provides a quick visual confirmation of power status.
8. Priežiūra
The EDUP Starlink PoE Injector is designed for minimal maintenance. Follow these guidelines to ensure optimal performance and longevity:
- Valymas: Įrenginį laikykite švarų ir be dulkių. Valymui naudokite minkštą, sausą šluostę. Nenaudokite skystų valiklių ar aerozolių.
- Vėdinimas: Ensure adequate ventilation around the device to prevent overheating. Do not block the ventilation slots.
- Kabelių jungtys: Periodiškai patikrinkite visas kabelių jungtis, kad įsitikintumėte, jog jos yra tvirtos ir nepažeistos.
- Aplinkos sąlygos: Operate the device within the specified operating temperature and humidity ranges (-20 ~ +55 °C, 10% - 90% non-condensing) to prevent damage.
9. Problemų sprendimas
If you encounter issues with your EDUP Starlink PoE Injector, refer to the following common problems and solutions:
| Problema | Galima priežastis / sprendimas |
|---|---|
| Nėra maitinimo indikatoriaus lemputės |
|
| Starlink Dish Not Receiving Power/Data |
|
| No Internet Connection via LAN Port |
|
| Device Feels Hot During Operation |
|
If the problem persists after attempting these solutions, please contact EDUP customer support for further assistance.
10. Garantija ir palaikymas
EDUP products are designed and manufactured to the highest quality standards. For information regarding warranty coverage and technical support, please refer to the warranty card included with your product or visit the official EDUP store on Amazon:
Visit the EDUP Store on Amazon
For direct assistance, please have your model number (EP-SK0019) and purchase information ready when contacting support.


