1. Įvadas
This manual provides detailed instructions for the installation, operation, and maintenance of your ASRock B860M Live Mixer WiFi motherboard. Designed for content creators, this motherboard offers robust connectivity and reliable performance for demanding tasks. Please read this manual thoroughly before proceeding with installation or operation.

1 pav.: priekis view of the ASRock B860M Live Mixer WiFi motherboard. This image highlights the CPU socket, RAM slots, and various heatsinks.
2. Pagrindinės savybės
The ASRock B860M Live Mixer WiFi motherboard is equipped with advanced features to support high-performance computing and content creation:
- Power Phase Design: Features a 10+1+1+1+1 power phase design with Dr.MOS for VCore+GT+SA, ensuring stable power delivery to the CPU.
- DDR5 atminties palaikymas: Supports 4 x DDR5 DIMMs in dual channel configuration, with speeds up to 8666+ (OC) MHz.
- Grafikos išvestis: Multiple display options including 1 HDMI, 1 DisplayPort, and 1 Thunderbolt 4 Type-C port.
- Garso kokybė: Integrated Realtek ALC1220 7.1 CH HD Audio Codec with Nahimic Audio for immersive sound.
- Enhanced Capacitors: Utilizes exclusive 20K Capacitors with 1000uF capacitance for improved durability and stability.
- Didelės spartos ryšys: Includes WiFi 6E and 2.5G LAN for fast and reliable network connections.
1 vaizdo įrašas: Viršview of ASRock Intel B860 Series Motherboards. This video highlights key features and design aspects of the B860 motherboard series, including power delivery and connectivity options.
3. Sąranka ir diegimas
Norėdami tinkamai įdiegti pagrindinę plokštę ir jos komponentus, atlikite šiuos veiksmus.
3.1 Išpakavimas ir patikrinimas
Atsargiai išimkite pagrindinę plokštę ir visus priedus iš pakuotės. Patikrinkite, ar nėra matomų pažeidimų.
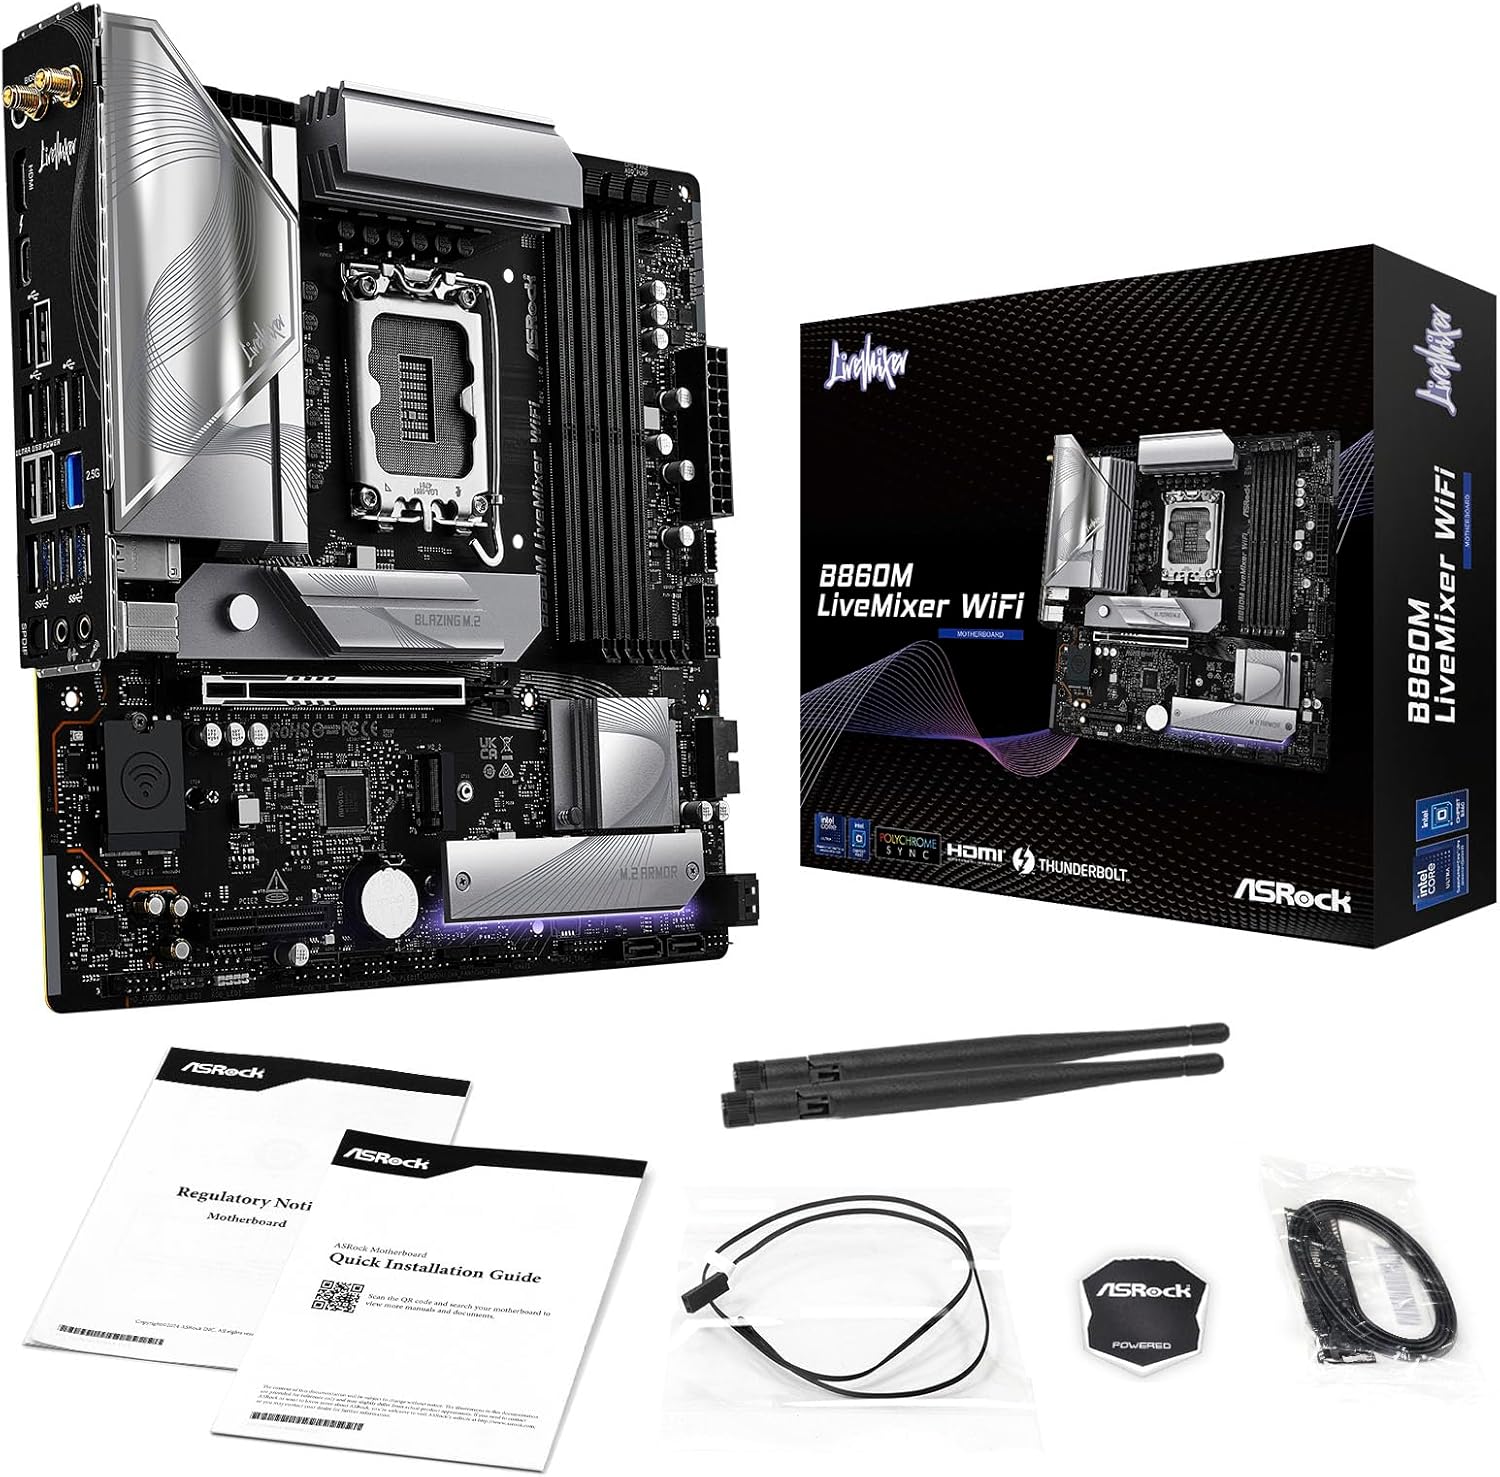
Figure 2: Contents of the ASRock B860M Live Mixer WiFi motherboard package. This image displays the motherboard, documentation, Wi-Fi antennas, and other accessories included.
3.2 CPU diegimas (LGA1851)
- Raskite LGA1851 procesoriaus lizdą pagrindinėje plokštėje.
- Atidarykite procesoriaus lizdo svirtį ir nuimkite apsauginį dangtelį.
- Align your Intel Core Ultra processor with the socket, ensuring the notches on the CPU match the keys on the socket. Gently place the CPU into the socket without forcing it.
- Uždarykite procesoriaus lizdo svirtį, kad pritvirtintumėte procesorių.
3.3 Atminties (DDR5) diegimas
- Raskite keturis DDR5 DIMM lizdus.
- Atidarykite spaustukus abiejuose DIMM lizdo galuose.
- Sulygiuokite atminties modulį su lizdu, užtikrindami, kad modulio įpjova sutaptų su lizdo rakteliu.
- Tvirtai spauskite abu atminties modulio galus, kol spaustukai užsifiksuos vietoje.
3.4 Saugyklos įrengimas (M.2 ir SATA)
The motherboard supports multiple M.2 slots and SATA3 6.0 Gb/s ports.
- M.2 SSD: Locate the M.2 slots (e.g., Blazing M.2, M.2 Armor). Insert the M.2 SSD into the slot at an angle, then push it down and secure it with the provided screw or tool-less mechanism.
- SATA diskai: Connect SATA data cables from your storage drives (HDDs/SSDs) to the SATA3 6.0 Gb/s ports on the motherboard. Connect power cables from your power supply to the drives.

3 pav.: Kampinis view of the ASRock B860M Live Mixer WiFi motherboard, highlighting the M.2 slots and their heatsinks for high-speed storage.
3.5 Expansion Cards (PCIe 5.0)
Insert your graphics card or other PCIe expansion cards into the appropriate PCIe 5.0 slot. Ensure it is seated firmly and secured with a screw to your chassis.
3.6 Maitinimo jungtys
Prijunkite 24 kontaktų ATX maitinimo jungtį ir 8 kontaktų (arba 4+4 kontaktų) procesoriaus maitinimo jungtį iš maitinimo šaltinio prie atitinkamų pagrindinės plokštės prievadų.
3.7 Galinės įvesties/išvesties jungtys
Connect your peripherals to the rear I/O panel. This includes USB devices, display cables (HDMI, DisplayPort, Thunderbolt 4 Type-C), Ethernet cable, and audio devices.

4 pav. Išsamus view of the rear I/O panel on the ASRock B860M Live Mixer WiFi motherboard, showing various USB ports, display outputs, Ethernet, and audio jacks.
Video 2: Demonstrates the ultimate connectivity features for creators on ASRock motherboards, including Thunderbolt and high-speed networking.
4. Naudojimo instrukcijos
After successful installation, power on your system. The motherboard will perform a Power-On Self-Test (POST). You can access the BIOS/UEFI setup utility by pressing the Ištrinti or F2 key during POST.
4.1 BIOS / UEFI sąranka
BIOS / UEFI sąsaja leidžia konfigūruoti sistemos nustatymus, įskaitant paleidimo tvarką, atminties nustatymus ir kt.files (XMP), fan speeds, and overclocking options. Refer to the on-screen instructions within the BIOS for navigation and adjustments.
4.2 BIOS Update Procedure
Updating your BIOS can improve system stability, compatibility, and performance. ASRock provides tools like USB BIOS Flashback and Instant Flash for this purpose.
Video 3: A detailed tutorial on how to update the motherboard BIOS using ASRock's USB BIOS Flashback and Instant Flash methods. This is crucial for maintaining system compatibility and performance.
For detailed steps on using USB BIOS Flashback or Instant Flash, please refer to the video tutorial above or the dedicated section in the full user manual available on the ASRock support websvetainę.
5. Priežiūra
Reguliarus pagrindinės plokštės aptarnavimas užtikrina jos ilgaamžiškumą ir optimalų veikimą.
- Dulkių šalinimas: Periodically clean dust from inside your PC case, especially from heatsinks and fans, using compressed air.
- BIOS atnaujinimai: Keep your BIOS updated to the latest version to ensure compatibility with new hardware and software, and to benefit from performance improvements and bug fixes.
- Tvarkyklės atnaujinimai: Install the latest drivers for your motherboard chipset, audio, network, and other components from the ASRock websvetainę.
- Kabelių valdymas: Ensure proper cable management to maintain good airflow within the case, preventing overheating.
6. Problemų sprendimas
Jei kyla problemų, apsvarstykite šiuos įprastus trikčių šalinimo veiksmus:
- Nėra galios: Check all power connections (24-pin ATX, 8-pin CPU, GPU power). Ensure your power supply is switched on.
- Nėra ekrano: Verify that your monitor is connected to the correct graphics output port (motherboard or discrete GPU). Reseat your graphics card and RAM modules.
- Sistemos nestabilumas / gedimai: Check RAM seating and try running with one stick of RAM at a time. Ensure CPU cooler is properly installed. Update BIOS and drivers.
- Įkrovos problemos: Check boot order in BIOS/UEFI. Ensure your storage drive is detected.
- Periferinis įrenginys neaptiktas: Try different USB ports. Install necessary drivers for the peripheral.
For more advanced troubleshooting, consult the full user manual or ASRock's online support resources.
7. Specifikacijos
| Funkcija | Detalė |
|---|---|
| Prekės ženklas | ASRock |
| Modelio pavadinimas | B860M LIVEMIXER WIFI |
| CPU lizdas | LGA 1851 |
| Suderinami procesoriai | Intel Core Ultra |
| Lustų rinkinio tipas | Intel B860 |
| RAM atminties technologija | DDR5 |
| Atminties laikrodžio greitis | 8666 MHz (nuolatinis dažnis) |
| Atminties talpa | Iki 256 GB |
| Grafikos išvesties parinktys | 1 HDMI, 1 DisplayPort, 1 Thunderbolt 4 Type-C |
| Garso kodekas | „Realtek ALC1220“ 7.1 kanalo HD garso kodekas, „Nahimic Audio“ |
| LAN | 2.5 G LAN |
| Belaidis ryšys | WiFi 6E |
| Power Phase | 10+1+1+1+1 maitinimo fazė, Dr.MOS, skirta VCore+GT+SA |
| Kondensatoriai | Exclusive 20K Cap with 1000uF Capacitance |
| Formos faktorius | Mikro ATX |
| Pakuotės matmenys | 11.73 x 10.51 x 2.4 colio |
| Prekės svoris | 3.25 svaro |
8. Garantija ir palaikymas
Dėl garantijos informacijos, techninės pagalbos ir tvarkyklių atsisiuntimų apsilankykite oficialioje ASRock svetainėje. websvetainė:
You can also find additional support and FAQs on the ASRock store page: ASRock America parduotuvė
Protection plans are available for purchase separately to extend coverage for your product.


