1. Produktas baigtasview
The Mastech MS850D is a 6000-count True RMS auto-ranging digital multimeter designed for precise electrical measurements. It is suitable for professionals, technicians, and enthusiasts, offering a wide range of functions for various electrical applications.

1 pav.: priekis view of the Mastech MS850D Digital Multimeter, displaying a measurement of 198.7 mV.
Pagrindinės funkcijos:
- 6000 Counts Auto Ranging: Provides precise measurements across various ranges automatically.
- Tikrasis RMS: Ensures accurate readings for non-sinusoidal AC waveforms.
- Išsamios matavimo galimybės: Priemonės AC/DC Voltage, kintamoji/nuolatinė srovė, varža, talpa, dažnis ir temperatūra.
- Saugos sertifikatas: CAT III 600V rating for safe use in electrical testing environments.
- Patogios vartotojui funkcijos: Includes Buzzer/Continuity, Diode Test, Transistor Test (optional), MAX/MIN, REL, Non-Contact Voltage (NCV) Detection, Live Wire Recognition, Data Hold, Flashlight, and Auto Power Off.
- Kompaktiškas dizainas: Ergonomic dimensions (150mm x 75mm x 47mm) and lightweight (284g) for easy handling.
2. Pakuotės turinys
Patikrinkite, ar pakuotėje yra visi toliau išvardyti daiktai:
- 1 x Mastech MS850D-6000 Counts True RMS Auto Ranging Digital Multimeter
- 1 x Temperature probe
- 1 x Pair of Test leads
- 2 x Batteries (AAA type, 1.5V)
- 1 x Vartotojo vadovas
3. Saugos informacija
ĮSPĖJIMAS: To avoid electric shock or personal injury, read all safety information before using this product. Use the multimeter only as specified in this manual; otherwise, the protection provided by the multimeter may be impaired.
- Prieš naudodami multimetrą, visada įsitikinkite, kad jis yra geros darbinės būklės.
- Netepkite daugiau nei vardinis tūristage, as marked on the multimeter, between the terminals or between any terminal and earth ground. The MS850D is rated for CAT III 600V.
- Būkite atsargūs dirbdami su voltagesant didesnei nei 30 V AC RMS, 42 V pikinei vertei arba 60 V DC įtampai. Šie įtampų lygiaitagtai kelia šoko pavojų.
- Do not use the multimeter if the test leads are damaged or if the meter appears damaged.
- Ensure the rotary switch is in the correct position for the measurement you intend to make.
- Niekada nejunkite bandymo laidų prie tūriotage source when the rotary switch is set to current, resistance, or continuity mode.
- Replace the battery and fuses only with the specified type and rating.
- Nenaudokite multimetro sprogiose dujų, garų ar dulkėtose aplinkose.
- Matavimo metu laikykite pirštus už bandymo zondų apsaugų.
4. Sąranka
4.1 Akumuliatoriaus įdėjimas
The MS850D multimeter requires two 1.5V AAA batteries for operation. To install or replace batteries:
- Įsitikinkite, kad multimetras yra išjungtas, ir atjunkite visus bandymo laidus.
- Raskite baterijų skyriaus dangtelį multimetro gale.
- Atsuktuvu atlaisvinkite varžtą, tvirtinantį akumuliatoriaus dangtelį.
- Remove the cover and insert the two AAA batteries, observing the correct polarity (+ and -).
- Uždėkite akumuliatoriaus dangtelį ir priveržkite varžtą.
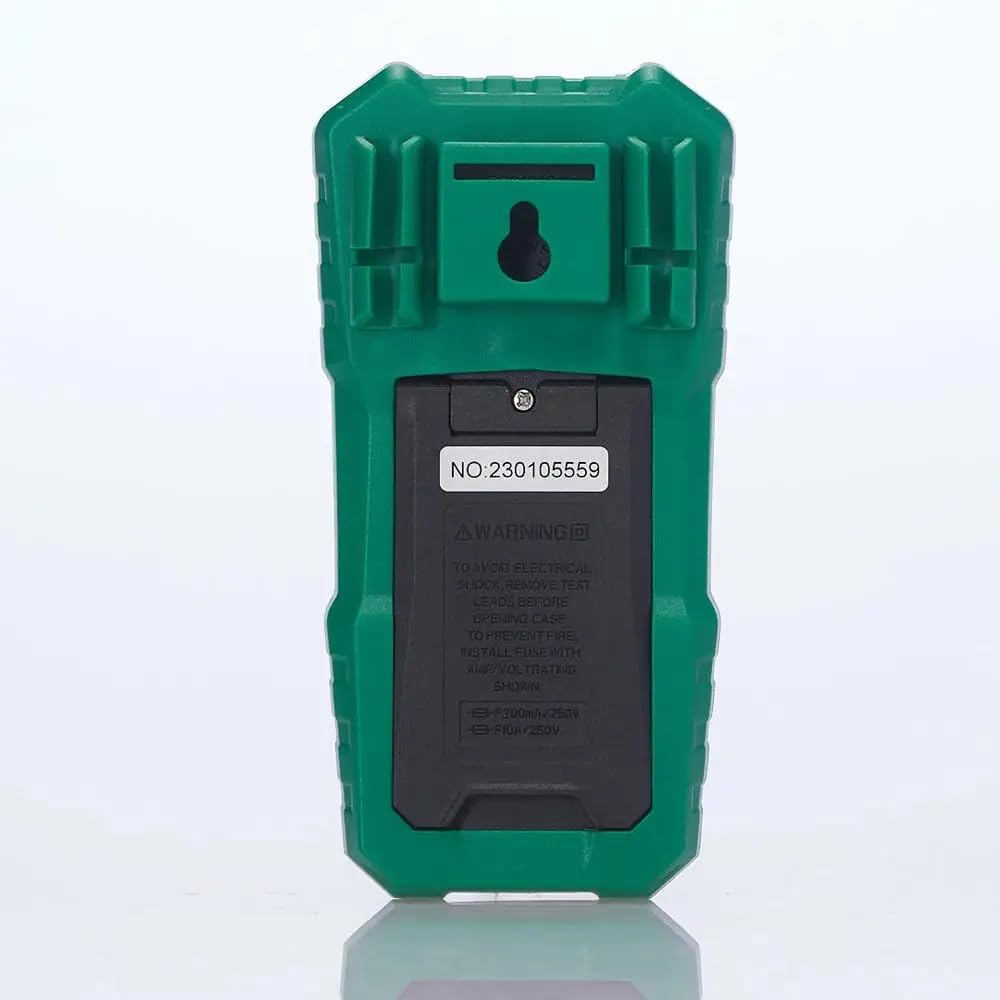
2 pav.: galinis view of the multimeter, illustrating the battery compartment and safety warnings.
4.2 Bandymo laidų prijungimas
Proper connection of test leads is essential for accurate and safe measurements.
- Įkiškite juodą bandymo laidą į COM (Bendra) įvesties lizdas.
- Daugumai tūriųtage, resistance, continuity, capacitance, frequency, and temperature measurements, insert the red test lead into the VΩmA įvesties lizdas.
- Srovei iki 600 mA matuoti įkiškite raudoną bandymo laidą į VΩmA įvesties lizdas.
- For current measurements between 600mA and 10A, insert the red test lead into the 10A MAX įvesties lizdas.

3 pav.: Kampinis view of the multimeter, highlighting the input jacks for test leads.
5. Naudojimo instrukcijos
This section details how to use the Mastech MS850D for various measurements.
5.1 Įjungimas / išjungimas
Rotate the central dial from the "OFF" position to any desired measurement function to power on the multimeter. To power off, rotate the dial back to the "OFF" position.
5.2 Rotary Switch Functions
The rotary switch selects the primary measurement function:
- V~ (AC Voltage): Measures alternating current voltage.
- V- (DC Voltage): Measures direct current voltage.
- Hz/% (Frequency/Duty Cycle): Matuoja dažnį ir darbo ciklą.
- Ω (Resistance): Matuoja elektrinę varžą.
- Continuity/Diode: Checks for circuit continuity and tests diodes.
- NCV/Live: Nekontaktinis ttage detection and Live Wire recognition.
- °C/°F (Temperature): Measures temperature using the included probe.
- hFE (Transistor Test): Measures transistor gain (requires optional socket).
- μA~ / μA- (AC/DC Microamperes): Measures microampar dabartinis.
- mA~ / mA- (AC/DC Milliamperes): Measures milliampar dabartinis.
- A~ / A- (AC/DC Amperes): Priemonės ampere current (up to 10A).
5.3 Mygtukų funkcijos
- SEL (Pasirinkti): Perjungia skirtingas funkcijas vienoje sukamojo jungiklio padėtyje (pvz., AC/DC garsumo reguliavimas).tage, continuity/diode, °C/°F).
- LAIKYTI: Įšaldo dabartinį rodmenį ekrane. Paspauskite dar kartą, kad atleistumėte.
- MIN/MAX/REL:
- Press once to enter MIN/MAX mode. The multimeter will record the minimum and maximum values. Press again to cycle between MIN, MAX, and current reading.
- Long press to activate REL (Relative) mode. This subtracts the current reading from all subsequent readings, useful for measuring changes.
- Flashlight Button (often combined with backlight): Activates the built-in flashlight for illuminating the measurement area.
5.4 Specific Measurement Procedures
5.4.1 tomastagMatavimas (AC/DC)
- Sukite jungiklį į padėtį V~ už AC ttage arba V- už DC ttage. Use the SEL button to switch between AC and DC if the position combines them.
- Prijunkite juodą bandymo laidą prie COM lizdą ir raudoną bandymo laidą prie VΩmA domkratas.
- Prijunkite bandymo zondus lygiagrečiai per išmatuotą grandinę arba komponentą.
- Perskaitykite ttage reikšmė ekrane.
5.4.2 Srovės matavimas (AC/DC)
ATSARGIAI: Niekada nejunkite multimetro lygiagrečiai su įtampos matuokliutage source when measuring current. Always connect in series with the load.
- Determine if the current is AC or DC.
- Set the rotary switch to the appropriate current range (μA, mA, or A). Use the SEL button to switch between AC and DC.
- Prijunkite juodą bandymo laidą prie COM domkratas.
- For currents up to 600mA, connect the red test lead to the VΩmA jack. For currents up to 10A, connect the red test lead to the 10A MAX domkratas.
- Open the circuit where the current is to be measured and connect the multimeter in series.
- Nuskaitykite dabartinę vertę ekrane.
5.4.3 Atsparumo matavimas
- Pasukite sukamąjį jungiklį į padėtį Ω padėtis.
- Prijunkite juodą bandymo laidą prie COM lizdą ir raudoną bandymo laidą prie VΩmA domkratas.
- Prieš matuodami varžą, įsitikinkite, kad grandinė arba komponentas yra atjungtas nuo įtampos.
- Prijunkite bandymo zondus prie komponento.
- Perskaitykite pasipriešinimo vertę ekrane.
5.4.4 Tęstinumo testas
- Pasukite sukamąjį jungiklį į padėtį Continuity/Diode position. Use SEL to select continuity mode (usually indicated by a speaker icon).
- Prijunkite juodą bandymo laidą prie COM lizdą ir raudoną bandymo laidą prie VΩmA domkratas.
- Prijunkite bandymo zondus prie grandinės arba komponento.
- Jei varža yra mažesnė nei maždaug 50 Ω, pasigirs garsinis signalas, rodantis tęstinumą.
5.4.5 Diodų bandymas
- Pasukite sukamąjį jungiklį į padėtį Continuity/Diode position. Use SEL to select diode mode (usually indicated by a diode symbol).
- Prijunkite juodą bandymo laidą prie COM lizdą ir raudoną bandymo laidą prie VΩmA domkratas.
- Prijunkite raudoną zondą prie diodo anodo, o juodą zondą – prie katodo. Ekrane bus rodomas tiesioginis srovės stipris.tage lašas.
- Apkeiskite zondus vietomis. Ekrane turėtų būti rodoma „OL“ (atvira kilpa), tai reiškia, kad diodas veikia gerai.
5.4.6 Talpos matavimas
- Pasukite sukamąjį jungiklį į padėtį Talpa position (often combined with Hz/% or other functions, use SEL to select).
- Prijunkite juodą bandymo laidą prie COM lizdą ir raudoną bandymo laidą prie VΩmA domkratas.
- Prieš matavimą įsitikinkite, kad kondensatorius yra visiškai išsikrovęs, kad nepažeistumėte multimetro.
- Prijunkite bandymo zondus prie kondensatoriaus gnybtų.
- Ekrane perskaitykite talpos vertę.
5.4.7 Dažnio matavimas
- Pasukite sukamąjį jungiklį į padėtį Hz/% position. Use SEL to select frequency mode.
- Prijunkite juodą bandymo laidą prie COM lizdą ir raudoną bandymo laidą prie VΩmA domkratas.
- Prijunkite bandymo zondus prie signalo šaltinio.
- Nuskaitykite dažnio reikšmę ekrane.
5.4.8 Temperatūros matavimas
- Pasukite sukamąjį jungiklį į padėtį ° C / ° F position. Use SEL to switch between Celsius and Fahrenheit.
- Prijunkite temperatūros zondą prie COM ir VΩmA jacks, observing polarity if specified by the probe.
- Temperatūros zondo galiuką uždėkite ant objekto, kurio temperatūrą norite matuoti, arba šalia jo.
- Nuskaitykite temperatūros vertę ekrane.
5.4.9 Nekontaktinis ttage (NCV) aptikimas
- Pasukite sukamąjį jungiklį į padėtį NCV/tiesiogiai padėtis.
- Move the top front part of the multimeter close to the conductor or outlet.
- The multimeter will emit an audible beep and the NCV indicator light will flash if AC voltage is detected, with the frequency of beeps and flashes increasing su tūriutage stiprybė.
6. Priežiūra
Tinkama priežiūra užtikrina jūsų multimetro ilgaamžiškumą ir tikslumą.
6.1 Valymas
- Nuvalykite dėklą su skelbimuamp audiniu ir švelniu plovikliu. Nenaudokite abrazyvinių ar tirpiklių.
- Saugokite įvesties gnybtus nuo purvo ir drėgmės.
6.2 Akumuliatoriaus keitimas
Refer to Section 4.1 for detailed instructions on battery replacement. Replace batteries when the low battery indicator appears on the display.
6.3 Saugiklio keitimas
If the current measurement function fails, the fuse may need replacement. The MS850D uses two fuses:
- F1: F300mA/250V (for mA/μA range)
- F2: F10A/250V (for 10A range)
To replace fuses:
- Įsitikinkite, kad multimetras yra išjungtas, ir atjunkite visus bandymo laidus.
- Atidarykite baterijų skyriaus dangtelį (žr. 4.1 skyrių).
- Carefully remove the old fuse(s) and replace with new fuses of the exact same type and rating.
- Uždėkite akumuliatoriaus dangtelį ir priveržkite varžtą.
7. Problemų sprendimas
If you encounter issues with your Mastech MS850D, refer to the following common problems and solutions:
| Problema | Galima priežastis | Sprendimas |
|---|---|---|
| Nėra ekrano arba ekranas yra pritemdytas | Išsikrovusios arba išsikrovusios baterijos | Pakeiskite baterijas (žr. 4.1 skyrių). |
| Neteisingi rodmenys | Incorrect function selected; Loose test leads; Damaged test leads; Out of range measurement | Verify rotary switch position; Ensure test leads are securely connected; Inspect test leads for damage; Check if the measurement is within the multimeter's specified range. |
| Srovės matavimas neveikia | Perdegęs saugiklis | Replace the appropriate fuse (refer to Section 6.3). |
| Rodoma „OL“ (perkrova) | Measurement exceeds the selected range or multimeter's maximum capacity | Select a higher range if available, or confirm the measurement is within the multimeter's limits. |
8. Specifikacijos
Detailed technical specifications for the Mastech MS850D Digital Multimeter:

Figure 4: Detailed specifications and packaging information for the Mastech MS850D.
| Matavimas | Diapazonas | Tikslumas |
|---|---|---|
| DC ttage | 600 mV, 6 V, 60 V, 600 V | ± (0.8 %+5) |
| AC ttage | 600 mV, 6 V, 60 V, 600 V | ± (1.0 %+10) |
| DC srovė | 600μA, 6000μA, 60mA, 600mA, 6A, 10A | ±(2.0%+5) (μA/mA), ±(3.0%+5) (A) |
| Kintamosios srovės srovė | 600 mA, 6 A, 10 A | ±(2.5 %+5) (mA), ±(3.0 %+5) (A) |
| Atsparumas | 600 Ω, 6 60 KΩ, 600 KΩ, 6 KΩ, 60 XNUMX MΩ, XNUMX MΩ | ±(1.0%+5) (600Ω-6MΩ), ±(1.2%+5) (60MΩ) |
| Talpa | 60nF, 600nF, 6μF, 60μF, 600μF, 6mF, 60mF, 100mF | ±(4.0%+25) (60nF-600μF), ±(5.0%+25) (6mF-100mF) |
| Dažnis | 10Hz, 100Hz, 1KHz, 10KHz, 100KHz, 1MHz, 10MHz | ± (0.5 %+4) |
| Temperatūra | -20°C to 0°C, 0°C to 400°C, 400°C to 1000°C | ±(4°C), ±(3.0%+3), ±(2.0%+3) |
| Ekranas | 6000 Skaičių | |
| Saugos įvertinimas | CAT III 600V | |
| Maitinimo šaltinis | 2 x 1.5 V AAA baterijos | |
| Matmenys (I x P x A) | 150 mm x 75 mm x 47 mm (apytiksliai) | |
| Svoris | 284 g (apytiksliai) | |
9. Garantija ir palaikymas
The Mastech MS850D Digital Multimeter is manufactured by Mastech and imported by REES52. For warranty information, technical support, or service inquiries, please refer to the warranty card included with your product or contact the seller/manufacturer directly.
Išsaugokite pirkimo įrodymą, kad galėtumėte kreiptis dėl garantijos.
- Gamintojas: mastech
- Importuotojas: REES52
- Modelio numeris: MS850D


