1. Įvadas
This manual provides detailed instructions for the installation, operation, and maintenance of the RAB Lighting B17 LED Bollard Light. This outdoor luminaire features field-adjustable wattage and selectable color temperature (CCT), designed for various outdoor applications.
Pagrindinės funkcijos:
- Energy-efficient LED with a 50,000-hour lifespan.
- Reguliuojama vatatage: 24W, 19W, or 14W.
- Selectable CCT: 3000K (Warm White), 4000K (Neutral White), or 5000K (Cool White).
- 0-10V dimming capability.
- UL įtrauktas į drėgnų vietų sąrašą.
- Durable metal construction with a glass shade.
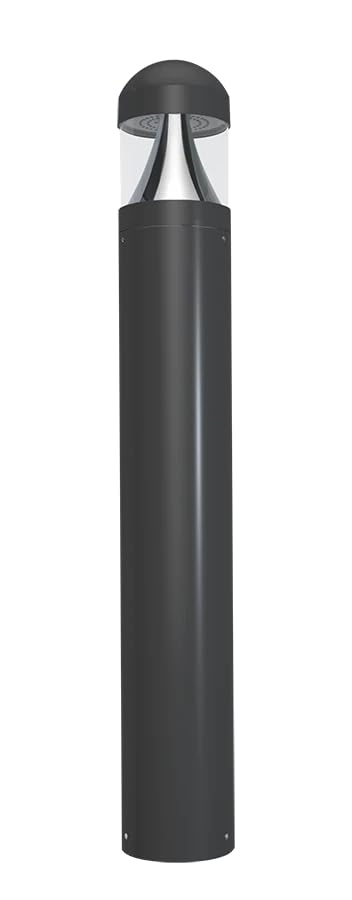
Figure 1: RAB Lighting B17 LED Bollard Light (Model B17D shown).
2. Saugos informacija
ĮSPĖJIMAS: Risk of electric shock. Disconnect power before installation or servicing. Installation should be performed by a qualified electrician in accordance with all applicable national and local electrical codes.
- Užtikrinkite tiekimo tūrįtage is correct for the fixture.
- Do not handle live components.
- Dėvėkite tinkamas asmenines apsaugos priemones (AAP).
- This fixture is suitable for wet locations. Ensure all connections are properly sealed to prevent water ingress.
- Nekeiskite įrenginio. Bet kokie pakeitimai gali panaikinti garantiją ir sukelti pavojų saugai.
3. Pakuotės turinys
Prieš pradėdami diegti, patikrinkite, ar yra visi komponentai:
- B17 LED Bollard Light Fixture
- On-Off Switch (Included Components)
- Installation Hardware (e.g., mounting bolts, gaskets) - (Assumed, not explicitly listed but typical for such products)
- Instrukcijų vadovas (šis dokumentas)
4. Sąranka ir diegimas
Follow these steps for proper installation of the B17 LED Bollard Light:
- Paruoškite diegimo vietą: Ensure the mounting surface is stable and level. Run electrical conduit and wiring to the desired location according to local codes.
- Atjunkite maitinimą: Prieš pradėdami bet kokius elektros darbus, išjunkite maitinimą grandinės pertraukikliu.
- Mount the Bollard: Secure the bollard base to the mounting surface using appropriate hardware. Ensure a watertight seal if required by local codes.
- Padarykite elektros jungtis: Connect the fixture's wires to the supply wires. Follow standard wiring practices:
- Black to Line (L)
- Balta iki neutralios (N)
- Green/Ground to Ground (G)
- Purple to Dimming (+) (for 0-10V dimming)
- Gray to Dimming (-) (for 0-10V dimming)
- Pasirinkite Wattage ir CCT: Before closing the fixture, adjust the wattage and CCT switches located inside the fixture head. Refer to Section 5 for details.
- Secure the Fixture Head: Attach the fixture head to the bollard body, ensuring all seals are properly seated to maintain the wet location rating.
- Atkurti maitinimą: Turn on power at the circuit breaker and test the light.

Figure 2: The B17 Bollard Light is UL Listed and rated for wet locations, ensuring durability in outdoor environments.
5. Naudojimo instrukcijos
5.1. Field-Adjustable Wattage
The B17 bollard light allows you to select the desired wattage output to optimize brightness and energy consumption. A switch located inside the fixture head enables selection between 24W, 19W, and 14W.
- 24 W: Maksimalus ryškumas.
- 19 W: Medium brightness, reduced energy use.
- 14 W: Lower brightness, maximum energy savings.
Norėdami sureguliuoti: Disconnect power. Open the fixture head. Locate the wattage selection switch and move it to the desired setting. Close the fixture head and restore power.
5.2. Pasirenkama spalvos temperatūra (CCT)
The fixture offers three color temperature options to suit different aesthetic preferences and applications. A separate switch inside the fixture head allows selection between 3000K, 4000K, and 5000K.
- 3000K: Warm White, ideal for creating a cozy and inviting atmosphere.
- 4000K: Neutral White, suitable for general illumination and task lighting.
- 5000K: Cool White, provides bright, crisp light, often used for security or modern aesthetics.
Norėdami sureguliuoti: Disconnect power. Open the fixture head. Locate the CCT selection switch and move it to the desired setting. Close the fixture head and restore power.

Figure 3: Visual representation of adjustable wattage and selectable CCT settings.
5.3. 0-10V Dimming
The B17 bollard light is compatible with 0-10V dimming systems. Connect the purple and gray dimming wires to a compatible 0-10V dimmer control. This allows for smooth adjustment of light output from 100% down to 10% (or lower, depending on dimmer specifications).
Ensure the dimmer is rated for LED loads and is compatible with 0-10V dimming protocols.
6. Priežiūra
The B17 LED Bollard Light is designed for minimal maintenance due to its long LED lifespan of 50,000 hours.
- Valymas: Periodiškai valykite įrenginio išorę minkšta, d šluosteamp cloth to remove dirt and debris. Do not use abrasive cleaners or solvents. Ensure power is off before cleaning.
- Patikra: Annually inspect the fixture for any signs of damage, loose connections, or wear. Ensure all seals remain intact to maintain weather resistance.
- LED pakeitimas: LEDs are integrated and not user-replaceable. The long lifespan minimizes the need for replacement.

Figure 4: The B17 LED Bollard Light offers a long 50,000-hour operational lifespan.
7. Problemų sprendimas
| Problema | Galima priežastis | Sprendimas |
|---|---|---|
| Šviesa neįsijungia. | Nėra maitinimo. Atsipalaidavusi laidų jungtis. Neteisinga vatatage/CCT setting. | Check circuit breaker. Ensure power is on. Patikrinkite, ar visi laidai yra tvirtai sujungti (pirmiausia išjunkite maitinimą). Patvirtinkite, kątage/CCT switches are set correctly. |
| Šviesa netikėtai mirksi arba pritemsta. | Nesuderinama pritemdymo sistema. Loose dimming wire connection. ttage svyravimai. | Ensure 0-10V dimmer is compatible with LED loads. Check purple and gray dimming wire connections. Norėdami patikrinti elektros tiekimo stabilumą, pasitarkite su elektriku. |
| Šviesos srautas per mažas/per didelis. | Neteisinga vatatage nustatymas. | Sureguliuokite vatątage selection switch inside the fixture head (power off first). |
| Light color is not desired. | Neteisingas CCT nustatymas. | Adjust the CCT selection switch inside the fixture head (power off first). |
8. Specifikacijos
| Funkcija | Detalė |
|---|---|
| Modelio pavadinimas | B17 |
| Prekės ženklas | RAB apšvietimas |
| Vattage | Field-Adjustable: 24W / 19W / 14W |
| Spalvų temperatūra (CCT) | Selectable: 3000K / 4000K / 5000K |
| Pritemdymas | 0-10V Pritemdomas |
| Gyvenimo trukmė | 50,000 valandos |
| Medžiaga | Metal body, Glass shade |
| Aplinkosaugos įvertinimas | UL sertifikuotas drėgnoms vietoms |
| Įtraukti komponentai | Įjungimo ir išjungimo jungiklis |
| UPC | 192552028424 |
| ASIN | B0DY2FPPNS |
9. Garantija ir palaikymas
For warranty information and technical support, please contact RAB Lighting directly. Refer to the official RAB Lighting webKonkrečias garantijos sąlygas ir kontaktinę informaciją rasite svetainėje arba pirkimo dokumentuose.
RAB Lighting Contact: www.rablighting.com


