1. Produktas baigtasview
The 1Mii RT5066Pro is a wireless audio transmitter and receiver set designed to transmit high-fidelity audio with low latency. This system allows you to wirelessly connect audio sources like TVs, PCs, DVD players, or MP4 players to various audio output devices such as active speakers, subwoofers, soundbars, AV receivers, or amplifiers. It operates on 2.4 GHz technology, ensuring a stable connection and clear sound.
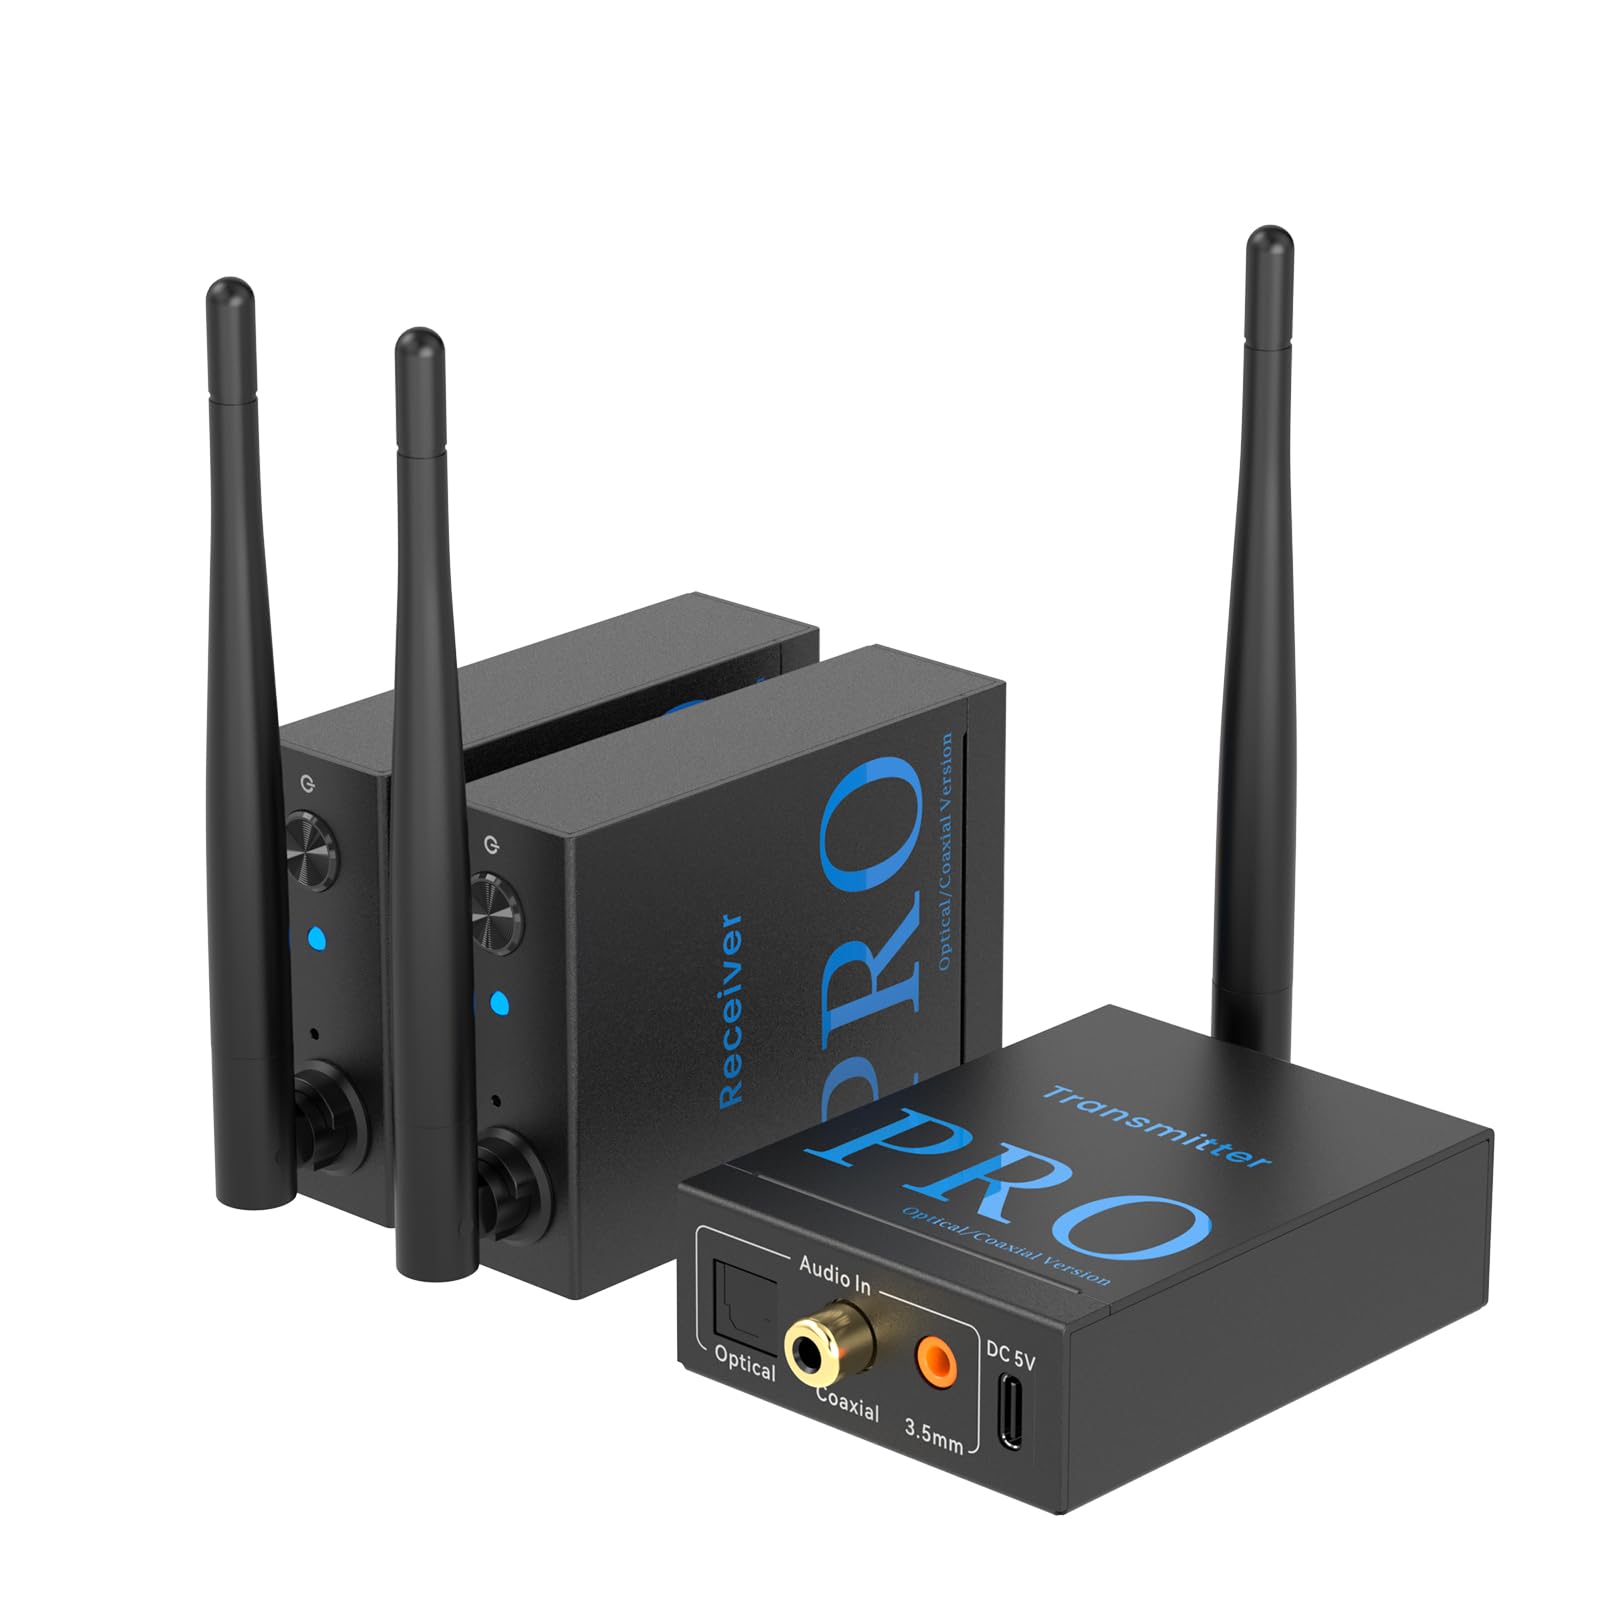
Image: The 1Mii RT5066Pro Wireless Audio Transmitter and Receiver Set, showing one transmitter and two receiver units.
Pagrindinės funkcijos:
- „Plug & Play“ sąranka: Easy and quick connection to various audio devices with automatic pairing.
- Išplėstas belaidžio ryšio diapazonas: Utilizes 2.4 GHz technology with high-gain antennas, offering up to 100 meters (320 feet) outdoors and 30-50 meters indoors. Supports simultaneous reception by two receivers.
- HiFi Audio with Ultra-Low Latency: Ensures clear, stable, noise-free audio transmission with less than 20ms latency, perfectly synchronized with video.
- Wireless Speaker Freedom: Ideal for connecting TVs, PCs, or projectors wirelessly to embedded or garden speakers, eliminating cable clutter.
- Universalus ryšys: Supports Optical, Coaxial, 3.5mm AUX, and RCA inputs/outputs. Compatible with most home sound systems, active speakers, subwoofers, and ampgelbėtojai.
2. Pakuotės turinys
Patikrinkite pakuotę, ar joje yra šie daiktai:
- 1 x 1Mii RT5066Pro Transmitter Unit
- 2 x 1Mii RT5066Pro Receiver Units
- 3 x USB maitinimo adapteriai
- 3 x Optical Audio Cables
- 3 x 3.5 mm garso kabeliai
- 3 x RCA to 3.5mm Cables
- 3 x USB-C Power Cables
- 1 x Vartotojo vadovas

Image: A visual representation of all items included in the 1Mii RT5066Pro package, including the transmitter, two receivers, power adapters, and various audio cables.
3. Sąrankos instrukcijos
3.1 Maitinimo jungtis
To power the devices, connect one end of the USB-C power cable to the DC 5V port on each transmitter and receiver unit. Connect the other end of the USB-C power cable to the provided USB power adapters, and then plug the adapters into a power outlet.

Vaizdas: Stambus planas view demonstrating how to connect the USB-C power cable to the DC 5V port on the transmitter and receiver units, and then to a power source.
Once powered, the transmitter and receiver units will automatically enter pairing mode. The indicators will flash blue and red. Upon successful pairing, both indicators will turn solid blue.
3.2 Connecting the Transmitter to an Audio Source (e.g., TV/PC)
The transmitter unit (labeled "Transmitter") has multiple audio input options. Choose the appropriate cable based on your audio source's output port:
- 3.5 mm AUX jungtis: Connect one end of the 3.5mm audio cable to the "Audio In" 3.5mm port on the transmitter. Connect the other end to the 3.5mm audio output port of your TV or PC.
- Optinė jungtis: Connect one end of the optical audio cable to the "Audio In" Optical port on the transmitter. Connect the other end to the optical audio output port of your TV or PC.
- Koaksialinis ryšys: Connect one end of a coaxial audio cable (not included) to the "Audio In" Coaxial port on the transmitter. Connect the other end to the coaxial audio output port of your TV or PC.
- RCA Connection (via 3.5mm to RCA cable): If your device has RCA audio output, use the included 3.5mm to RCA cable. Connect the 3.5mm end to the "Audio In" 3.5mm port on the transmitter, and the RCA ends to the corresponding red and white RCA audio output ports on your TV or PC.

Image: This diagram illustrates how to connect the transmitter to a TV using optical, coaxial, or 3.5mm/RCA cables, depending on the TV's audio output ports.
Important Note for Optical/Coaxial Connections: For some TVs, you may need to adjust the audio output settings. Navigate to your TV's sound settings and ensure the audio output is set to "Optical" or "Digital Out," and the audio format is set to "PCM/Stereo" or "Dolby Off." Refer to your TV's manual for specific instructions.

Image: A typical TV menu showing audio output settings, highlighting options for Optical, PCM/Stereo, and Dolby Off, which may be necessary for proper audio transmission.
3.3 Connecting the Receiver to an Audio Output Device (e.g., Speaker/Ampgyvybingesnis)
The receiver unit (labeled "Receiver") has multiple audio output options. Choose the appropriate cable based on your audio output device's input port:
- 3.5 mm AUX jungtis: Connect one end of the 3.5mm audio cable to the "Audio Out" 3.5mm port on the receiver. Connect the other end to the 3.5mm audio input port of your speaker or ampgyvesnis.
- Optinė jungtis: Connect one end of the optical audio cable to the "Audio Out" Optical port on the receiver. Connect the other end to the optical audio input port of your speaker or ampgyvesnis.
- Koaksialinis ryšys: Connect one end of a coaxial audio cable (not included) to the "Audio Out" Coaxial port on the receiver. Connect the other end to the coaxial audio input port of your speaker or ampgyvesnis.
- RCA Connection (via 3.5mm to RCA cable): If your device has RCA audio input, use the included 3.5mm to RCA cable. Connect the 3.5mm end to the "Audio Out" 3.5mm port on the receiver, and the RCA ends to the corresponding red and white RCA audio input ports on your speaker or ampgyvesnis.

Image: This diagram illustrates how to connect the receiver to speakers or an amplifier using optical, coaxial, or 3.5mm/RCA cables, depending on the audio device's input ports.
4. Naudojimo instrukcijos
After successfully connecting the power and audio cables to both the transmitter and receiver units, ensure your audio source (e.g., TV, PC) is playing audio and your audio output device (e.g., speaker, amplifier) is turned on and set to the correct input source.
- Automatinis susiejimas: The devices are designed for automatic pairing. Once both the transmitter and receiver are powered on, they will automatically search for and connect to each other. The indicator lights will turn solid blue when a stable connection is established.
- Garsumo valdymas: Adjust the volume directly on your audio source (TV, PC) or your audio output device (speaker, amplifier). The 1Mii RT5066Pro units do not have independent volume controls.
- Multiple Receivers: The system supports connecting up to two receiver units to a single transmitter simultaneously, allowing you to transmit audio to two separate audio output devices.

Image: Two individuals enjoying a movie with audio wirelessly transmitted to speakers, demonstrating the low-latency performance of the 1Mii RT5066Pro system.

Image: This image shows the 1Mii RT5066Pro system in action, wirelessly connecting a single transmitter to two separate active speakers or subwoofers for a multi-room audio experience.
5. Problemų sprendimas
If you encounter issues with your 1Mii RT5066Pro system, please refer to the following common troubleshooting steps:
- Nėra garso:
- Ensure all units (transmitter, receivers) are properly powered and the indicator lights are solid blue, indicating a successful connection.
- Verify that the audio cables are securely connected to the correct input/output ports on both the 1Mii units and your audio source/output devices.
- Check the volume levels on your audio source and output device.
- If using optical or coaxial connection, confirm your TV/PC audio output settings are configured to PCM/Stereo or Dolby Off (refer to section 3.2).
- Try restarting all devices (audio source, 1Mii units, audio output device).
- Intermittent Audio or Poor Sound Quality:
- Ensure the transmitter and receivers are within the recommended operating range (30-50m indoors, 100m outdoors) and there are no significant obstructions (thick walls, metal objects) between them.
- Minimize interference from other 2.4 GHz devices (Wi-Fi routers, cordless phones) by repositioning the 1Mii units if possible.
- Patikrinkite, ar nėra laisvų kabelių jungčių.
- Įrenginiai, kurie nesusijungia:
- Ensure both the transmitter and receiver units are powered on. The indicator lights should be flashing blue and red when in pairing mode.
- If they do not pair automatically, power cycle both units (unplug and replug the power cables).
6. Specifikacijos
| Modelio numeris | RT5066Pro |
| Prekės ženklas | 1Mii |
| Belaidė technologija | 2.4 GHz |
| Belaidis diapazonas (lauke) | Iki 100 metrų (320 pėdų) |
| Belaidis diapazonas (patalpose) | 30-50 metrai |
| Latencija | < 20 ms |
| Audio Inputs (Transmitter) | Optical, Coaxial, 3.5mm AUX |
| Audio Outputs (Receiver) | Optical, Coaxial, 3.5mm AUX |
| Maitinimo įvestis | DC 5 V (USB-C) |
| Medžiaga | Metalas |
| Gaminio matmenys | 10 x 6 x 0.1 cm |
| Produkto svoris | 447 g (viso rinkinio) |
| Kilmės šalis | Kinija |
7. Priežiūra
To ensure the longevity and optimal performance of your 1Mii RT5066Pro system, follow these maintenance guidelines:
- Valymas: Use a soft, dry cloth to clean the surfaces of the units. Do not use liquid cleaners or aerosols, as they may damage the device.
- Saugykla: Įrenginius laikykite vėsioje, sausoje vietoje, apsaugotoje nuo tiesioginių saulės spindulių ir ekstremalių temperatūrų.
- Tvarkymas: Handle the units with care. Avoid dropping them or exposing them to strong impacts.
- Vėdinimas: Ensure proper ventilation around the units to prevent overheating. Do not cover the devices during operation.
8. Garantija ir palaikymas
1Mii products are designed for reliability and performance. For warranty information, technical support, or service inquiries, please refer to the warranty card included in your package or visit the official 1Mii websvetainėje. Išsaugokite pirkimo kvitą kaip pirkimo įrodymą garantiniams reikalavimams.
For further assistance, you may contact 1Mii customer support through their official channels.


