1. Įvadas
The ChunHee WT42 Wireless Intercom System provides reliable two-way communication for homes, offices, and businesses. Designed for clear sound and extended range, this system facilitates easy room-to-room communication without the need for Wi-Fi. This manual provides essential instructions for setup, operation, and maintenance to ensure optimal performance of your intercom units.
2. Kas yra dėžutėje
- Intercom Unit x 2
- USB-C įkrovimo laidas x 2
- Maitinimo adapteris x 2
- Belt Clip x 2 (pre-attached)
- Diržas x 2
3. Produktas baigtasview
The ChunHee WT42 intercom units are compact and designed for ease of use. Each unit features an antenna for extended range, a speaker, a microphone, and several control buttons.
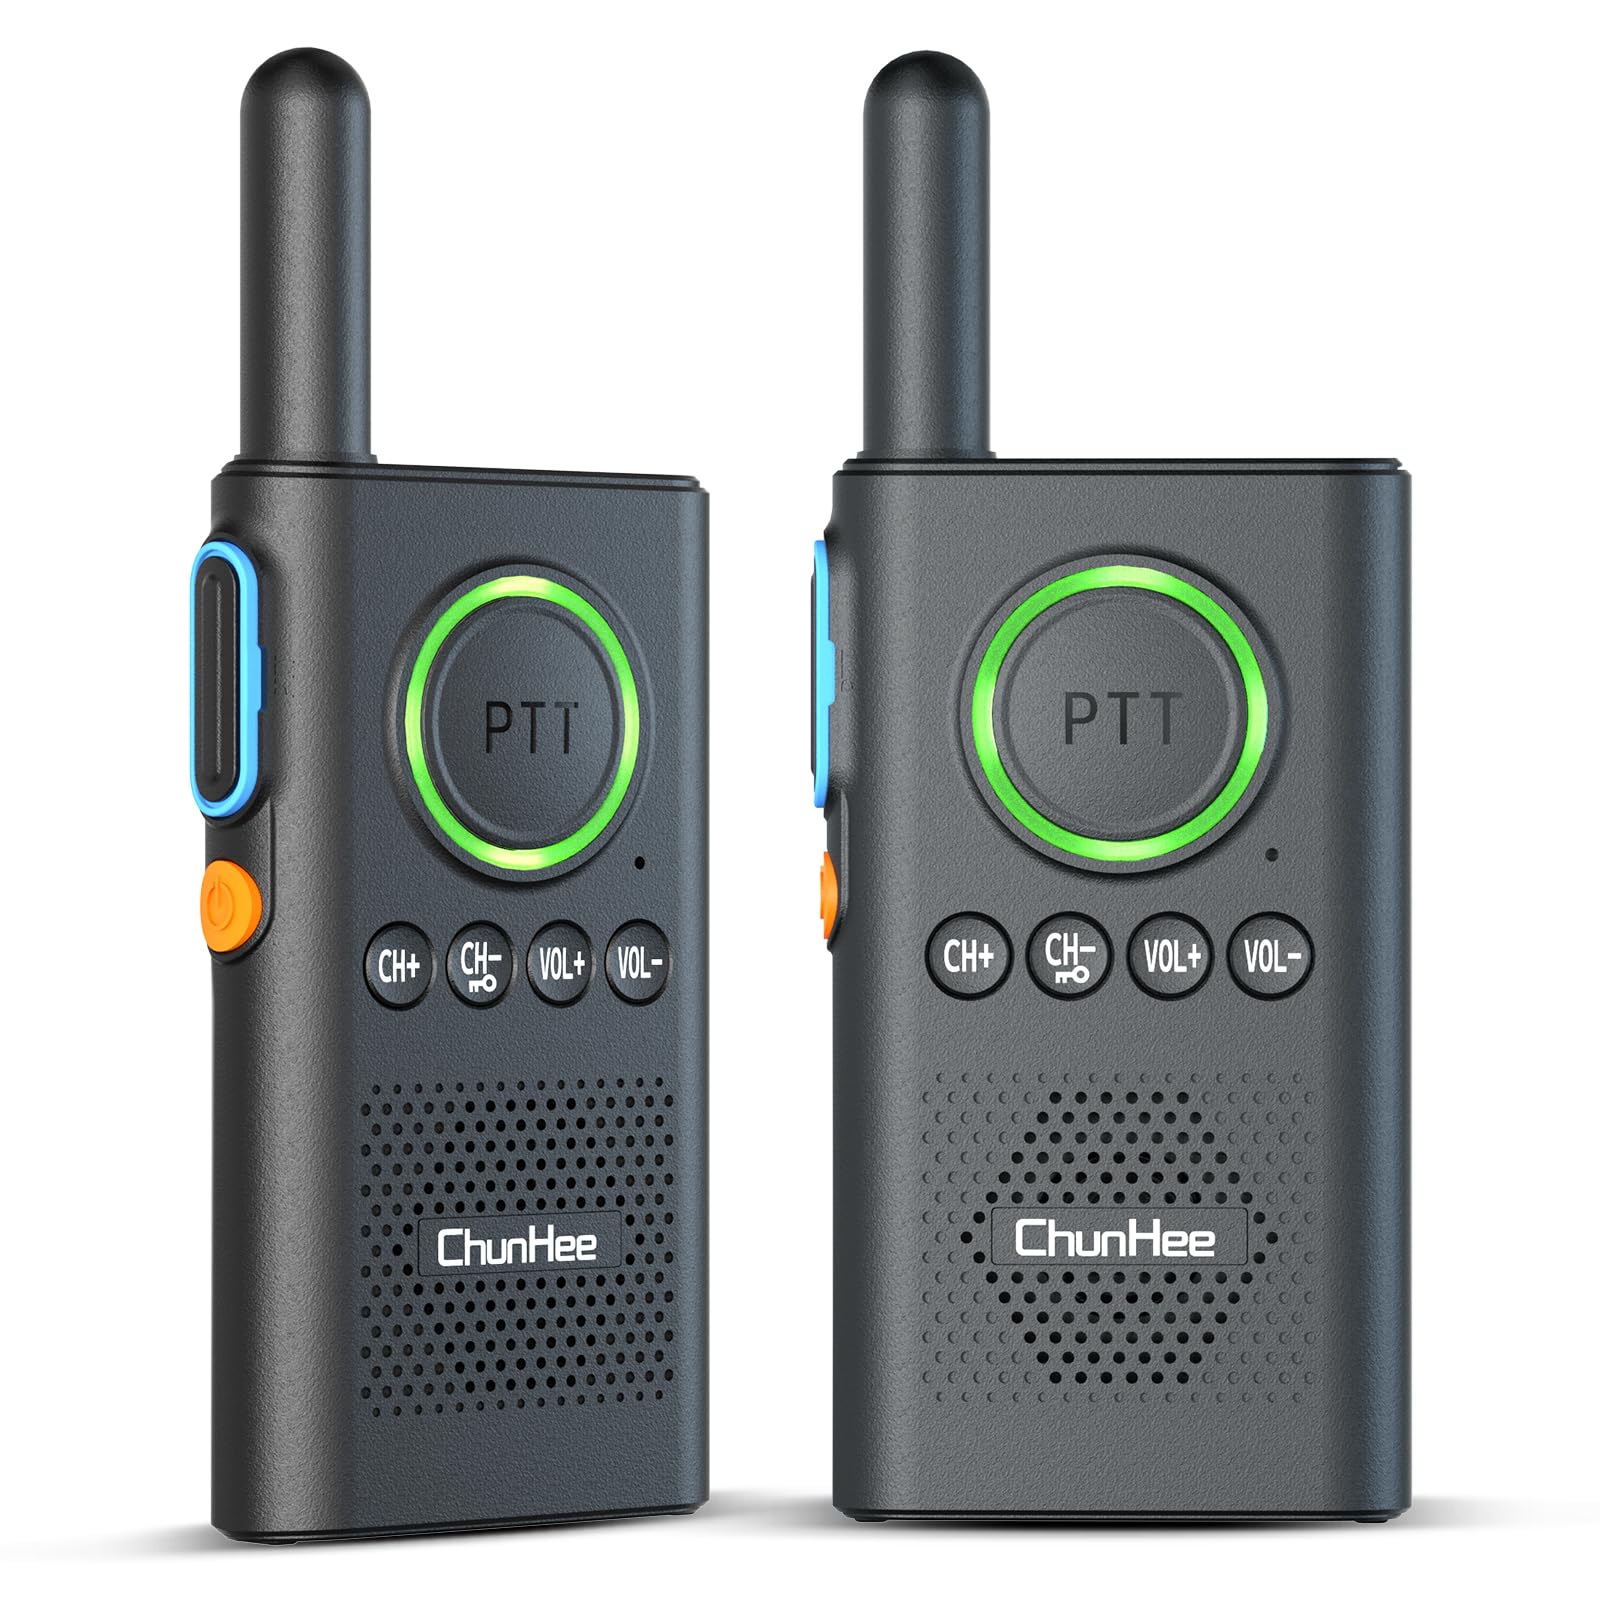
Figure 1: ChunHee WT42 Wireless Intercom Unit
Valdikliai ir indikatoriai
- PTT mygtukas (kalbėjimo mygtukas): Large central button for transmitting voice. Lights up red when transmitting, green when receiving.
- Maitinimo mygtukas: Orange button on the side. Hold for 3 seconds to power on/off.
- CH+ / CH- mygtukai: Adjust communication channels.
- VOL+ / VOL- mygtukai: Sureguliuokite garsiakalbio garsumą.
- Channel Confirmation Button: Blue button on the side, above the power button. Press to confirm the current channel.
- USB-C prievadas: Located at the bottom for charging.
- Ausinių lizdas: Located at the top for private listening.
4. Sąranka
4.1 Domofono įrenginių įkrovimas
Before first use, fully charge both intercom units. The units feature a 1000mAh battery, providing 70-80 hours of use and 2-3 hours for a full charge. A voice alert "Please charge" will sound when power is low.
- Connect the provided USB-C charging cable to the charging port at the bottom of each intercom unit.
- Plug the other end of the cable into a power adapter, laptop, or power bank.
- The indicator light will show charging status (e.g., red for charging).
- Once fully charged, disconnect the units.

2 pav.: Informacija apie bateriją ir įkrovimą

Figure 3: Indicator Light Alerts
4.2 Įjungimas / išjungimas
- Norėdami įjungti: Hold the orange Power Button on the side for approximately 3 seconds until you hear a voice prompt.
- Norėdami išjungti: Hold the orange Power Button on the side for approximately 3 seconds until you hear a voice prompt.
Video 1: Demonstrates how to power on/off the intercom units and adjust volume.
4.3 Pairing Intercoms
For two intercom units to communicate, they must be set to the same channel.
- Įsitikinkite, kad abu domofono įrenginiai yra įjungti.
- Naudokite CH+ or CH- buttons to select the desired channel for both units. Ensure both units display the same channel number.
- Once both units are on the same channel, they are paired and ready for communication.
Video 2: Instructions on how to pair two intercom units by setting them to the same channel.
5. Naudojimo instrukcijos
5.1 Garsumo reguliavimas
Norėdami reguliuoti garsumą, paspauskite VOL+ mygtuką, kad padidintumėte arba VOL- button to decrease the volume level. A voice prompt will indicate the current volume level.
5.2 Speaking (PTT Function)
To speak, press and hold the large PTT (push-to-Talk) button. The PTT button will light up red, indicating transmission. Release the button to listen. For clear communication, speak directly into the microphone located below the PTT button.
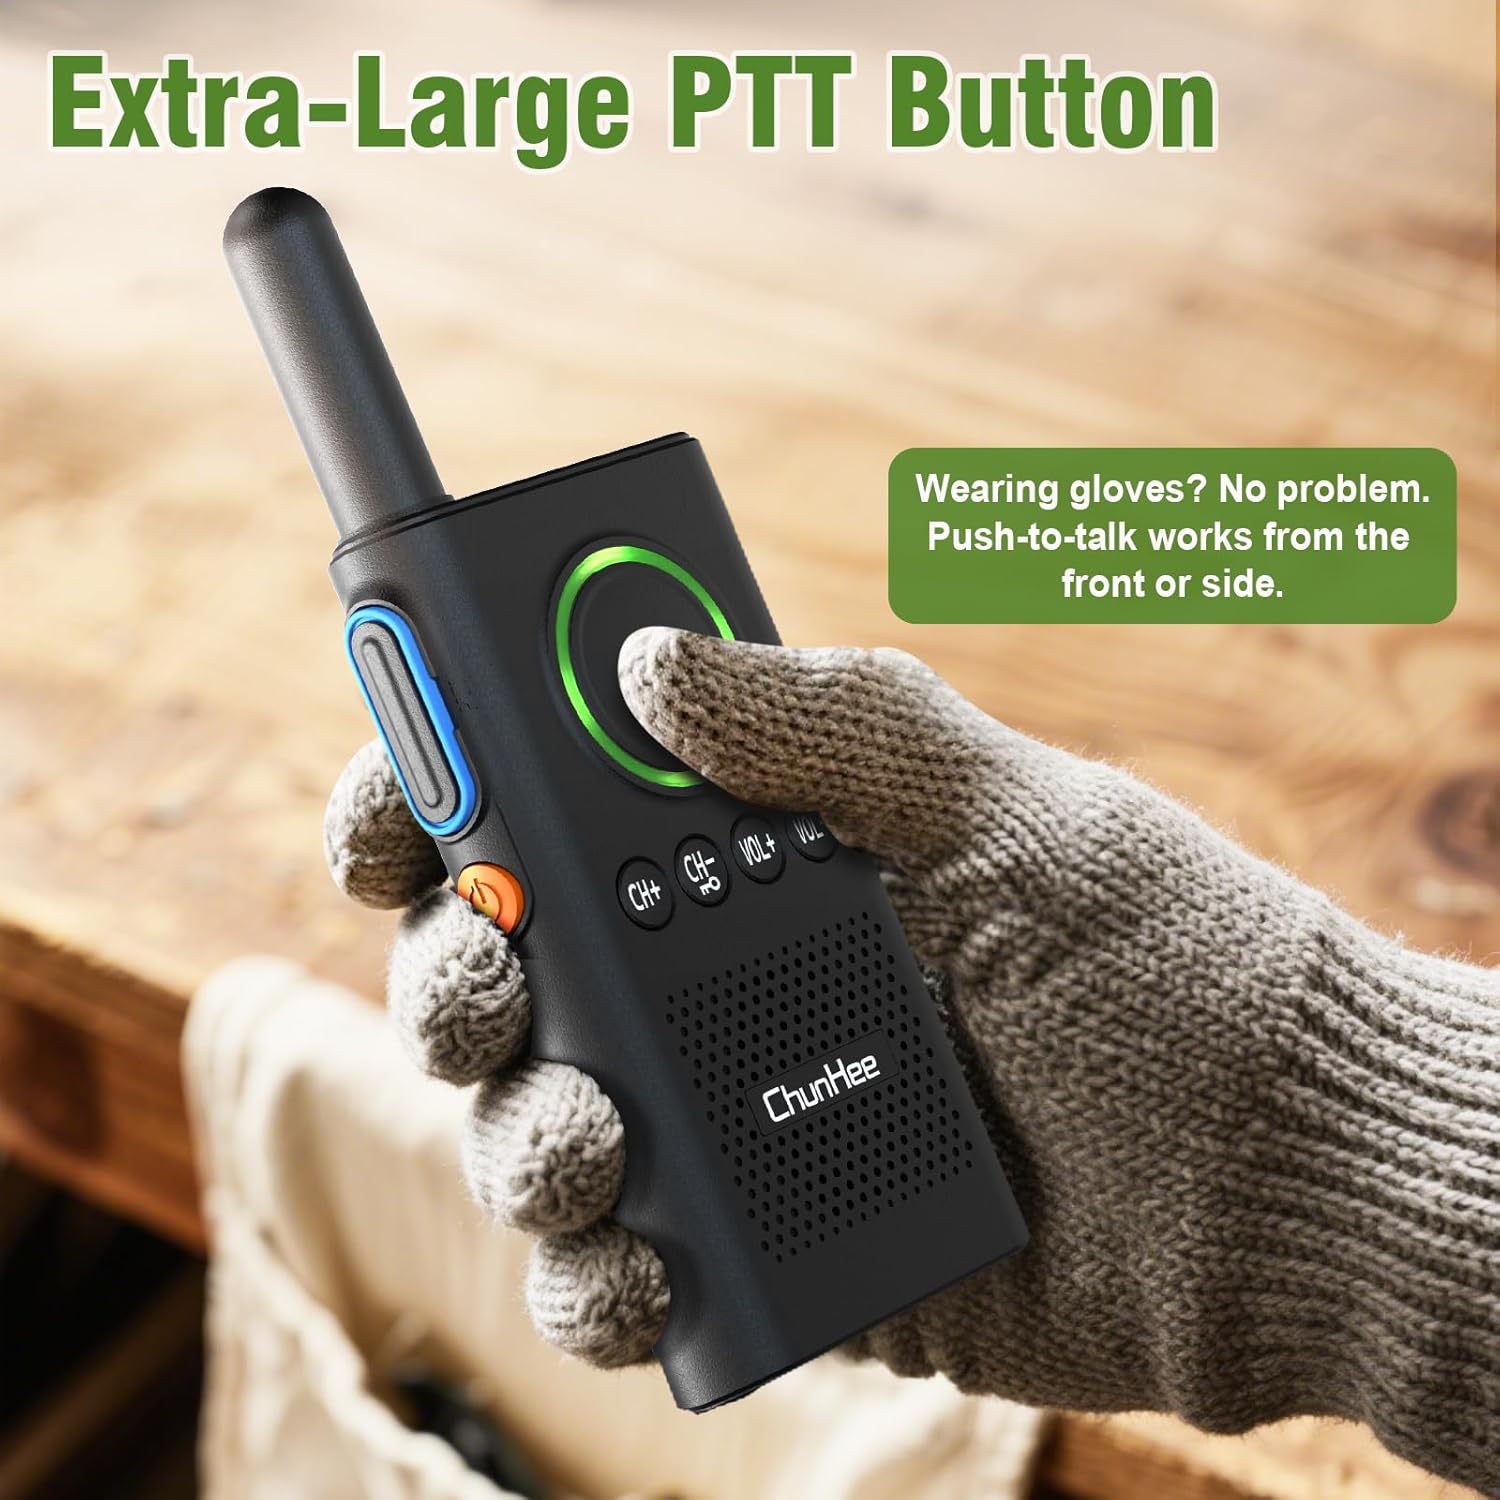
Figure 4: Extra-Large PTT Button for easy use.
5.3 VOX (Voice Operated Exchange) Hands-Free Function
The VOX function allows for hands-free communication, automatically transmitting your voice when you speak, without needing to press the PTT button. This is ideal for multitasking.
- To Enable VOX: With the device powered off, hold the CH+ mygtuką ir Maitinimo mygtukas simultaneously. Release when you hear a "beep" and see the flashing light, indicating VOX is ON.
- To Disable VOX: With the device powered off, hold the CH+ mygtuką ir Maitinimo mygtukas simultaneously. Release when you hear a "beep beep" and see the flashing light, indicating VOX is OFF.
Video 3: Detailed guide on how to enable and disable the VOX function.

Figure 5: Hands-Free VOX Function in use.
5.4 Kanalo užraktas
The channel lock feature prevents accidental channel changes and cross-talk, ensuring stable communication.
- To Lock Channel: Laikykite CH- button until you hear a "DI" sound. The keyboard is now locked.
- To Unlock Channel: Laikykite CH- button again until you hear a "DIDI" sound. The keyboard is now unlocked.
Video 4: Explains how to lock and unlock the intercom keyboard to prevent accidental changes.

Figure 6: Channel Lock ensures stable communication.
6. Priežiūra
- Keep the intercom units clean by wiping them with a soft, dry cloth.
- Avoid exposing the units to extreme temperatures, direct sunlight, or moisture.
- Do not attempt to disassemble or repair the units yourself, as this will void the warranty.
- Nenaudojamus įrenginius laikykite vėsioje, sausoje vietoje.
7. Problemų sprendimas
| problema | Galima priežastis | Sprendimas |
|---|---|---|
| Nėra galios | Senka baterija | Charge the intercom unit fully. |
| Negaliu bendrauti | Units on different channels | Įsitikinkite, kad abu įrenginiai nustatyti tam pačiam kanalui. |
| Prasta garso kokybė | Out of range, obstacles, or low battery | Move closer, reduce obstacles, or charge battery. |
| Accidental button presses | Keyboard not locked | Activate the channel lock function. |
8. Specifikacijos
- Gaminio matmenys: 1.26 x 6.3 x 9 colio
- Prekės svoris: 10.8 uncijos
- Kanalų skaičius: 16
- Ypatinga funkcija: Half-duplex with VOX
- Maksimalus pokalbio diapazonas: 3300 Feet (in open areas)
- ttage: 5 voltų
- Baterija: 1 Lithium Polymer battery required (included), 1000mAh
- Atsparumo vandeniui lygis: Neatsparus vandeniui
9. Garantija ir palaikymas
For warranty information, technical support, or any inquiries regarding your ChunHee WT42 Wireless Intercom System, please contact the manufacturer directly through their official website or the contact information provided with your purchase. Keep your purchase receipt for warranty claims.


