Įvadas
The GAMDIAS Aura GC10m V2 WH is a micro-tower computer case designed for Micro-ATX and Mini-ITX motherboards. It features a dual-chamber design, panoramic tempered glass panels, and comes equipped with three Addressable RGB (ARGB) fans to enhance system aesthetics and cooling. This manual provides essential information for the proper installation, operation, and maintenance of your computer case.
Vaizdas: priekis view of the GAMDIAS Aura GC10m V2 WH Micro-Tower Computer Case, showcasing its tempered glass panels and pre-installed ARGB fans.
Sąranka ir diegimas
Prieš pradėdami diegimą, įsitikinkite, kad turite visus reikalingus komponentus ir įrankius. Konkrečias diegimo instrukcijas rasite savo pagrindinės plokštės ir komponentų vadovuose.
1. Bylos rengimas
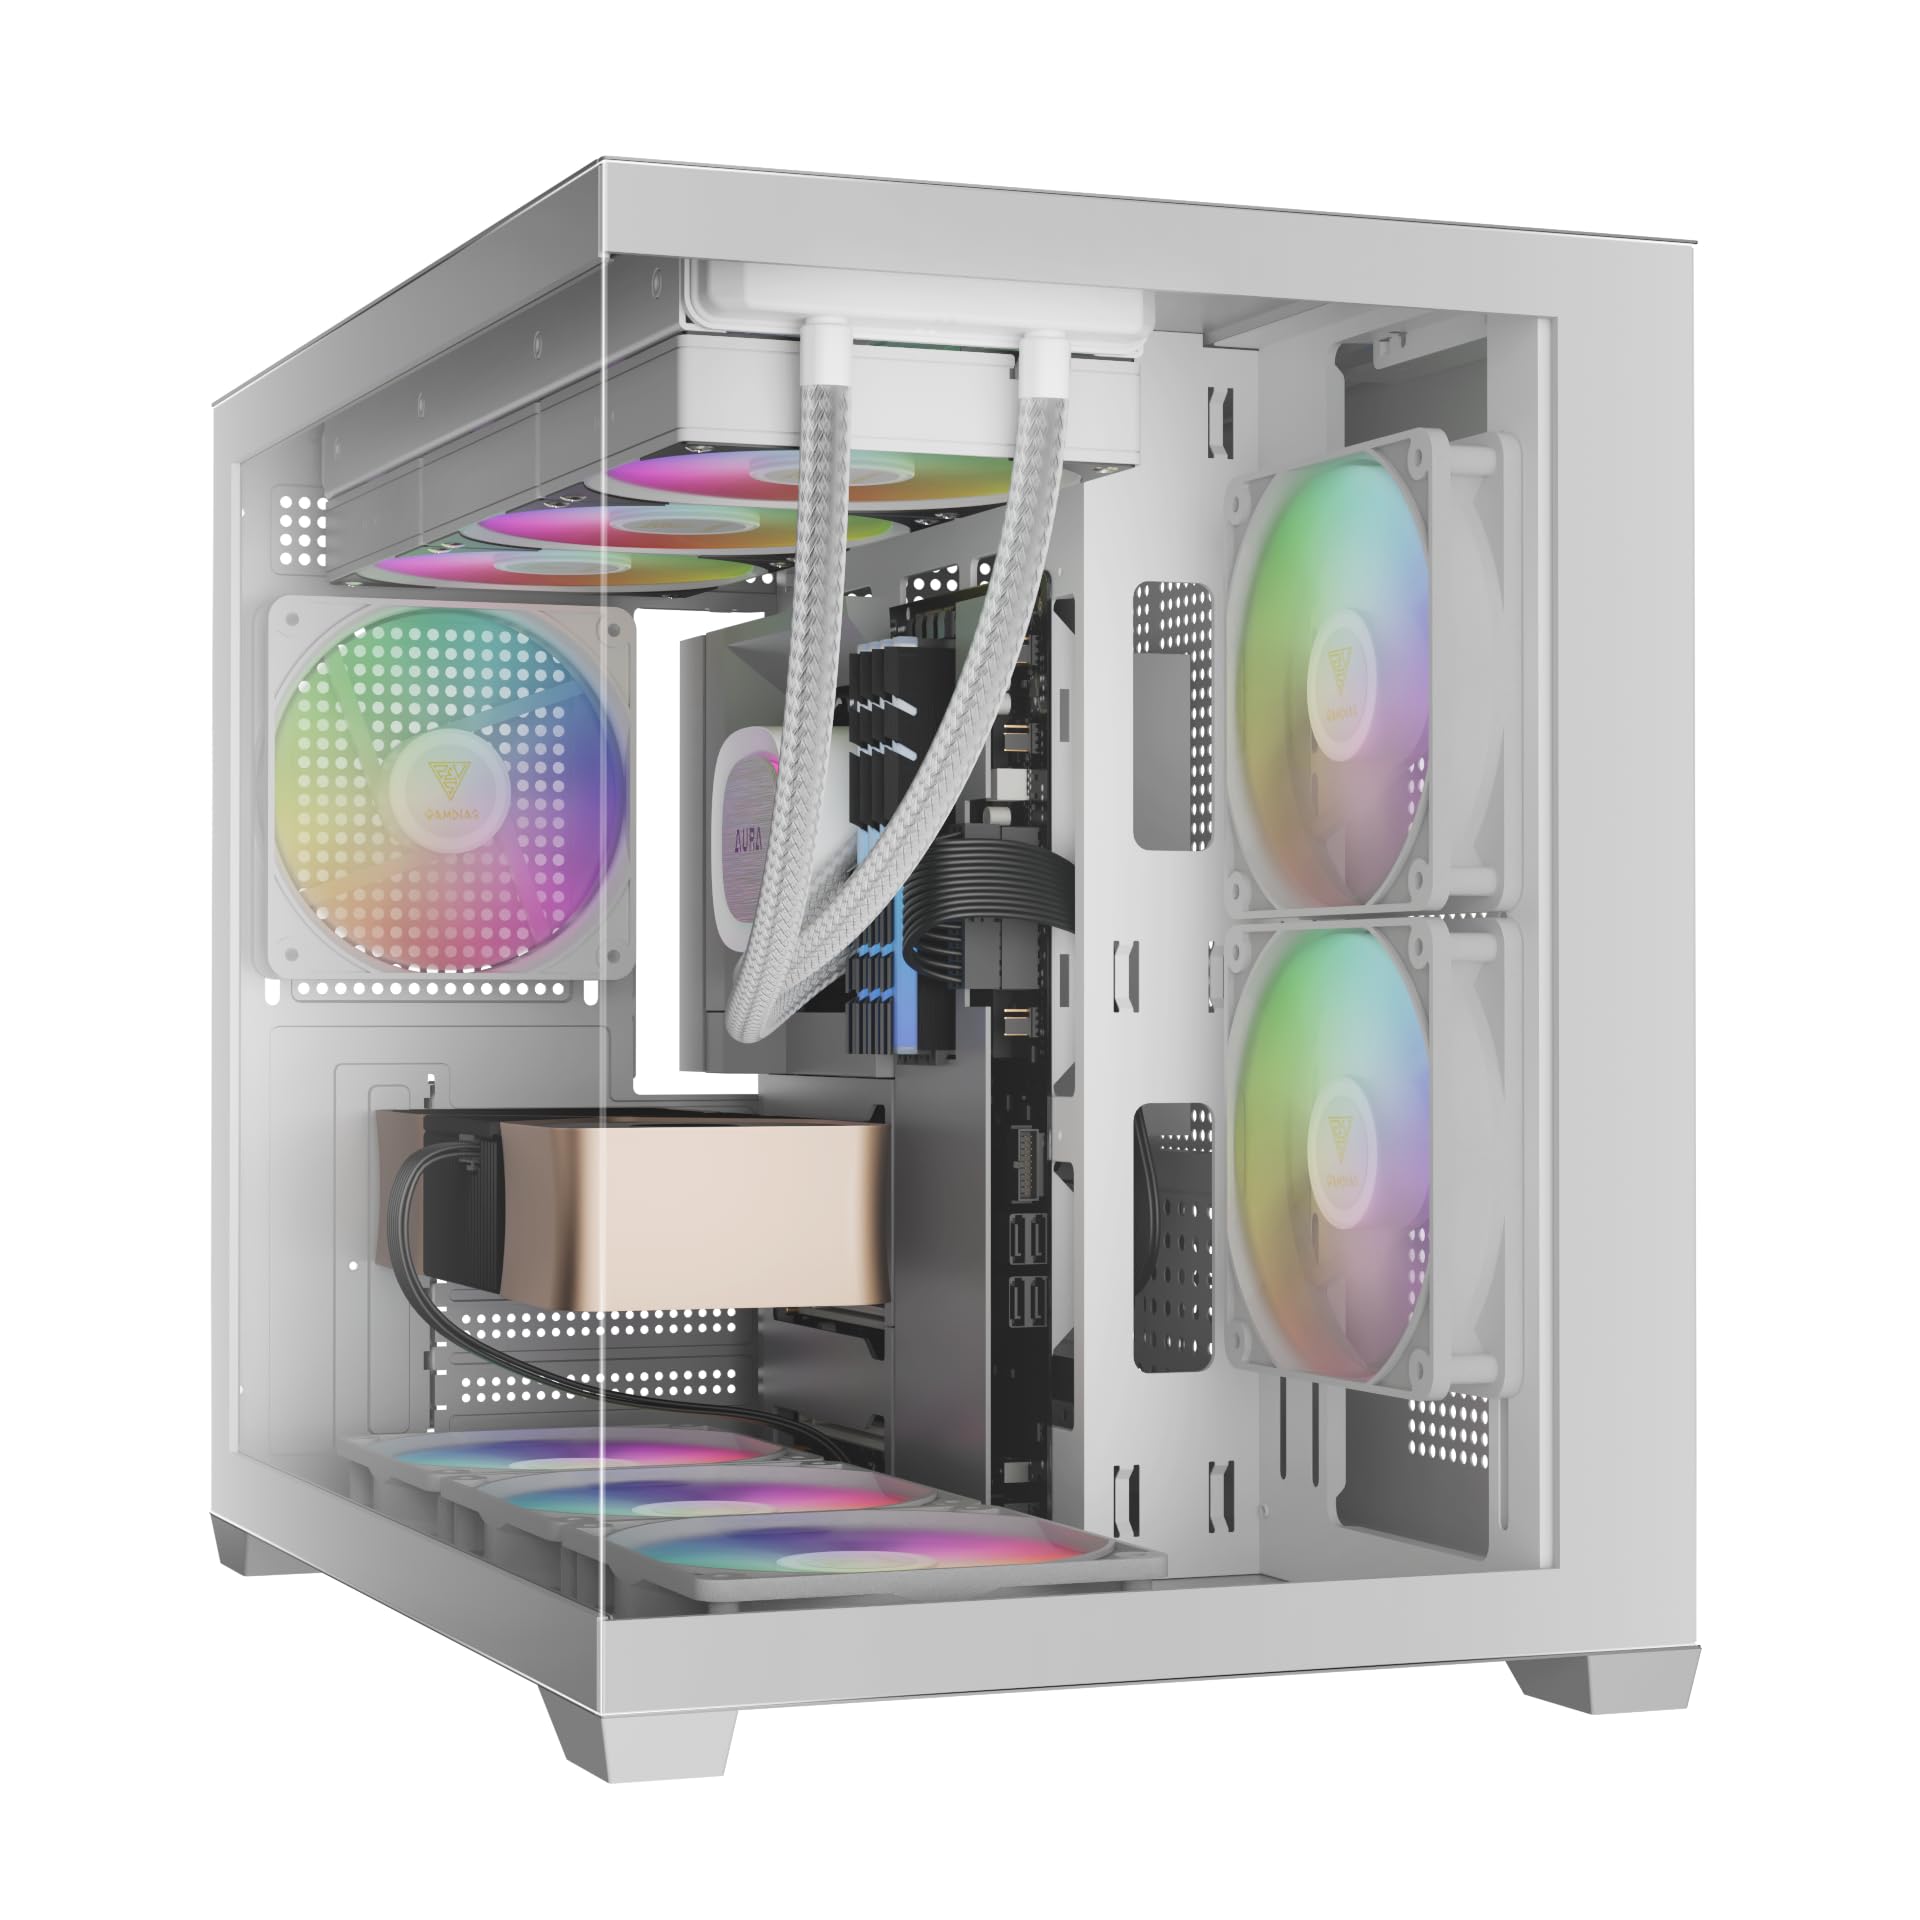
Carefully remove the tempered glass side and front panels. These are typically secured with thumbscrews or a latch mechanism. Place them on a soft, flat surface to prevent scratches.

Vaizdas: kampuotas view of the case with the tempered glass side panel removed, showing the internal structure and fan mounts.
2. Pagrindinės plokštės montavimas
- Įdėkite įvesties / išvesties skydą (jei jis nėra iš anksto pritvirtintas prie pagrindinės plokštės) į korpuso galinę angą.
- Sulygiuokite „Micro-ATX“ arba „Mini-ITX“ pagrindinę plokštę su korpuso viduje esančiais tarpikliais.
- Pritvirtinkite pagrindinę plokštę naudodami pateiktus varžtus.

Vaizdas: vidinis view of the case, highlighting the motherboard tray area and fan mounting points.
3. Maitinimo šaltinio (PSU) įrengimas
- Install your PSU into its designated compartment, typically at the rear bottom of the case.
- Pritvirtinkite maitinimo bloką varžtais iš korpuso galo.
- Ensure the PSU fan faces the correct direction for optimal airflow (usually downwards if there's a vent, or upwards if not).

Image: Rear internal view of the case, showing the PSU mounting area and cable routing options.
4. Pavaros įrengimas
- 3.5" / 2.5" Drive Bay (HDD Cage): Locate the HDD cage. Install one 3.5" HDD or one 2.5" SSD/HDD.
- 2.5" Drive Bays: The case supports three additional 2.5" SSDs/HDDs. Mount these drives to the designated brackets or locations within the case.
5. Ventiliatoriaus ir radiatoriaus montavimas
The case comes with three pre-installed ARGB fans (two side, one rear). Additional fans or radiators can be installed in the following locations:
- Į viršų: Supports 3 x 120mm or 2 x 140mm fans; 360mm or 280mm radiators.
- Šonas: Supports 2 x 120mm or 2 x 140mm fans; 240mm radiators. (Pre-installed 2 x 120mm ARGB fans)
- Apačia: Palaiko 3 x 120 mm arba 2 x 140 mm ventiliatorius.
- Galinis: Supports 1 x 120mm or 1 x 140mm fan; 120mm radiators. (Pre-installed 1 x 120mm ARGB fan)

Vaizdas: vidinis view showing the pre-installed ARGB fans on the side and rear, illustrating fan placement.
6. Connecting Front I/O Ports and ARGB
Connect the following cables from the case to your motherboard:
- USB 2.0: Connect the USB 2.0 header cable.
- C tipas: Connect the USB Type-C header cable (if your motherboard supports it).
- HD garsas: Connect the HD Audio header cable.
- Power/Reset/LEDs: Connect the front panel power, reset, HDD LED, and power LED cables according to your motherboard manual.
- ARGB Fans: Connect the ARGB fan cables to your motherboard's 5V ARGB header or to the integrated ARGB controller (if applicable). The case includes an LED Switch Button for controlling ARGB lighting if connected to the case's internal controller.

Vaizdas: Viršus view of the case, showing the front I/O panel with USB ports and the LED switch button.
Operacija
Įjungimas
Once all components are installed and connected, close the side panels. Connect your monitor, keyboard, mouse, and power cable. Press the power button on the front panel of the case to start your system.
ARGB apšvietimo valdymas
Iš anksto įdiegtus ARGB ventiliatorius galima valdyti dviem būdais:
- LED jungiklio mygtukas: If the ARGB fans are connected to the case's internal controller, press the dedicated LED Switch Button on the front I/O panel to cycle through various lighting effects and colors.
- Pagrindinės plokštės programinė įranga: If the ARGB fans are connected directly to a compatible 5V ARGB header on your motherboard, you can control the lighting effects using your motherboard's proprietary RGB software (e.g., ASUS Aura Sync, MSI Mystic Light, Gigabyte RGB Fusion, ASRock Polychrome Sync).
Priežiūra
Reguliarus kompiuterio komponentų aptarnavimas padeda užtikrinti optimalų našumą ir ilgaamžiškumą.
- Dulkių filtrai: The case features removable dust filters (e.g., on the top and bottom). Periodically remove and clean these filters with compressed air or water (ensure they are completely dry before reinstallation).
- Korpuso valymas: Naudokite minkštą, damp cloth to clean the exterior surfaces of the case. For tempered glass panels, use a glass cleaner and a microfiber cloth. Avoid abrasive cleaners.
- Vidinis dulkių šalinimas: Every few months, open the case and use compressed air to remove dust from internal components, especially fan blades and heatsinks.
Trikčių šalinimas
Jei kyla problemų, apsvarstykite šiuos įprastus sprendimus:
- Sistema neįsijungia:
- Įsitikinkite, kad maitinimo šaltinis įjungtas ir tinkamai prijungtas prie sieninio lizdo.
- Verify all power cables (24-pin ATX, CPU, GPU, drives) are securely connected.
- Check that the front panel power button cable is correctly connected to the motherboard.
- ARGB Fans Not Lighting Up/Spinning:
- Confirm ARGB cables are securely connected to a 5V ARGB header on the motherboard or the case's controller.
- Ensure fan power cables are connected to appropriate fan headers on the motherboard or PSU.
- If using motherboard software, verify it is installed and configured correctly.
- Priekiniai įvesties / išvesties prievadai neveikia:
- Check that the USB and HD Audio cables from the front panel are correctly connected to their respective headers on the motherboard.
For persistent issues, consult your motherboard manual or contact GAMDIAS support.
Specifikacijos
| Modelis | AURA GC10 V2 WH |
| Atvejo tipas | Mikro bokštas |
| Pagrindinės plokštės palaikymas | „Micro-ATX“, „Mini-ITX“ |
| Matmenys (IxPxH) | 42 x 29 x 37 cm |
| Svoris | 5 kg |
| Drive Bays | 1 x 3.5 colio arba 1 x 2.5 colio (HDD lizdas), 3 x 2.5 colio |
| I/O prievadai | 1 x Type-C, 1 x USB 2.0, 1 x HD Audio, 1 x LED Switch Button |
| Iš anksto įdiegti ventiliatoriai | 2 x 120 mm ARGB (šonuose), 1 x 120 mm ARGB (gale) |
| Ventiliatorių palaikymas |
|
| Radiatoriaus palaikymas |
|
| CPU aušintuvo aukščio riba | 165 mm |
| VGA ilgio apribojimas | 400 mm |
| Maitinimo bloko ilgio apribojimas | 160 mm |
Informacija apie garantiją
For detailed warranty terms and conditions, please refer to the official GAMDIAS websvetainėje arba garantijos kortelėje, pridėtoje prie jūsų gaminio. Išsaugokite pirkimo įrodymą, jei prireiktų pateikti garantijos pretenzijas.
Pagalba klientams
If you require further assistance or have questions regarding your GAMDIAS Aura GC10m V2 WH computer case, please contact GAMDIAS customer support.
- Gamintojas: GAMDIAS TAIWAN
- Adresas: No. 113, Jian 2nd Rd., Zhonghe, Dist., New Taipei City 235, Taiwan
- Importuotojas (Indija): Allway Distributions Pvt Ltd, No-49, H.B. Samajha Road, Baswangudi , Bengaluru- 560004
- Importuotojo kontaktinis asmuo (Indija): 8904307700
- Oficialus Websvetainė: www.gamdias.com (Prašome patikrinti oficialų website for the most up-to-date support contact information and resources.)


