1. Įvadas
This manual provides comprehensive instructions for setting up, operating, maintaining, and troubleshooting your DBIT AX1500 WiFi 6 Mesh Wi-Fi System. Please read this manual carefully before using the product to ensure optimal performance and safety.

Image 1.1: DBIT AX1500 Mesh Wi-Fi System (3-Pack) Overview. The image displays three white and gray mesh units. The front unit shows the DBIT logo, while the rear unit displays the WAN, LAN, Mesh, Reset, and Power ports.
2. Pakuotės turinys
Patikrinkite, ar pakuotėje yra visi reikalingi daiktai:
- 3 Mesh Router Units
- 3 maitinimo adapteriai
- 1 RJ45 eterneto kabelis
- Greito montavimo vadovas

Image 2.1: Package Contents. This image illustrates the items included in the product box: three mesh router units, three power adapters, one yellow RJ45 Ethernet cable, and a quick installation guide.
3. Sąranka
3.1. Initial Setup of the Primary Mesh Router
- Maitinimas: Insert the power adapter into one mesh router unit and plug the other end into a power outlet. The LED indicator will turn solid red during startup, then flash yellow when ready for network connection.
- Prisijungimas prie modemo: Turn off your cable modem. Connect one end of the provided Ethernet cable to your modem and the other end to the WAN/LAN port of the mesh router. Turn on your cable modem and wait for it to fully start up.
- Patikrinkite ryšį: Wait for the mesh router's LED indicator to turn solid green, which signifies a normal network connection.
Video 3.1: Instructions on how to set up the primary mesh router, including power connection, modem connection, and LED indicator status.
3.2. Setting Up with the MU-LINK App
- Prisijunkite prie „Wi-Fi“: Connect your smartphone or PC to the primary mesh router's Wi-Fi SSID. The default SSID and password are printed on the product label at the bottom of the unit.
- Atsisiųsti programą: Download and install the MU-LINK app from your device's app store.
- Prisijungti: Launch the app and log in using the credentials found on the product label.
- Konfigūruoti nustatymus: Programoje galite view network status and customize settings such as Wi-Fi name, parental controls, guest network, and more.

Image 3.2: Quick Setup with MU-LINK App. This diagram illustrates the four steps for setting up the mesh system using the mobile application.
Video 3.3: A visual guide on how to set up the mesh system using the MU-LINK app, covering initial connection and app login.
3.3. Adding More Mesh Nodes
You can add additional mesh nodes using two methods:
Method 1: Via MU-LINK App
- Power up the secondary mesh router(s). Wait for the secondary node's LED light to blink yellow.
- The MU-LINK app will automatically detect the new device(s) for mesh networking. Follow the on-screen prompts to complete the networking process sequentially. Do not attempt to network multiple devices simultaneously.
- The LED turning solid green indicates a successful connection. If the LED does not turn solid green, reset the secondary node(s) and try again.
Method 2: One-Button Networking (Mesh Button)
- Press the Mesh button on the already connected primary node. The green light will blink rapidly.
- Within two minutes, press the Mesh button on the powered-up secondary node. The yellow light will blink rapidly.
- Both devices will enter the automatic networking process. The LED turning solid green on both units indicates a successful connection.
Video 3.4: Detailed instructions on how to add more mesh nodes to your existing DBIT Mesh Wi-Fi system using either the app or the Mesh button.
3.4. Node Placement Suggestions
Optimal placement of mesh nodes is crucial for maximizing Wi-Fi coverage. Consider your house's layout when positioning the devices. The following diagrams provide general suggestions:
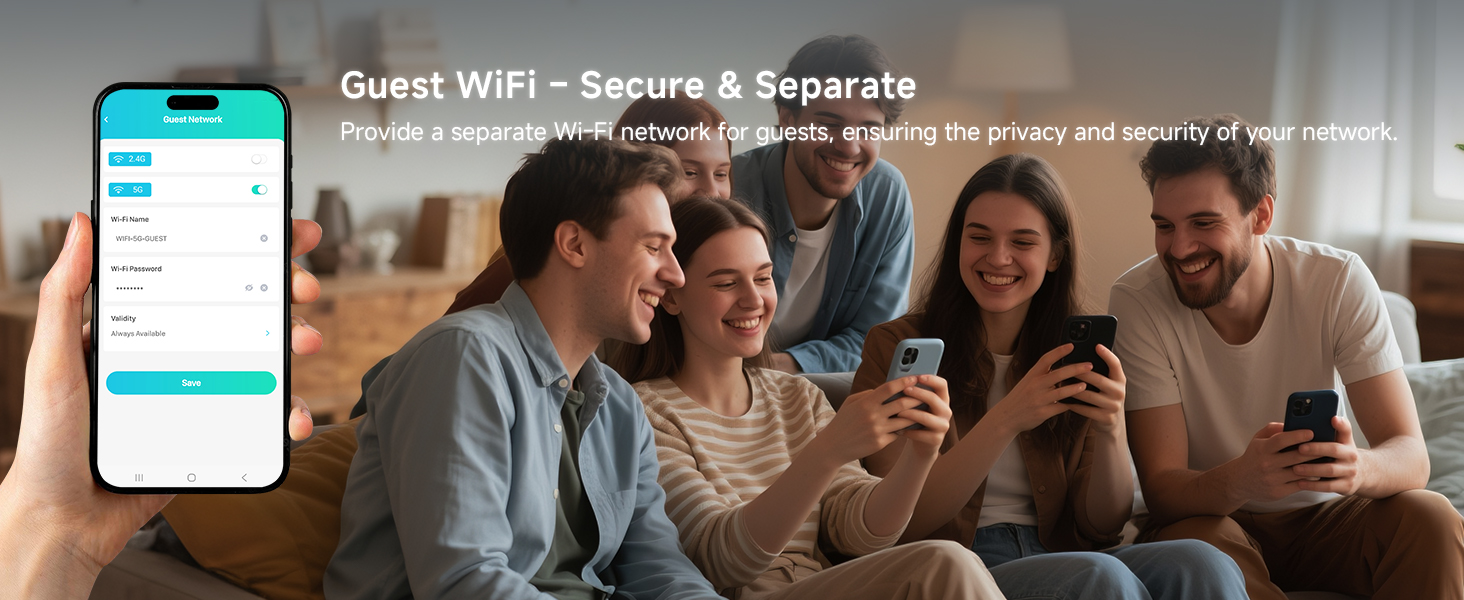
Image 3.5: Flexible Node Placement for Full Signal Coverage. This image depicts recommended mesh unit placements for different home types (one-story, two-story, three-story) to ensure comprehensive Wi-Fi coverage.
4. Naudojimo instrukcijos
4.1. „Wi-Fi 6“ našumas
The DBIT AX1500 system delivers combined wireless speeds up to 1500Mbps (300Mbps on 2.4GHz and 1201Mbps on 5GHz). This supports high-bandwidth activities such as 4K/8K streaming, online gaming, and video calls without lag.

Image 4.1: AX1500 Wi-Fi 6 Mesh System Speeds. This image highlights the dual-band speeds of 1201Mbps on 5GHz and 300Mbps on 2.4GHz, suitable for streaming, gaming, and downloading.
4.2. Whole-Home Coverage and Seamless Roaming
The 3-pack system provides Wi-Fi coverage up to 5,600 sq ft, eliminating dead zones. Seamless roaming technology ensures your devices automatically switch to the node with the strongest signal as you move around your home, maintaining an uninterrupted connection.

Image 4.2: Whole-Home Wi-Fi Coverage. This image depicts a house with Wi-Fi signals reaching all areas, emphasizing coverage up to 5,600 sq ft and optional Ethernet backhaul.

Image 4.3: Seamless Roaming. This diagram illustrates how devices stay connected without buffering as users move between mesh nodes in a multi-story home.
4.4 vaizdo įrašas: metimas per sekundęview of the DBIT Mesh WiFi System, demonstrating its whole-home coverage, seamless roaming, and high capacity for multiple devices.
4.3. High Capacity Connectivity
The system supports over 120 simultaneous connections without performance degradation, making it suitable for smart homes, offices, and gaming setups with numerous connected devices.

Image 4.5: Connect More Devices. This image emphasizes the system's capability to connect up to 120 devices simultaneously, maximizing network efficiency.
4.4. Gigabito Ethernet prievadai
Each mesh unit includes four Gigabit Ethernet ports (1 WAN + 3 LAN) for stable wired connections. These ports are ideal for devices like smart TVs, gaming consoles, or PCs that benefit from maximum stability and speed.

Image 4.6: More Ports, Smoother Flows. This image shows the rear of a mesh unit with four Gigabit Ethernet ports, highlighting wired connectivity options.
4.5. Advanced Network Protection
- WPA3-SAE Encryption: Safeguards your network against unauthorized access and cyber threats with enterprise-grade security.
- Isolated Guest Network: Create a separate Wi-Fi network for visitors, ensuring your main network and sensitive data remain protected.
- Tėvų kontrolė: Manage internet access for family members. Features include blocking harmful content, balancing screen time, and setting internet schedules.
5. Priežiūra
- Firmware atnaujinimai: Regularly check for and install firmware updates via the MU-LINK app or web sąsaja, siekiant užtikrinti optimalų našumą, saugumą ir prieigą prie naujų funkcijų.
- Valymas: Keep the mesh units clean and free from dust to prevent overheating and maintain proper ventilation. Use a soft, dry cloth for cleaning.
- Vieta: Ensure units are placed in well-ventilated areas, away from direct sunlight, heat sources, and obstructions that could interfere with Wi-Fi signals.
6. Problemų sprendimas
- No Internet Connection (LED not solid green):
- Ensure your modem is powered on and functioning correctly.
- Verify that the Ethernet cable is securely connected between the modem and the mesh router's WAN/LAN port.
- Restart both your modem and the primary mesh router.
- Nepavyko prisijungti prie „Wi-Fi“:
- Check if the mesh router is powered on and its LED is solid green.
- Confirm you are selecting the correct SSID and entering the correct password. The default SSID and password are on the product label.
- Note on Default Password: Some units may have a default password of "1-2-3-4-5-6-7-8-9" printed on the label, which should be used instead of "admin" if "admin" does not work.
- Mažas „Wi-Fi“ greitis arba nutrūkęs ryšys:
- Relocate mesh nodes to optimize coverage, referring to the placement suggestions in Section 3.4.
- Ensure there are no physical obstructions (thick walls, large metal objects) between your devices and the mesh nodes.
- Reduce the number of active devices or bandwidth-intensive activities if experiencing consistent slowdowns.
- Consider using Ethernet backhaul for critical devices or between mesh nodes for improved stability and speed.
- Secondary Node Not Connecting:
- Ensure the secondary node's LED is flashing yellow before attempting to add it.
- If using the app, ensure you are adding nodes sequentially.
- If the LED does not turn solid green after attempting to add, reset the secondary node and try the process again.
7. Specifikacijos
| Funkcija | Detalė |
|---|---|
| Modelio numeris | D-MAX4 |
| Prekės ženklas | DBIT |
| bevielio ryšio standartas | 802.11ac, 802.11ax (Wi-Fi 6), 802.11b, 802.11g, 802.11n |
| Dažnių juostos klasė | Dviejų dažnių juosta (2.4 GHz ir 5 GHz) |
| Combined Wireless Speed | Up to 1500Mbps (300Mbps on 2.4GHz + 1201Mbps on 5GHz) |
| Aprėptis (3 vnt. pakuotė) | Iki 5,600 kv |
| Palaikomų įrenginių skaičius | 120+ |
| Ethernet Ports Per Unit | 4 Gigabit Ports (1 WAN/LAN, 3 LAN) |
| Apsaugos funkcijos | WPA3-SAE Encryption, Guest Mode, Internet Security, Parental Control |
| Ypatingos savybės | Beamforming, Guest Mode, Internet Security, Parental Control, Seamless Roaming |
| Gaminio matmenys | 5.04 x 5.04 x 4.02 colio |
| Prekės svoris | 2.08 svaro |
| Gamintojas | Shenzhen Dbit Network Equipment Co., Ltd. |
8. Garantija ir palaikymas
For warranty information and technical support, please refer to the official DBIT website or contact their customer service directly. Contact details are typically provided in the Quick Installation Guide or on the manufacturer's websvetainę.
Manufacturer: Shenzhen Dbit Network Equipment Co., Ltd.


