1. Įvadas
This manual provides detailed instructions for the installation, operation, and maintenance of your PHILIPS TAC-1109 Car Dashcam. Please read this manual thoroughly before using the device to ensure proper functionality and safety. The PHILIPS TAC-1109 is designed to record driving footage in 2K resolution, offering features such as WiFi connectivity, Super Night Vision, Loop Recording, and Parking Mode.
2. Pakuotės turinys
Patikrinkite, ar pakuotėje yra visi reikalingi daiktai:
- PHILIPS TAC-1109 Car Dashcam
- „Hardwire“ rinkinys
- 32GB MicroSD Card (if included with purchase)
- Vartotojo vadovas (šis dokumentas)

Image 1: PHILIPS TAC-1109 Dashcam, Hardwire Kit, and MicroSD card.
3. Produktas baigtasview
Familiarize yourself with the components of your dashcam.

Image 2: Dimensions of the PHILIPS TAC-1109 Car Recorder (approximately 9cm x 3cm).
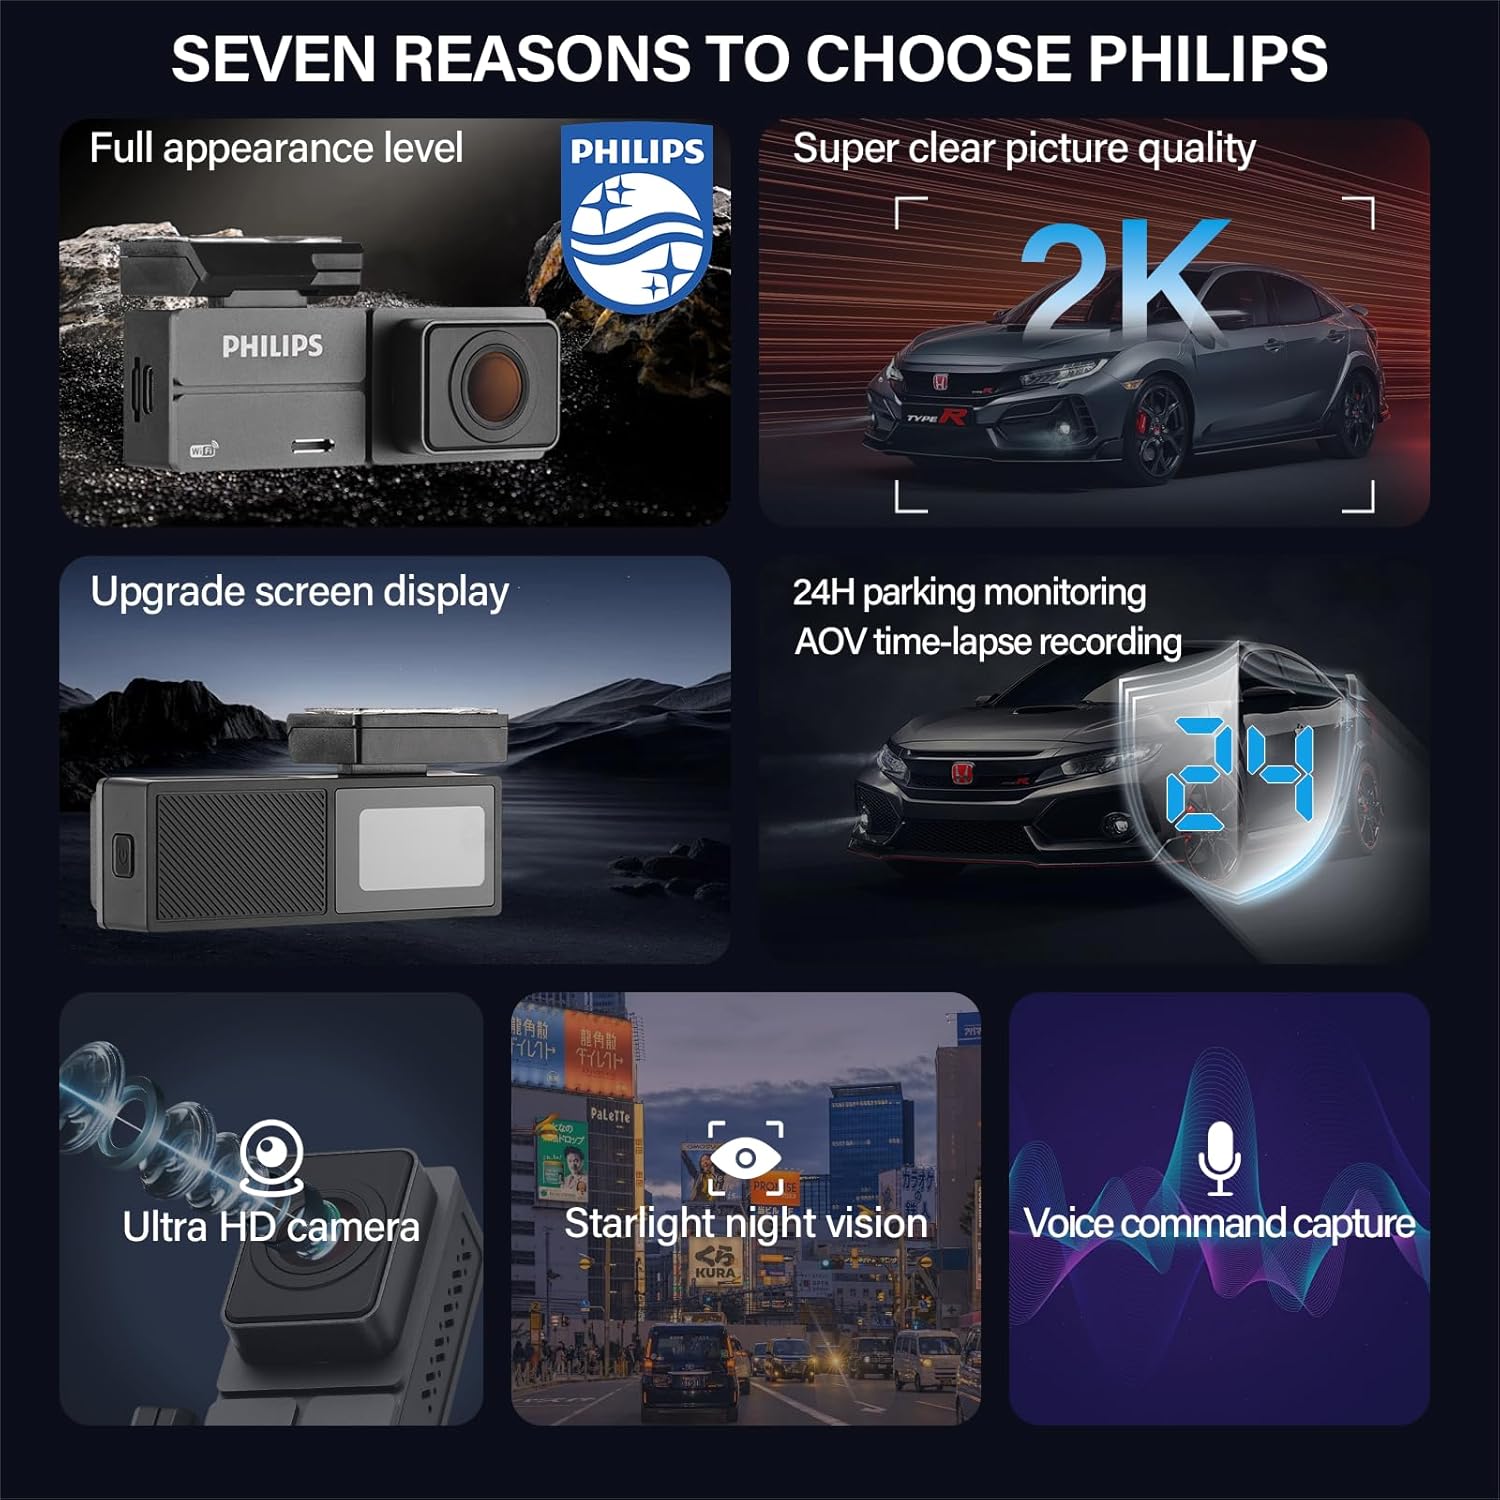
Image 3: The dashcam features a 1.47-inch IPS display, a detachable rear base for easy installation, and an adjustable lens for optimal viewkampų.
Pagrindinės funkcijos:
- 2K Front Camera: Įrašo aiškius ir išsamius maisto įrašustage.
- 140° plataus kampo objektyvas: Suteikia platų view of the road, reducing blind spots.
- Integruotas „Wi-Fi“ ir programėlių valdymas: Connects to the Wolfbox app for viewing, downloading, and sharing videos.
- 24H Parking Surveillance: Monitors your vehicle when parked (requires hardwire kit).
- Super naktinis matymas: Enhanced low-light recording with WDR, HDR, and F1.5 aperture.
- Ciklo įrašymas: Automatiškai perrašo seną footage kai atminties kortelė pilna.
- G jutiklis: Detects impacts and locks important video files.
- Kompaktiškas dizainas: Discreet and easy to install without obstructing vision.
4. Sąranka ir diegimas
4.1 Atminties kortelės įdėjimas
- Įsitikinkite, kad vaizdo registratorius yra išjungtas.
- Raskite „MicroSD“ kortelės lizdą vaizdo registratoriaus šone.
- Insert the 32GB MicroSD card (or a compatible card, up to 128GB, Class 10 or higher) into the slot until it clicks into place.
- Norėdami išimti, švelniai stumkite kortelę, kol ji iššoks.
4.2 Vaizdo registratoriaus montavimas
- Nuvalykite priekinio stiklo vietą, kurioje ketinate montuoti vaizdo registratorių.
- Attach the adhesive mount to the dashcam's rear base.
- Peel off the protective film from the adhesive mount.
- Press the dashcam firmly onto the chosen spot on your windshield, ensuring it does not obstruct your view.
- Sureguliuokite objektyvo kampą, kad užfiksuotumėte norimą view kelio.
4.3 Power Connection (Standard)
- Connect the provided power cable to the dashcam's power input port.
- Kitą maitinimo laido galą prijunkite prie savo automobilio 12 V maitinimo lizdo (cigarečių degiklio lizdo).
- Route the cable neatly along the windshield and dashboard edges to avoid interference with driving.
4.4 Hardwire Kit Installation (for Parking Surveillance)
The included hardwire kit is required for 24-hour parking surveillance functionality. Professional installation is recommended for this component.
- Identify your vehicle's fuse box.
- Connect the red wire of the hardwire kit to a constant power fuse (always on).
- Connect the yellow wire to an ACC (Accessory) fuse (powers on with ignition).
- Connect the black wire to a metal ground point on the vehicle chassis.
- Connect the hardwire kit's output to the dashcam's power input.
5. Naudojimo instrukcijos
5.1 Įjungimas / išjungimas
- Automatinis: The dashcam will power on and begin recording automatically when your vehicle's ignition is turned on (if connected to the 12V outlet or ACC fuse).
- Rankinis: Press and hold the power button (usually located on the side or bottom) for a few seconds to manually power on or off the device.
5.2 Pagrindinis įrašymas
Once powered on, the dashcam automatically starts continuous loop recording. The recording status is typically indicated by a flashing LED light or an icon on the screen.
5.3 App Control & WiFi Connection
The dashcam features built-in WiFi for seamless control via the Wolfbox app.

Image 4: The dashcam connects to the Wolfbox app via built-in WiFi, allowing users to access camera settings, playback recordings, download files, and perform OTA updates.
- Download the "Wolfbox" app from your smartphone's app store (compatible with iPhone and Android).
- Įjunkite prietaisų kamerą.
- On your smartphone, go to WiFi settings and connect to the dashcam's WiFi network (SSID and password usually displayed on the dashcam screen or in the manual).
- Open the Wolfbox app. You can now control the dashcam, view gyvas kvailystage, įrašytų vaizdo įrašų atkūrimas, atsisiuntimas files to your phone, and share them.
5.4 Ciklo įrašymas
The dashcam continuously records video in short segments (e.g., 1, 3, or 5 minutes). When the memory card is full, the oldest unlocked video fileautomatiškai perrašomi naujais įrašais. Tai užtikrina nepertraukiamą įrašymą be rankinio įsikišimo.
5.5 G jutiklis (avarinis įrašymas)
The built-in G-sensor detects sudden impacts or collisions. When an event is detected, the current video segment is automatically locked and saved to a protected folder on the memory card, preventing it from being overwritten by loop recording. This ensures critical evidence is preserved.
5.6 Parking Surveillance
With the hardwire kit properly installed, the dashcam can monitor your vehicle even when parked. It offers:
- Crash Detection Mode: Records when an impact is detected while parked.
- 24-hour Delay Mode (Time-lapse): Records continuously at a low frame rate, compressing hours of footage into minutes, providing extended coverage while conserving storage.
5.7 Super naktinis matymas
The dashcam utilizes advanced WDR (Wide Dynamic Range) and HDR (High Dynamic Range) technologies, combined with an F1.5 large aperture lens, to enhance video clarity and detail in low-light conditions, providing clear night driving footage.

Image 5: Illustration of Super Night Vision capability and Loop Recording functionality.
6. Priežiūra
6.1 Atminties kortelių valdymas
- Regularly format the MicroSD card (e.g., once a month) to maintain optimal performance and prevent data corruption. This can usually be done through the dashcam's settings menu or the companion app.
- Replace the MicroSD card periodically (e.g., every 6-12 months) as continuous overwriting can degrade its lifespan.
6.2 Valymas
- Use a soft, dry cloth to clean the dashcam lens and body.
- Nenaudokite abrazyvinių valiklių ar tirpiklių, nes jie gali pažeisti prietaisą.
- Ensure the windshield area around the lens is clean for clear recordings.
7. Problemų sprendimas
| Problema | Galima priežastis | Sprendimas |
|---|---|---|
| Vaizdo registratorius neįsijungia. | Nėra maitinimo šaltinio; sugedęs laidas; atsilaisvinęs prijungimas. | Check power cable connection; ensure vehicle's 12V outlet is functional; test with another power source if possible. |
| Įrašymas sustoja arba užstringa. | Memory card full or corrupted; incompatible memory card; firmware issue. | Format the memory card; replace with a new, compatible (Class 10 or higher) MicroSD card; update firmware via app if available. |
| „Wi-Fi“ ryšio problemos. | Incorrect WiFi password; app not updated; interference. | Verify WiFi password; ensure Wolfbox app is updated; restart dashcam and phone; try connecting in a different location. |
| Prasta vaizdo kokybė. | Dirty lens; protective film still on lens; incorrect settings. | Clean the lens; remove any protective film; check video resolution settings in the app. |
| Parkavimo stebėjimas neveikia. | Hardwire kit not installed correctly; parking mode not enabled. | Ensure hardwire kit is properly installed and connected; enable parking mode in dashcam settings via the app. |
8. Specifikacijos
| Funkcija | Detalė |
|---|---|
| Prekės ženklas | Philips |
| Modelio pavadinimas | BLSK-1109 |
| Vaizdo raiška | 2K (Front Camera) |
| Viewing kampas | 140 laipsnių |
| Ekrano dydis | 1.4 Inches (IPS Display) |
| Ypatingos savybės | App Control, Built-in WiFi, Parking Monitor, Super Night Vision (WDR, HDR, F1.5 Aperture), G-Sensor, Loop Recording, Time-lapse Video |
| Montavimo įranga | Hardwire Kit (Included) |
| Gaminio matmenys | 13 x 18 x 15 cm (approximate packaging dimensions) |
| Prekės svoris | 440 g |
| Transporto priemonės paslaugos tipas | Automobilis |
9. Garantija ir palaikymas
Dėl garantijos informacijos ir klientų aptarnavimo kreipkitės į oficialią „Philips“ website or contact your local Philips service center. The product typically comes with a standard warranty as per regional regulations.
Dėl papildomos pagalbos galite apsilankyti „Philips“ parduotuvė „Amazon“ svetainėje or refer to the warranty policy provided at the time of purchase.


