1. Įvadas
This manual provides essential information for the safe and efficient operation, installation, and maintenance of your Ranein 2025 GEN II On-Demand 65,000 BTU RV Tankless Water Heater, ExploreFlow Max model. Please read this manual thoroughly before installation and use, and retain it for future reference.
The Ranein ExploreFlow Max is designed to provide continuous hot water for recreational vehicles, featuring high altitude readiness, a multi-function controller, a thermostatic chamber, and an external shower head.
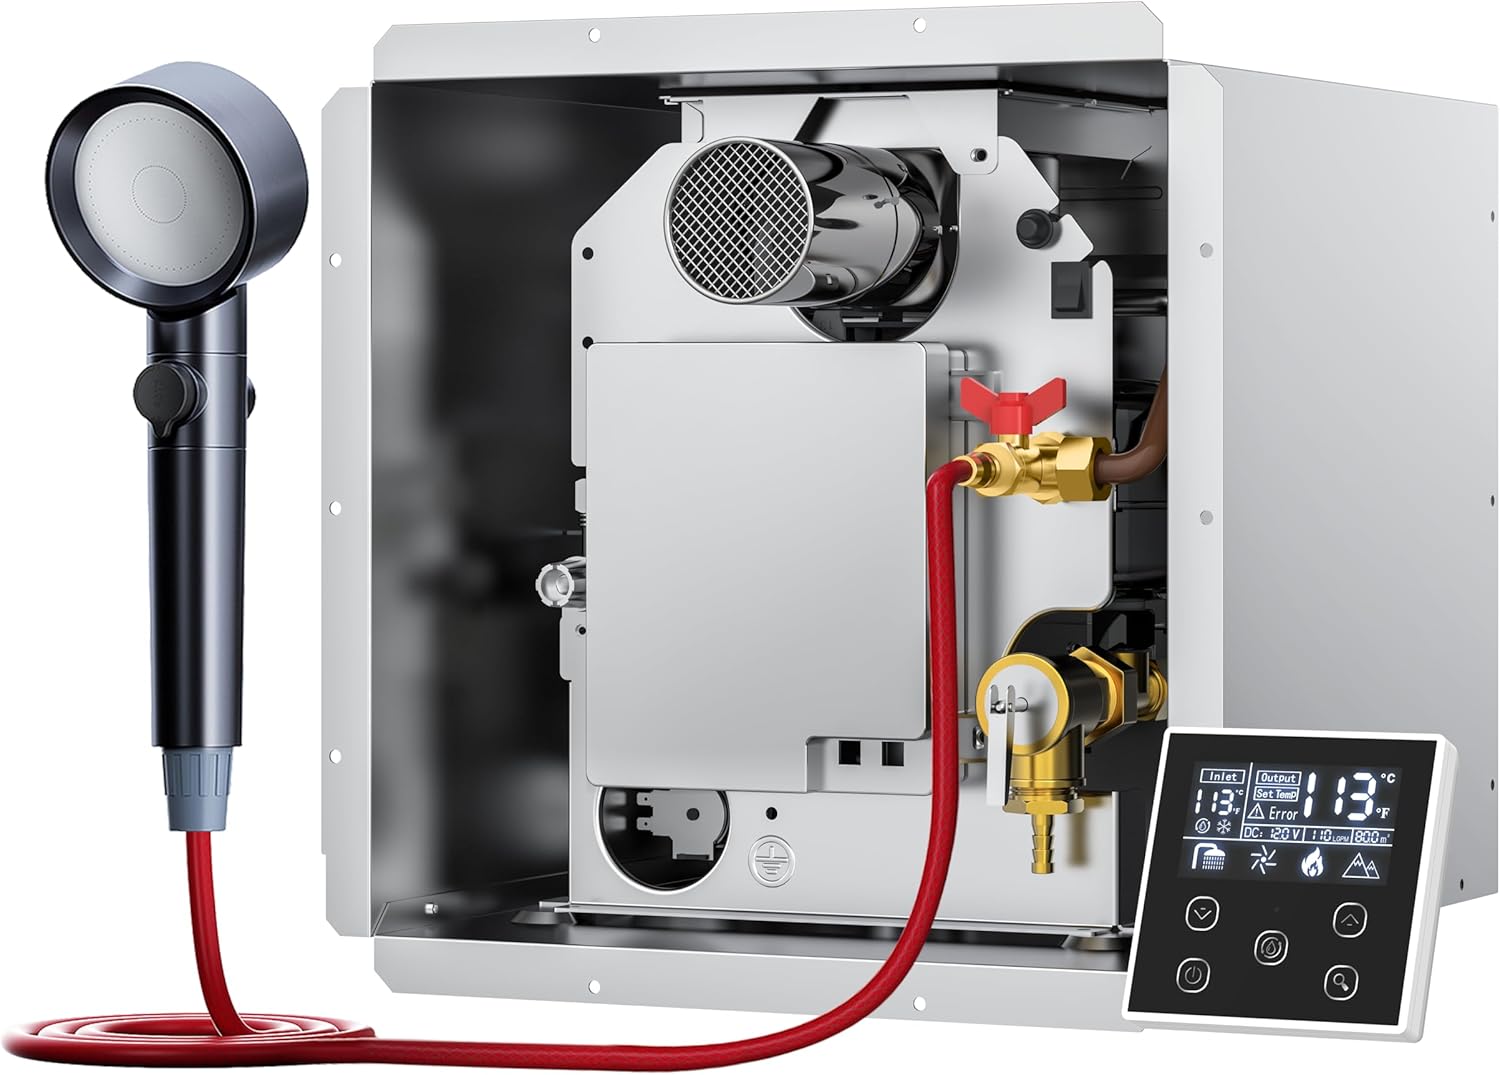
Image 1.1: Ranein ExploreFlow Max RV Tankless Water Heater with included accessories.
2. Saugos informacija
ĮSPĖJIMAS: Netinkamas montavimas, reguliavimas, keitimas, aptarnavimas ar techninė priežiūra gali sukelti žalą turtui, susižalojimą arba mirtį. Prieš montuodami arba atlikdami techninę priežiūrą, atidžiai perskaitykite montavimo, naudojimo ir priežiūros instrukcijas.
- Ensure all gas and water connections are properly sealed and leak-tested before operation.
- Always turn off the power and gas supply to the unit before performing any maintenance or service.
- Nelaikykite ir nenaudokite benzino ar kitų degių garų ir skysčių šalia šio ar kito prietaiso.
- Maintain minimum clearances: 4 inches back, 6 inches sides, 4 inches top.
- This unit is CSA-certified for safety.
- Includes a built-in pressure relief valve; no separate purchase needed.
3. Produkto ypatybės
- Begalinis karštas vanduo: Advanced deep fire row design for maximum heating efficiency, delivering up to 3.9 GPM at 65,000 BTU.
- Lengvas pakeitimas: Designed to replace most RV water heaters (including Suburban & Atwood 6/10/12-gallon models) with a 12.8" x 12.8" opening. Compatible door kits (15" x 15", 15" x 18", or 18" x 18") are available separately.
- Enhanced Multi-Function Remote Control: Displays real-time gas usage, voltage, water flow rate (GPM), anti-freeze activation status, and supports operation at high altitudes up to 9,800 feet.
- Thermostatic Chamber: Ensures consistent water temperature by automatically adjusting heat output, preventing sudden fluctuations.
- Pet-Friendly Shower Kit: Includes a convenient shower head attachment for washing pets or outdoor gear.
- Saugus ir patikimas: Features a top-mounted exhaust fan for stable combustion, automatic gas shut-off if flames fail, and an anti-freeze system that activates below 42.8°F.

3.1 vaizdas: Baigtaview of key features of the Ranein RV Tankless Water Heater.

Image 3.2: Details on the 2025 GEN II performance upgrades for the water heater.
4. Specifikacijos
| Atributas | Vertė |
|---|---|
| Prekės ženklas | Raneinas |
| Modelio numeris | RA65SH |
| Gaminio matmenys | 15 colio pločio x 15 colio aukščio |
| Spalva | Pilka |
| Efektyvumas | Didelis efektyvumas |
| Montavimo tipas | Siena |
| Yra elektrinis | Nr |
| Prekės svoris | 29 svaro |
| Įtraukti komponentai | Water heater x1 |
| BTU | 65,000 |
| GPM | MAX 3.9 |
| Kuro | Propanas (LP dujos) |
| Fuel Inlet Pressure | 0.4 PSI |
| Maitinimo įvestis | 12V DC |
| Vandens darbinis slėgis | 10 PSI - 110 PSI |
| Temperatūros diapazono nustatymas | 95°F (35°C) - 124°F (51°C) |

4.1 pav.: Vizualinis gaminio matmenų ir pagrindinių specifikacijų vaizdas.
5. Montavimo instrukcijos
Proper installation is crucial for the safe and efficient operation of your Ranein RV Tankless Water Heater. If you are unsure about any step, consult a qualified technician.
5.1. Paruošimas
- Wear protective gloves to prevent scratches during handling.
- Ensure the RV's power and gas supplies are turned off before beginning installation.
- The water heater requires a 12.8" x 12.8" opening. If replacing an existing unit, ensure the opening matches or is adapted.
- Apply butyl tape continuously around the flange backside and corners of the water heater for a secure seal.
Video 5.1: Installation instructions for the Ranein RV Water Heater, covering preparation, connections, and door installation.
5.2. Water and Gas Connections
- Place the water heater into the RV water heater opening. If you have a larger opening, install the water heater on the right side of the opening.
- Remove the protective covers from the HOT Water Outlet and COLD Water Inlet.
- Connect the water pipes to the back of the water heater. Ensure to check the direction of water flow in the RV's pipes first to avoid reversing the connection. Tighten fittings with a wrench.
- Connect the gas pipe to the back of the water heater. Tighten the fitting with a wrench.
- After connecting, turn on the gas and check for leaks with a detector or bubble water. If bubbles appear, there is a gas leak that must be repaired immediately.

Image 5.2: Connection diagram for water, gas, and power supply.
5.3. Elektrinis sujungimas
- When connecting to a power source, turn off the power to the RV first.
- Turn the power switch (boat switch) on the front of the water heater to "OFF".
- The two blue wires on the back of the water heater are for the remote control. Connect them to the wires of the remote control using wire connectors and stripper pliers.
- Connect the power supply wires (black and white wires on the rear of the water heater) to the appropriate nominal 12V DC power source connection. The black wire connects to the positive terminal (+12V) and the white wire connects to the negative terminal (-12V) of the power supply.
5.4. Door Frame Installation
The water heater is compatible with various door sizes. Ensure you have the correct door kit for your RV.
- Įstatykite durelių flanšą į vandens šildytuvo korpusą ir tvirtai prispauskite flanšą prie šoninės sienelės.
- Secure the door flange with screws.
- Apply a liberal amount of sealant around the door frame to all any gaps in the RV wall. Wipe any excess adhesive.
- For 15"x18" or 18"x18" doors, it is recommended to install wood strips (not included) on the left side of the water heater for reinforcement.

Image 5.3: RV opening and compatible door kit dimensions.
5.5. Wall Controller Installation
- Fix the installation board to the wall with screws.
- Clip the monitor (multi-function remote control) into the installation board.

Image 5.4: The multi-function remote control for the water heater.
6. Operacija
After successful installation, follow these steps to operate your Ranein RV Tankless Water Heater:
- Įsitikinkite, kad visos vandens ir dujų jungtys yra tvirtos ir be nuotėkių.
- Turn on the power to the RV and then to the water heater using the power switch on the unit's front.
- Įjunkite dujų tiekimą.
- Turn on the water supply to the RV.
- Use the multi-function remote control to set your desired water temperature. The display will show inlet/output temperatures, set temperature, voltage, water flow rate (GPM), and anti-freeze status.
- The unit will automatically adjust heat output to maintain consistent water temperature thanks to its thermostatic chamber.
- For high altitude operation (up to 9,800 feet), activate the high altitude mode via the remote control.
- The anti-freeze system will activate automatically if the temperature drops below 42.8°F.

Image 6.1: The water heater provides hot water for multiple applications.
7. Priežiūra
Reguliarus vandens šildytuvo aptarnavimas užtikrina jo ilgaamžiškumą ir optimalų veikimą.
- Žieminimas: If the unit is to be stored in a freezing environment or for long periods of time, it must be winterized. Drain all water from the unit and pipes to prevent freezing damage. Consult a qualified technician if unsure.
- Valymas: Periodically clean the exterior of the unit. Do not use abrasive cleaners.
- Filtro priežiūra: Reguliariai tikrinkite ir valykite vandens įleidimo filtrą, kad išvengtumėte užsikimšimų.
- Dujų sistemos patikrinimas: Annually inspect gas connections and hoses for wear or leaks.
- Slėgio sumažinimo vožtuvas: The built-in pressure relief valve will automatically drain excess water if pressure is too high. Ensure the outlet is not obstructed.
8. Problemų sprendimas
Šiame skyriuje pateikiami dažniausiai pasitaikančių problemų sprendimai. Dėl čia nepaminėtų problemų kreipkitės į klientų aptarnavimo tarnybą.
| Problema | Galima priežastis | Sprendimas |
|---|---|---|
| Nėra karšto vandens | No gas supply, no water flow, power off, low water pressure. | Check gas tank, open water valves, ensure power is on, check water pressure. |
| Vanduo nepakankamai karštas | Temperature setting too low, high flow rate, cold inlet water. | Increase temperature setting on controller, reduce water flow, allow unit to adjust. |
| Įrenginys neužsidega | No gas, faulty igniter, gas pressure issue. | Verify gas supply, check for error codes on controller, contact service. |
| Rodomas klaidos kodas | Specifinis sistemos gedimas. | Refer to the error code section in the full manual (if available) or contact customer support with the code. |
9. Garantija ir palaikymas
Ranein offers comprehensive product problem-solving service and a 2-year warranty against manufacturing defects.
- Garantinis laikotarpis: 2 years against manufacturing defects.
- Kontaktinis asmuo po pardavimo:
- El. paštas: service@ranein.net
- US Phone: (424)-452-2630

Image 9.1: Ranein customer service and warranty information.


