RAINPOINT HTP149FRF išmaniosios automatinės laistymo sistemos naudotojo vadovas
Model: HTP149FRF (ASIN: B0FMXHDBHK)
Prekės ženklas: RAINPOINT
Produktas baigtasview
The RAINPOINT HTP149FRF Smart Automatic Watering System is designed to provide efficient and flexible irrigation for up to 15 potted plants. It offers both local physical control and remote control via the RainPoint Home App and Wi-Fi Hub. The system is dual-powered, utilizing a detachable solar panel or USB charging, and features even water distribution with an anti-backflow valve to prevent overwatering or water shortage.
Pagrindinės funkcijos:
- Exclusive Dual-Control Technology: Manual operation and remote control via RainPoint Home App & Wi-Fi Hub (2.4 GHz ONLY).
- Du maitinimo šaltiniai: Detachable solar panel for sunlight charging or USB charging for continuous power.
- Tolygus vandens paskirstymas: Specially designed system with an anti-backflow valve ensures consistent watering for all plants.
- Intelligent Gardening: Partner with other RainPoint smart devices (e.g., soil meter) for real-time, condition-based watering adjustments.
- Remote Control & Monitoring: User-friendly app for monitoring local and app-set watering schedules, with custom alerts.
- Low Water Auto-Shutoff Pump: Prevents pump damage when the water source is low.
Kas yra dėžutėje
Prieš pradėdami diegti, patikrinkite, ar yra visi komponentai:
- 1 x kompaktiškas išmanusis saulės laistymo siurblys
- 1 x saulės skydelis
- 1 x WiFi Hub
- 1 x nuimamas galinis tvirtinimo kabliukas
- 1 x Accessories Pack (includes emitters & tubing for 10 plants)
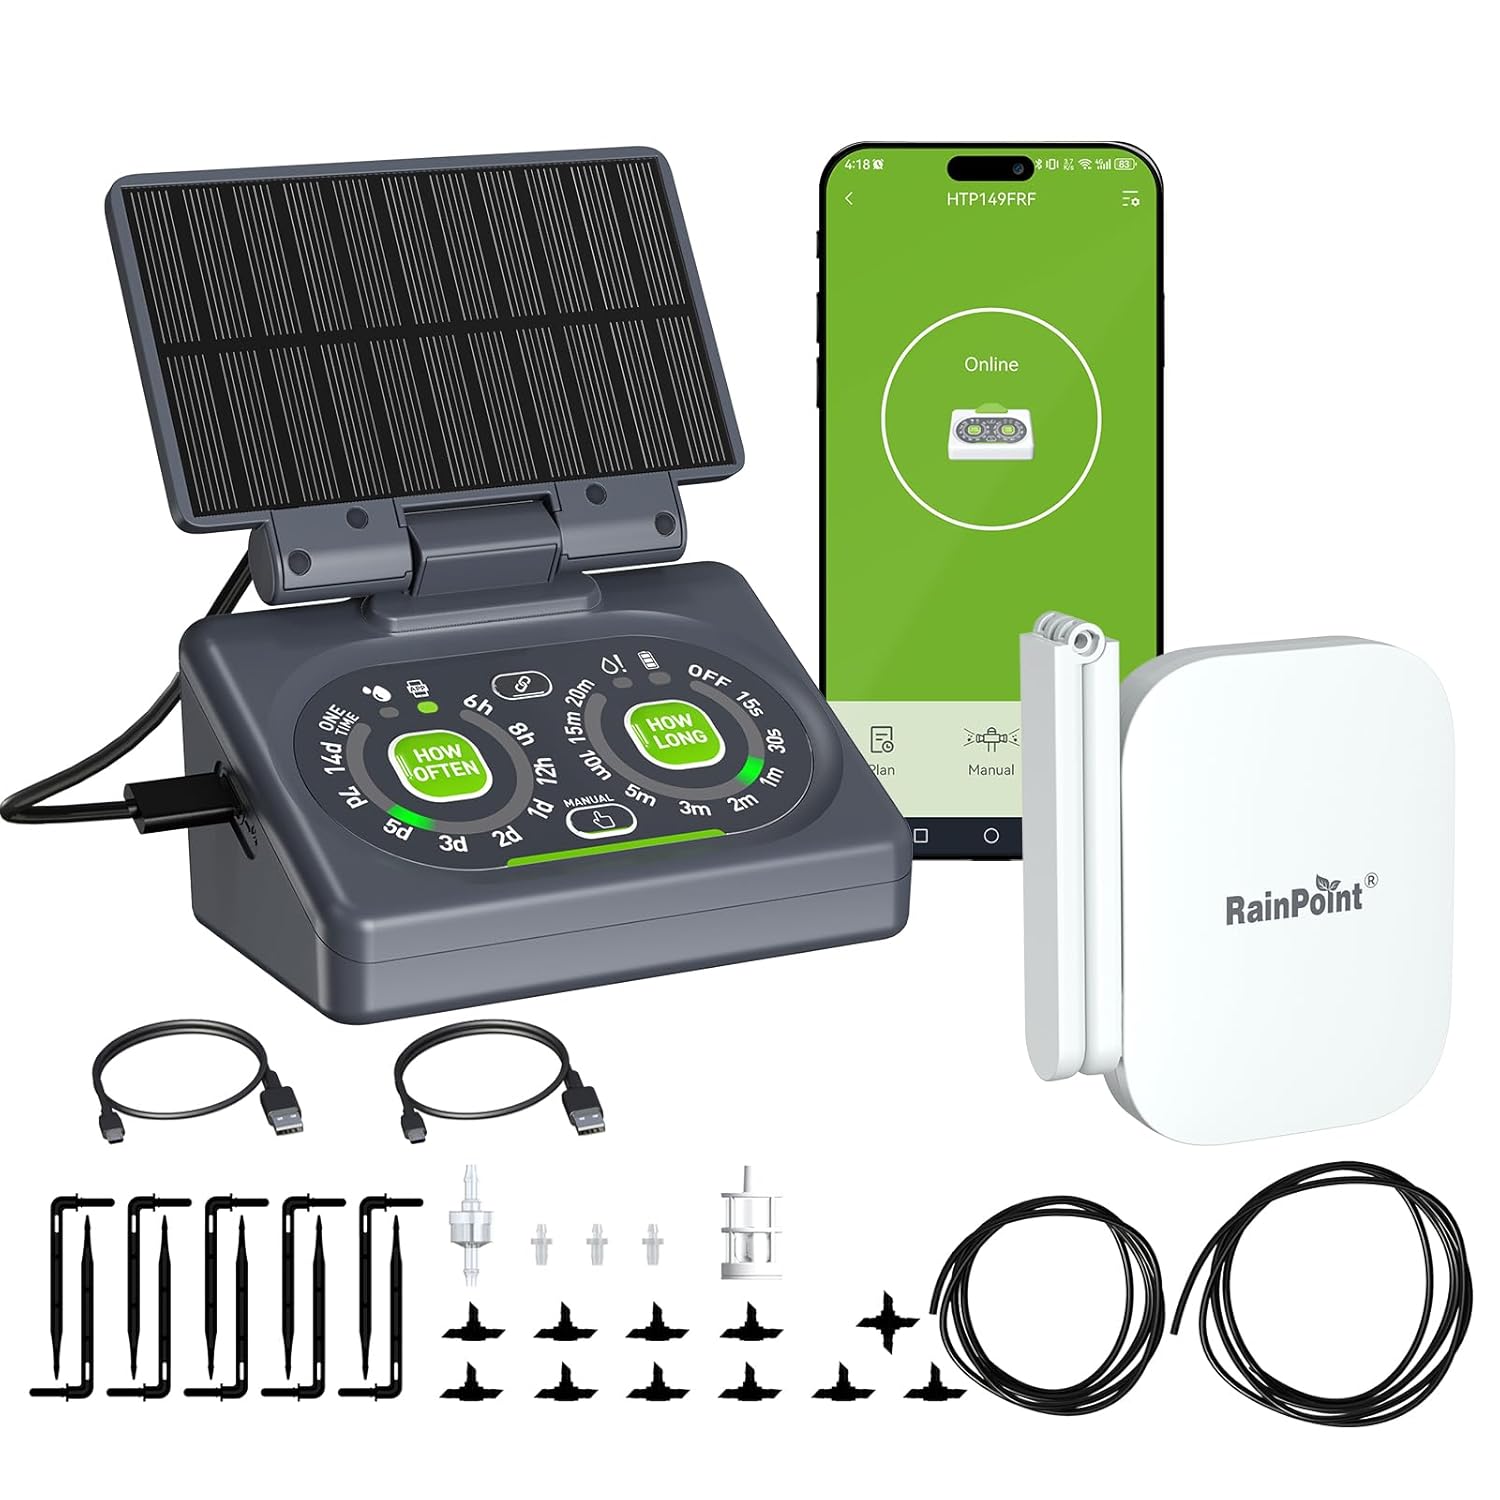
Image: All components included in the RAINPOINT Smart Automatic Watering System kit.
Sąrankos vadovas
1. Fizinis įrengimas
- Prijunkite saulės kolektorių: Attach the detachable solar panel to the main pump unit. Ensure it is securely connected.
- Padėkite siurblį: Place the pump unit near your plants. It can be hook-mounted, placed on a tabletop, or wall-mounted. Ensure the water source (e.g., a bucket of water) is accessible to the pump's intake hose.
- Install Tubing and Emitters: Connect the 1/4" main line tubing to the pump's output. Use the provided T-fittings and 1/8" branch lines to route water to individual plants. Insert micro drip emitters into the branch lines and position them near the base of each plant. For easier assembly, soak tubing ends in hot water before attaching fittings.
- Install Filter and Anti-Siphon Valve: Ensure the filter is placed at the end of the intake hose submerged in the water source to prevent clogging. Install the anti-siphon valve as directed to ensure even water distribution and prevent backflow.

Vaizdas: pvzample setup of the RAINPOINT watering system with tubing and emitters.

Image: Detail of the anti-siphon valve and filter for smooth, precise water flow.
2. App and Hub Setup
The system supports both local physical control and remote control via the RainPoint Home App. For remote control, the Wi-Fi Hub is required.
Download RainPoint Home App and Add Hub:
- Atsisiųsti programą: Ieškokite "RainPoint Home" on the App Store (iOS) or Google Play (Android), or scan the QR code provided in the product packaging to download the application.
- Plug in Hub: Plug the Wi-Fi Hub into an indoor outlet. The power indicator will turn solid blue.
- Atidarykite programėlę ir pridėkite įrenginį: Open the RainPoint Home APP. Click the "+" icon to add a new device. Select "HWG023" (or "HWG023WBRF" for hubs with an antenna) from the list of available hubs.
- Prisijunkite prie „Wi-Fi“: Choose the 2.4GHz Wi-Fi network you wish to connect the hub to and enter the password. (Note: The hub only supports 2.4GHz Wi-Fi or dual-band Wi-Fi).
- Pair Hub: Press and hold the operation button on the hub until the Wi-Fi connecting indicator light flashes rapidly. Once connected, the indicator will turn solid blue.
Add Pump Timer to RainPoint Home App:
- Select Add Device: On the app's home page, select the "+" button.
- Select Pump Model: On the "Add Device" page, select "HTP149FRF" under the Controller section.
- Pair Pump: Follow the in-app instructions. Long press the pairing button on the pump unit until its LED flashes rapidly. The app will confirm successful pairing.
Video: A detailed guide on setting up and using the RainPoint HTP149 Drip Irrigation System, including app pairing and physical installation.
Naudojimo instrukcijos
1. Local Physical Control
The pump unit features physical buttons for direct control without the app.
- Laistymo dažnumo nustatymas: Short press the "HOW OFTEN" button to cycle through available watering frequencies (e.g., 6h, 8h, 1d, 2d, 3d, 5d, 7d, 14d, One Time). The LED will flash 4 times and turn solid green to confirm your selection.
- Laistymo trukmės nustatymas: Short press the "HOW LONG" button to select the watering duration (e.g., 15s, 30s, 1m, 2m, 3m, 5m, 10m, 15m, 20m, OFF). The LED will flash 4 times and turn solid green to confirm your selection.
- Start Watering: Once both frequency and duration are set, the system will begin watering according to the schedule.
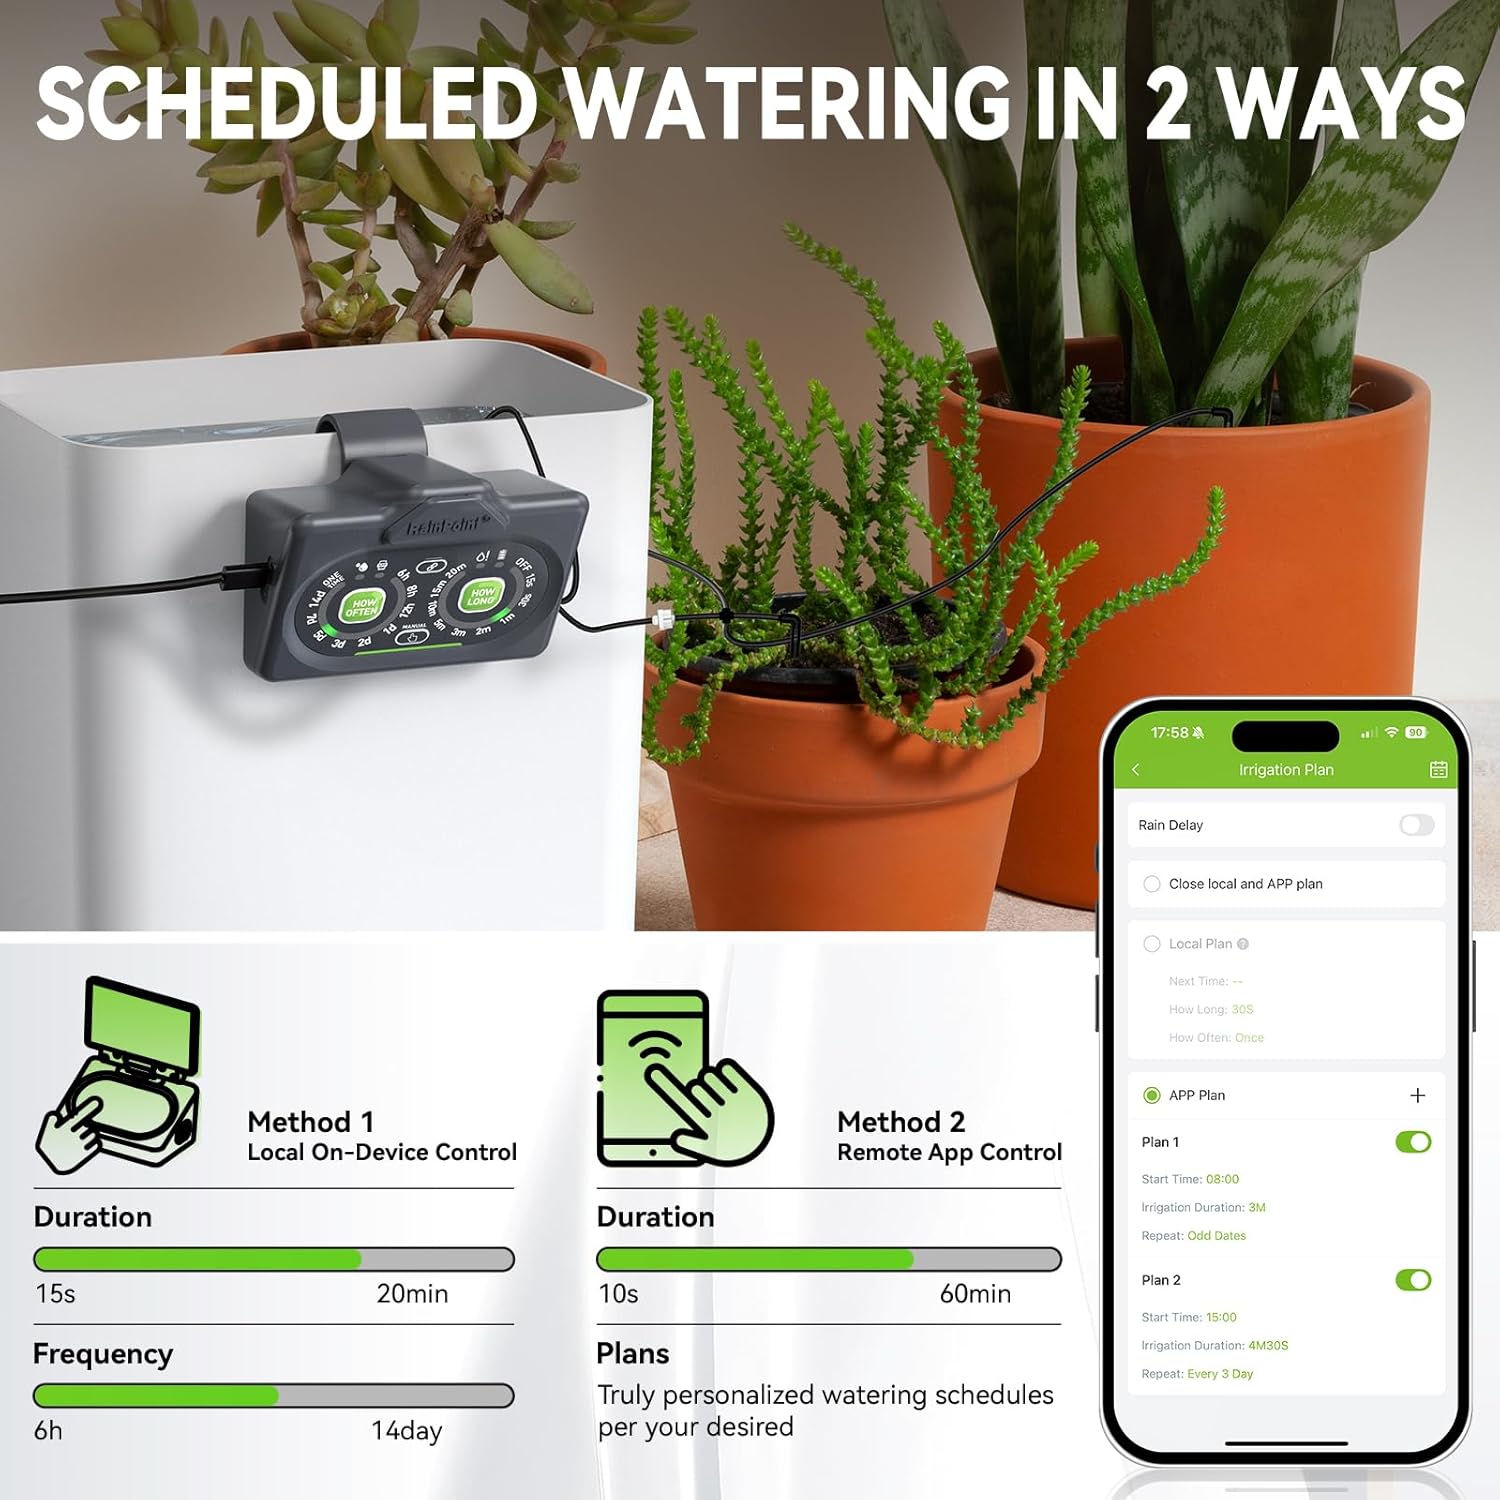
Image: The pump's control panel for setting watering schedules directly on the device.
2. Remote App Control
After successfully adding the pump to the RainPoint Home App, you can manage watering schedules remotely.
- Access Watering Plan: Open the RainPoint Home App and navigate to the pump's control interface. Select the "Plan" tab.
- Nustatyti pradžios laiką: Choose your desired start time for watering.
- Set Duration & Frequency: Define the irrigation duration and how often the watering cycle should repeat (e.g., daily, specific days).
- Activate Plan: Confirm your settings to activate the watering plan. The app will display the next scheduled watering time.
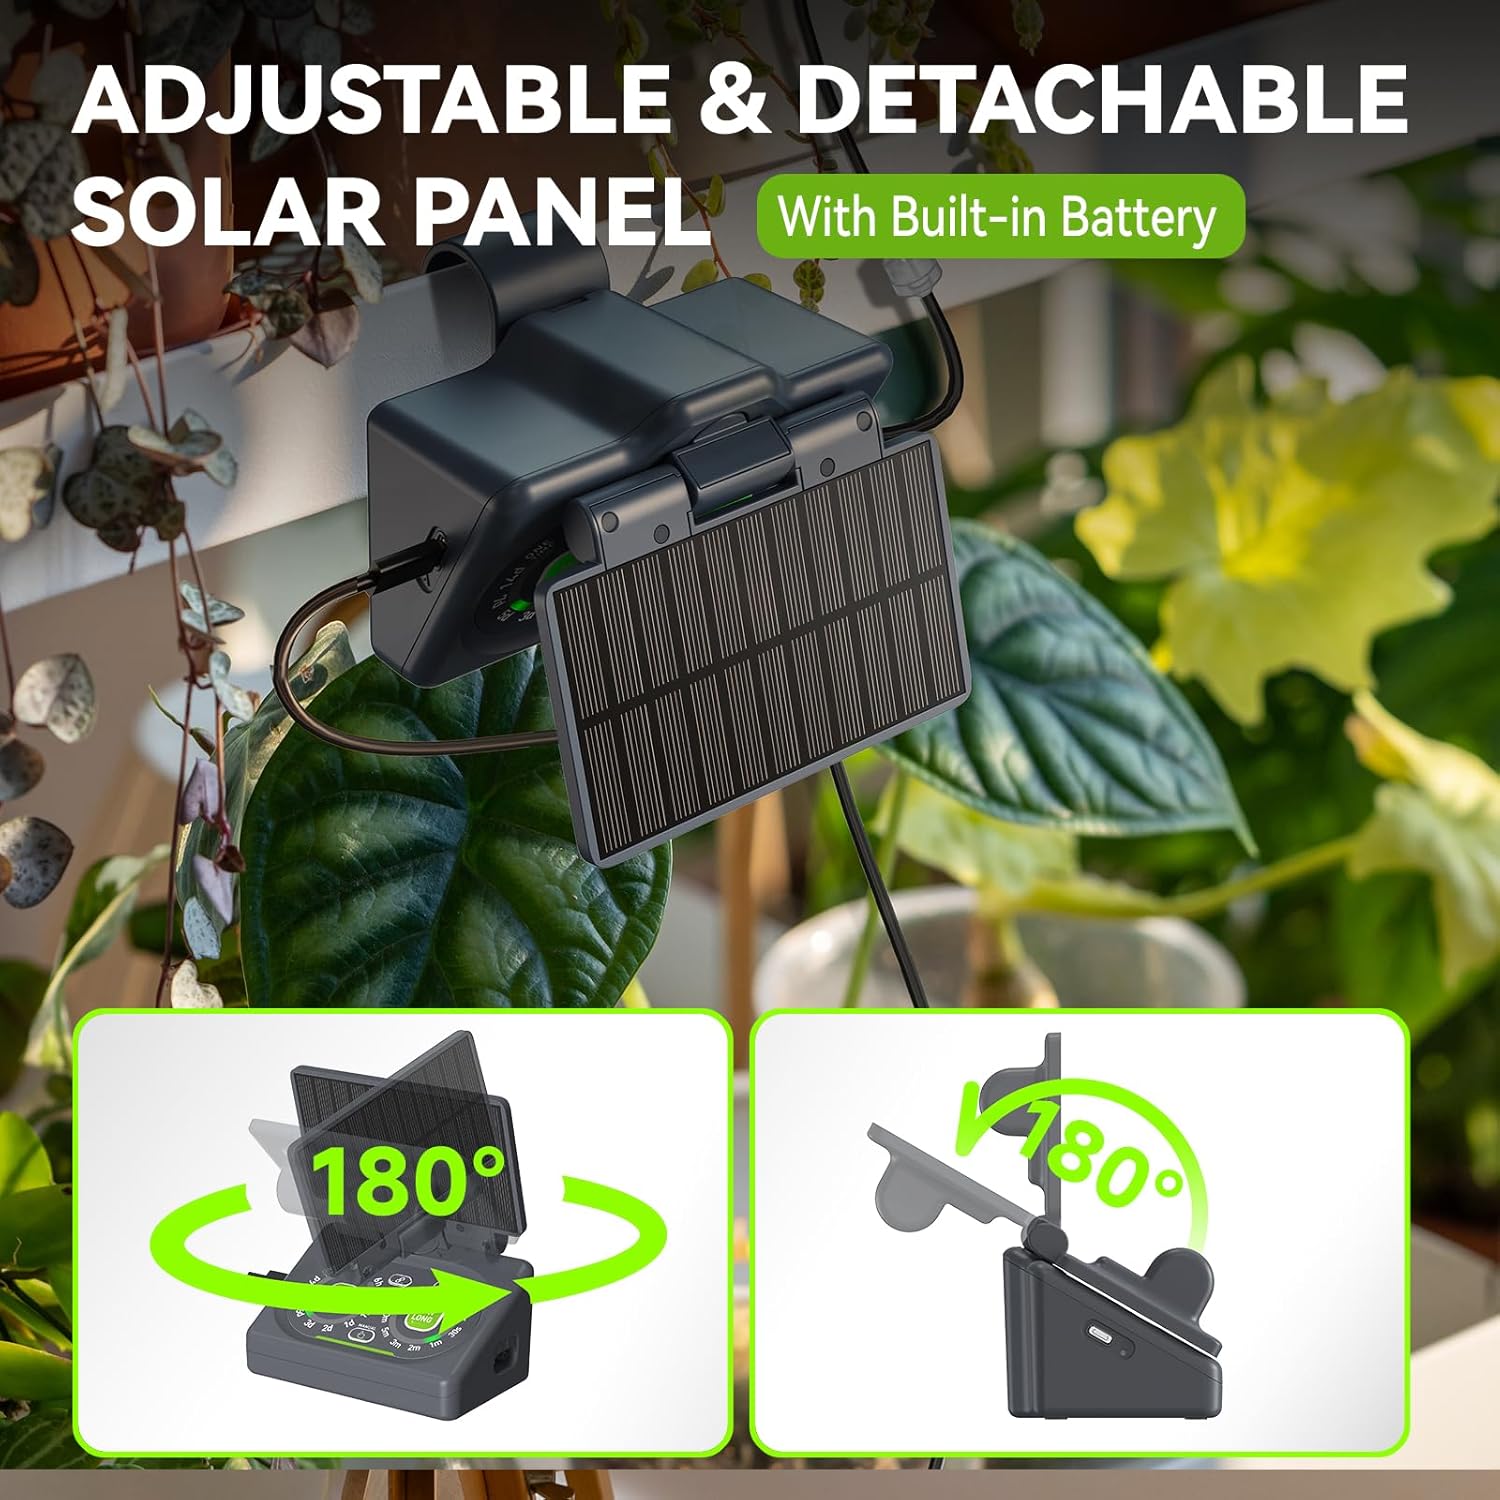
Image: The RainPoint Home App interface for remote control and scheduling.
Video: Demonstrating the dual control functionality of the RainPoint HTP149FRF system, highlighting both physical and app-based control methods.
3. Smart Scene Watering (with optional Smart Soil Meter)
Enhance your watering system by integrating a RainPoint Smart Soil Meter (sold separately) for intelligent, condition-based watering.
- Connect Smart Soil Meter: Pair your RainPoint Smart Soil Meter with the RainPoint Home App.
- Create Smart Scene: In the app, navigate to the "Smart Scene" feature.
- Define Conditions: Set conditions for watering based on real-time soil moisture levels, weather forecasts, or specific times. For example, you can configure the system to water only when soil moisture drops below a certain percentage.
- Automated Watering: The system will automatically adjust watering schedules based on the defined smart scene conditions, ensuring optimal hydration for your plants.

Image: Smart Scene feature in the app, allowing watering based on soil moisture, weather, or specific times.
Maitinimo šaltiniai
The RAINPOINT HTP149FRF offers flexible power options:
- Varomas saulės energija: The detachable solar panel charges the built-in battery using sunlight. Place the device on a balcony, porch, greenhouse, or by a window to ensure adequate sun exposure.
- Maitinamas USB: For continuous power supply or when sunlight is insufficient, the unit can be powered via USB charging.
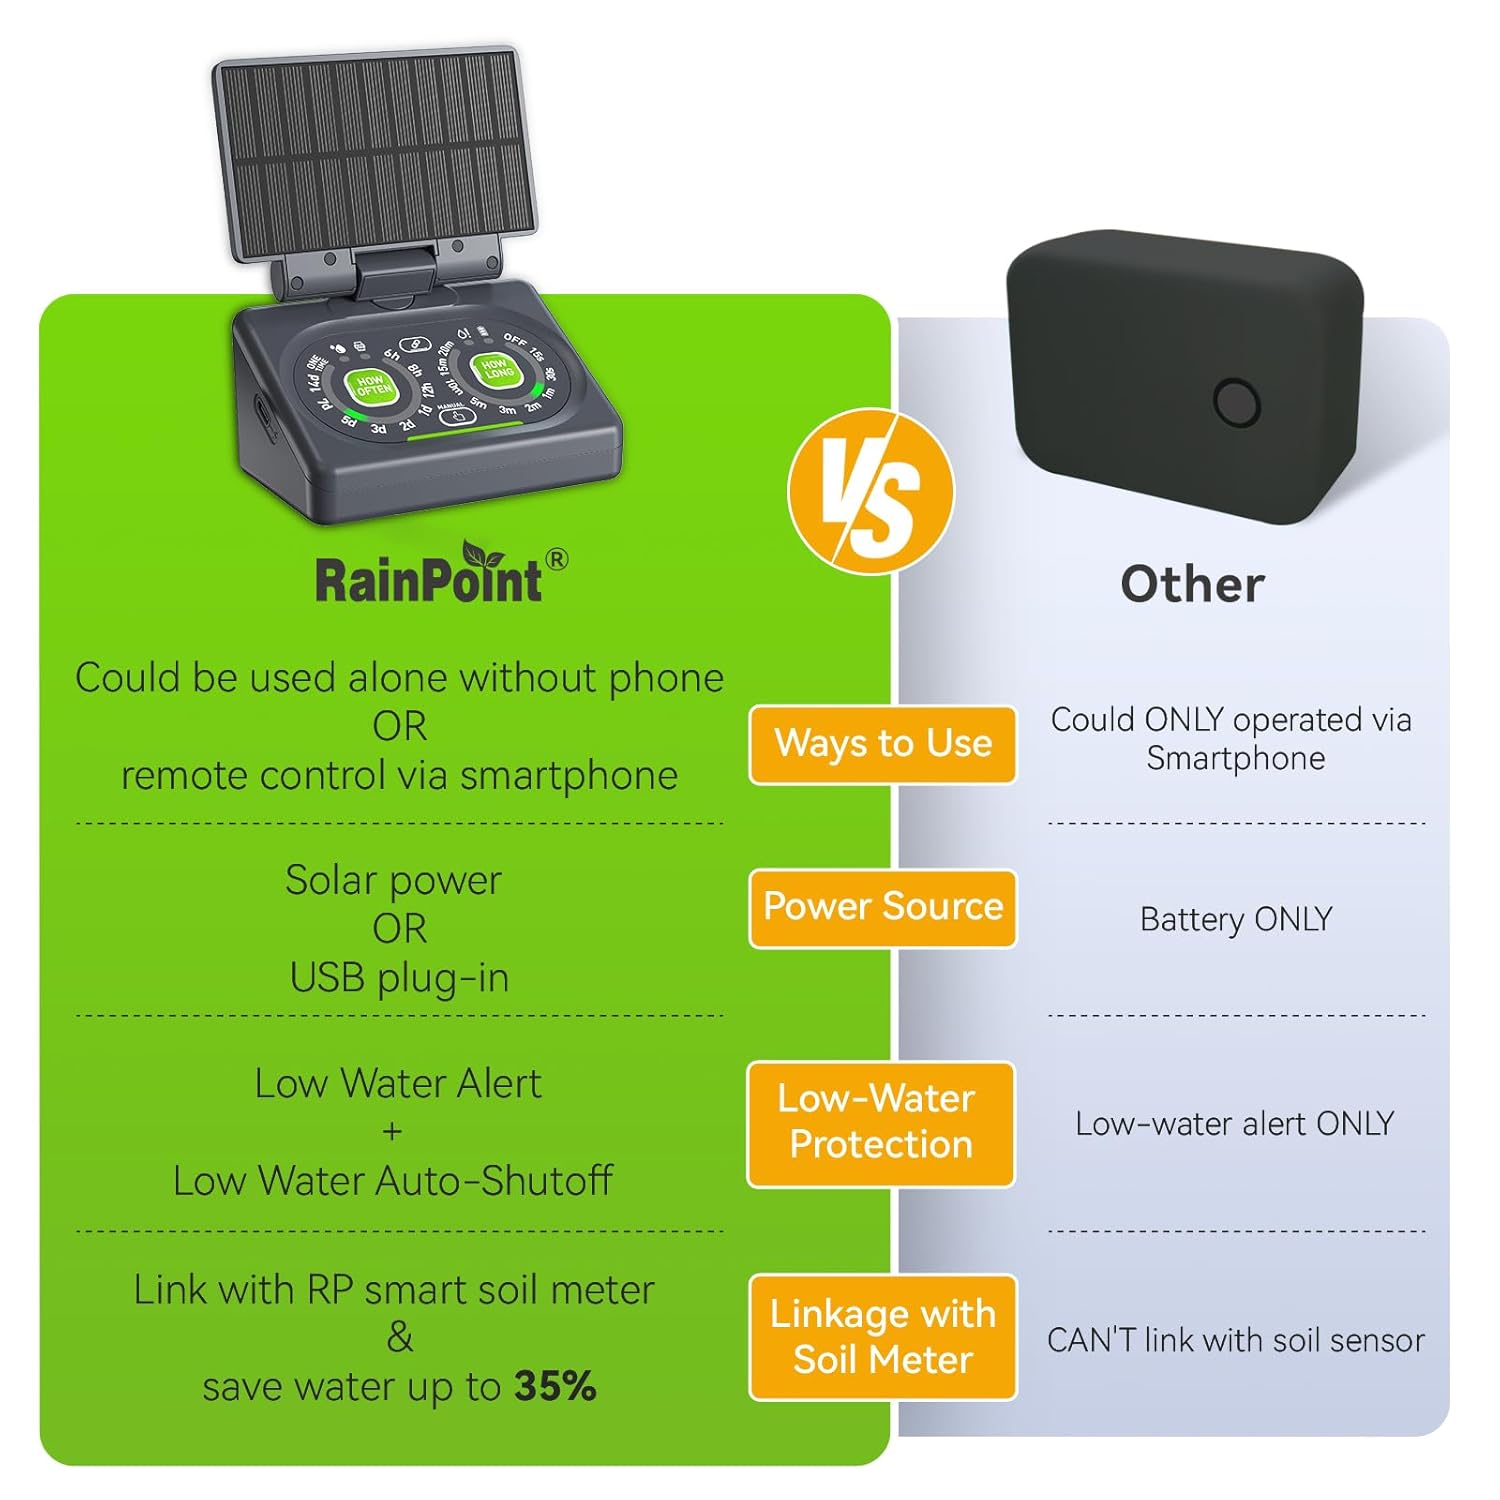
Image: The adjustable and detachable solar panel providing power to the unit.
Paskirties vietos parinktys
The compact design of the RAINPOINT HTP149FRF allows for versatile placement:
- Hook-Mountable: Utilize the detachable back mounting hook to hang the unit on the edge of a water container or a plant pot.
- Stalviršis: Place the unit directly on a flat surface, such as a table or shelf.
- Tvirtinamas prie sienos: Secure the unit to a wall using appropriate fasteners (not included) for a more permanent installation.

Image: Various placement options for the RAINPOINT watering system.
Priežiūra
- Filtro valymas: Regularly check and clean the water intake filter to prevent blockages and ensure consistent water flow.
- Vamzdžių patikra: Periodically inspect all tubing and emitters for kinks, leaks, or clogs. Clear any obstructions to maintain even water distribution.
- Akumuliatoriaus priežiūra: If using solar power, ensure the solar panel is clean and exposed to adequate sunlight for optimal charging. For long-term storage, fully charge the battery.
- Žieminimas: In colder climates, drain the system and store the pump and tubing indoors to prevent freezing damage.
Trikčių šalinimas
- Nėra vandens srauto: Check the water source level, ensure the filter is not clogged, and inspect tubing for kinks or disconnections. Verify the pump is powered on and the watering schedule is active.
- Netolygus vandens pasiskirstymas: Ensure all emitters are properly installed and not clogged. Check the anti-siphon valve for correct placement.
- Programos ryšio problemos: Confirm the Wi-Fi Hub is powered on and connected to a 2.4GHz Wi-Fi network. Ensure the hub and pump are within range. Try restarting the app or re-pairing the devices if necessary.
- Pump Not Charging (Solar): Ensure the solar panel is clean and receiving direct sunlight. Check the connection between the solar panel and the pump.
- Low Water Auto-Shutoff: If the pump stops unexpectedly, check the water source. The auto-shutoff feature protects the pump from running dry. Refill the water source to resume operation.
Specifikacijos
| Funkcija | Detalė |
|---|---|
| Gaminio matmenys | 6.38 x 6.1 x 4.53 colio; 1.92 svaro |
| Prekės modelio numeris | B0FMXHDBHK (HTP149FRF) |
| Baterijos | Reikalinga 1 ličio jonų baterija (pridedama) |
| Gamintojas | LYTAUS TAŠKAS |
| Maitinimo šaltinis | Solar Powered, USB Powered |
| Ypatinga funkcija | Automatic Watering, Dual Powered, Local & Remote Control, Programmable, Low Water Auto-Shutoff |
| Palaikomi maksimalūs augalai | Iki 15 (su papildomu priedų rinkiniu) |
Saugos informacija
Please refer to the included safety instructions for proper handling and usage of the RAINPOINT Smart Automatic Watering System. Ensure the device is used in accordance with local electrical and safety regulations.
Garantija ir palaikymas
For warranty information and customer support, please visit the official RAINPOINT website or contact their customer service. Support is available 365 days a year.


