1. Įvadas
This manual provides detailed instructions for the installation, operation, and maintenance of your Antec Flux Rear Mid-Tower ATX PC Case. Please read this manual thoroughly before beginning assembly to ensure correct setup and optimal performance.
Saugos informacija: Always disconnect power from all components before installation or maintenance. Handle components with care to prevent damage. Wear an anti-static wrist strap when handling sensitive electronic parts.
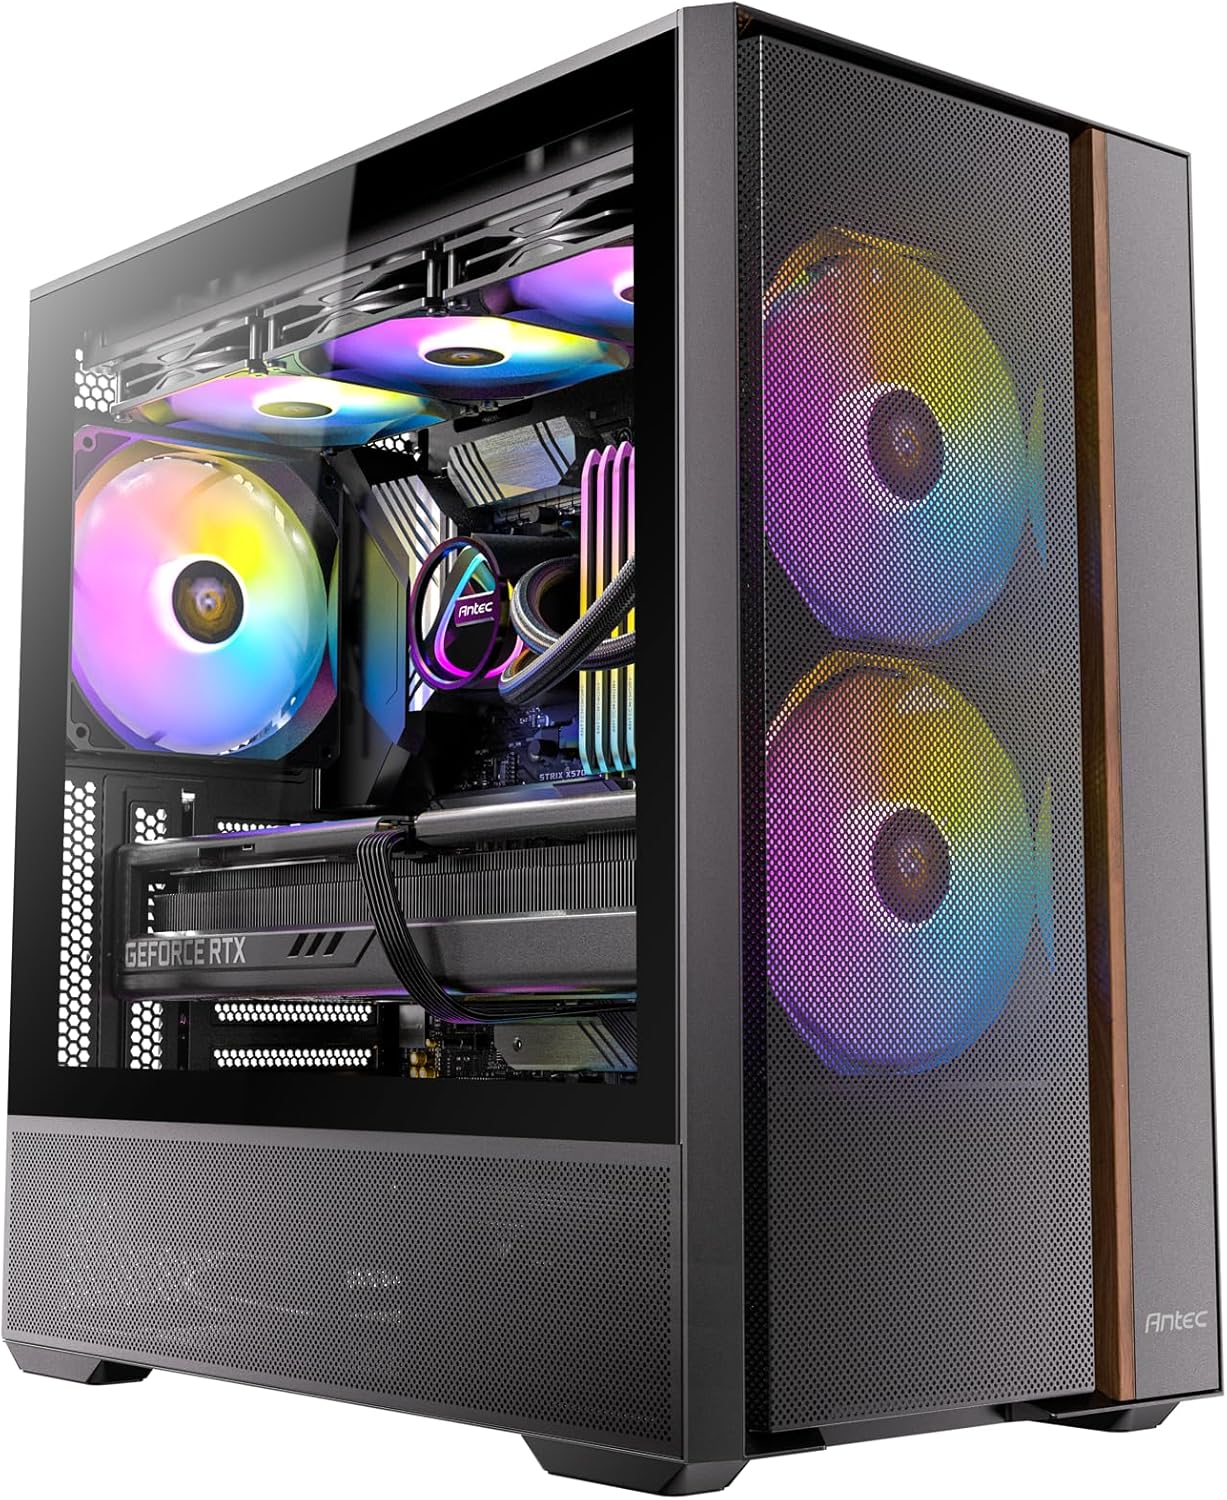
Image: The Antec Flux Rear Mid-Tower ATX PC Case, showcasing its tempered glass side panel, mesh front panel, and pre-installed RGB fans.
2. Pakuotės turinys
Patikrinkite, ar pakuotėje yra visi toliau išvardyti komponentai:
- Antec Flux Rear Mid-Tower ATX PC Case
- 2 x 140mm ARGB PWM Fans (Front, pre-installed)
- 2 x 120mm PWM Reverse Fans (PSU Shroud, pre-installed)
- 1 x 140mm ARGB PWM Fan (Rear, pre-installed)
- Accessory Box (screws, cable ties, user manual)
- 13A PSU Extension Cable
- GPU palaikymo laikiklis

Paveikslėlis: sprogęs view illustrating the various components of the Antec Flux Rear PC case, including the chassis, panels, and fans.
3. Specifikacijos
| Funkcija | Detalė |
|---|---|
| Modelio pavadinimas | Flux Rear |
| Atvejo tipas | Mid Tower |
| Pagrindinės plokštės suderinamumas | ATX, Micro-ATX, ITX (Supports Back-Connect Motherboards) |
| Matmenys (IxPxH) | 18.11 x 18.11 x 9.45 colio (460 x 460 x 240 mm) |
| Prekės svoris | 18.03 svaro (8.18 kg) |
| Medžiaga | Legiruotas plienas, grūdintas stiklas |
| Iš anksto įdiegti ventiliatoriai | 2x 140mm ARGB PWM (Front), 2x 120mm PWM Reverse (PSU Shroud), 1x 140mm ARGB PWM (Rear) |
| Ventiliatoriaus palaikymas (maks.) | Front: 2x 140mm; Top: 2x 140mm or 3x 120mm; Rear: 1x 140mm or 1x 120mm; PSU Shroud: 2x 120mm |
| Radiatoriaus atrama (maks.) | Top: Up to 360mm; Rear: Up to 120mm |
| Maksimalus CPU aušintuvo aukštis | 180 mm |
| GPU maksimalus ilgis | 400 mm |
| Maitinimo bloko montavimas | Front Mount (Max length without cable: 170mm) |
| Drive Bays | 1x 3.5", 2x 2.5" |
| I/O prievadai | 2x USB 3.0, 1x USB-C 10Gbps, Headphone/Mic Combo Jack, Power Button, LED Control Button |
4. Sąranka ir diegimas
4.1 Bylos parengimas
The Antec Flux Rear case features a tool-free panel design for easy access during assembly.
- To remove the tempered glass side panel, gently pull it open from the rear hinge.
- The metal right side panel can be removed by sliding it backward and lifting.
- The front mesh panel can be detached by pulling it from the bottom edge.
- The top panel can be lifted off after removing any securing screws.

Image: Illustration of the tool-free panel design, demonstrating how to remove the top, left glass, left metal, and front panels for access.
4.2 Pagrindinės plokštės montavimas
The case supports ATX, Micro-ATX, and ITX motherboards, including back-connect models.
- Ensure the correct standoffs are installed for your motherboard size.
- Carefully place the motherboard into the chassis, aligning it with the standoffs and I/O shield opening.
- Pritvirtinkite pagrindinę plokštę pridėtais varžtais.
- For back-connect motherboards, route all necessary cables through the designated cutouts behind the motherboard tray.

Paveikslėlis: vidinis view of the case demonstrating support for back-connect motherboards, with highlighted cable routing paths behind the motherboard tray.
4.3 Maitinimo šaltinio įrengimas
The Antec Flux Rear features a front-mounted PSU chamber.
- Install your power supply unit (PSU) into the front chamber.
- Connect the included 13A extension cable to the PSU and route it to the rear power inlet.
- Ensure the extension cable is securely connected and routed to avoid interference.

Vaizdas: A view of the front-mounted PSU chamber and the 13A extension cable, illustrating how the power supply is positioned and connected.

Image: Four distinct diagrams illustrating various methods for routing the power extension cable, depending on the power connector's position and desired cable path.
4.4 Drive Installation (HDD/SSD)
The case provides dedicated mounting points for storage drives.
- Install 3.5" hard disk drives (HDDs) in the designated bay located at the rear of the case.
- Install 2.5" solid-state drives (SSDs) in the mounting locations behind the motherboard tray.
- Secure all drives with the provided screws.

Image: An internal diagram of the PC case, clearly marking the installation areas for the CPU, GPU, Motherboard, SSD, HDD, and Power Supply.
4.5 Vaizdo plokštės diegimas
Install your graphics card into the appropriate PCIe slot on your motherboard.
- Nuimkite reikiamus PCIe lizdų dangtelius nuo korpuso galo.
- Insert the graphics card firmly into the PCIe slot until it clicks into place.
- Pritvirtinkite vaizdo plokštę varžtais.
- Utilize the built-in GPU support bracket to prevent sag for heavier graphics cards. Adjust the bracket to support the card's weight.

Image: A close-up illustration of the built-in GPU support bracket, demonstrating its function in preventing graphics card sag.
4.6 Ventiliatoriaus ir radiatoriaus montavimas
The case comes with five pre-installed PWM fans and offers extensive support for additional cooling.
- Į viršų: Supports up to 360mm radiators or 2x 140mm / 3x 120mm fans.
- Galinis: Supports 1x 140mm or 1x 120mm fan, or a 120mm radiator (with thickness between 55-70mm).
- Priekyje: Supports 2x 140mm fans.
- PSU gaubtas: Supports 2x 120mm fans.
- When installing radiators, ensure proper clearance with other components.

Image: A diagram illustrating the various fan and radiator mounting locations within the PC case, along with their supported sizes.

Image: An illustration detailing the installation process for a 360mm radiator and a rear fan in the top section of the PC case.
4.7 Kabelių valdymas
The case offers 37mm of space behind the motherboard tray for cable management, equipped with grommets and Velcro straps.
- Route power and data cables through the grommets and tie-down points.
- Use the included Velcro straps to bundle and secure cables, ensuring a clean interior and unobstructed airflow.
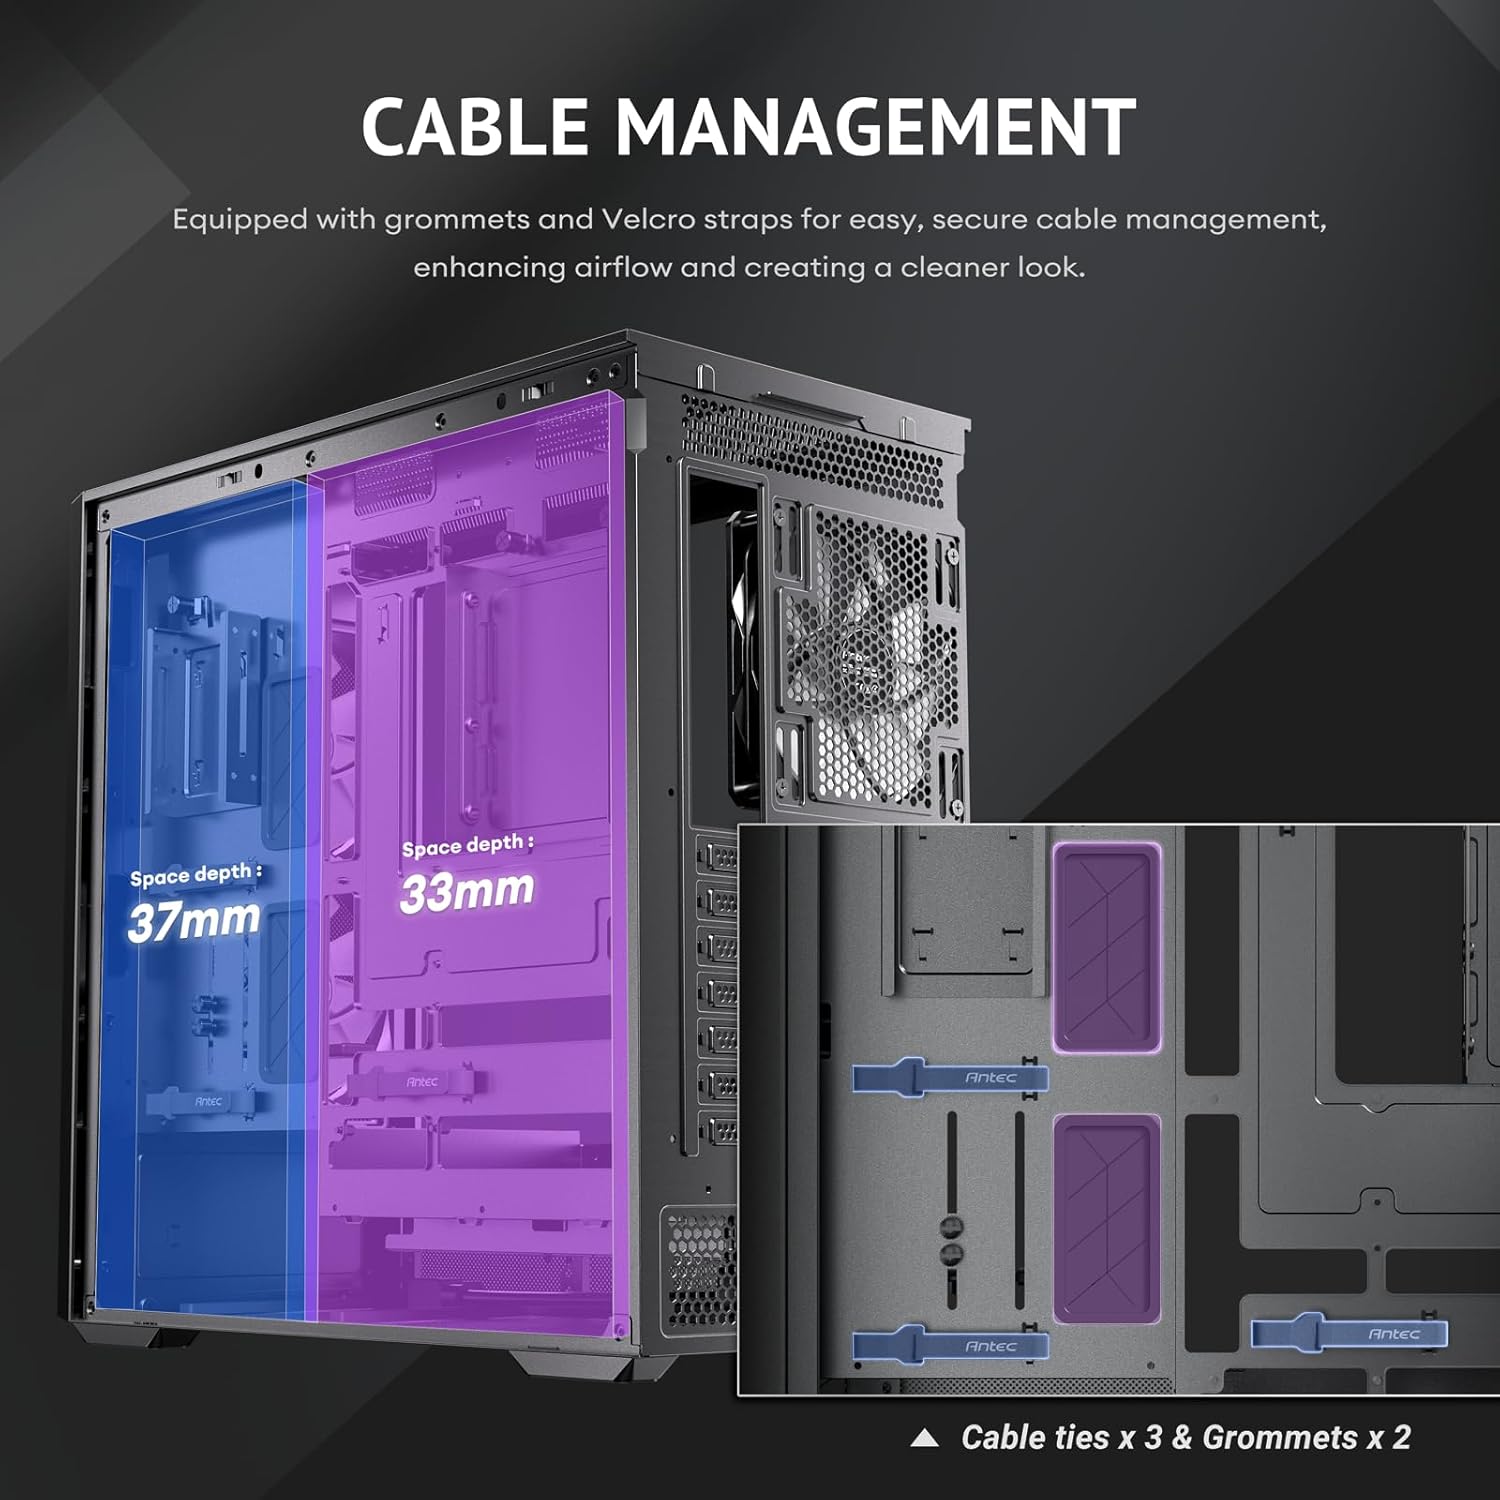
Image: A diagram illustrating the cable management features behind the motherboard tray, including space depth, cable ties, and grommets.
5. Operacija
5.1 Įjungimas
After completing all installations and connections, ensure the power cable is securely plugged into the rear of the case and a power outlet. Press the power button located on the top I/O panel to start your system.
5.2 Įvesties/išvesties skydelio funkcijos
The top I/O panel provides convenient access to essential ports and controls:
- Maitinimo mygtukas: Įjungia/išjungia sistemą.
- USB 3.0 prievadai (x2): Skirta USB 3.0 įrenginiams prijungti.
- USB-C 10Gbps Port: For connecting USB-C devices with high-speed data transfer.
- Ausinių / mikrofono jungties lizdas: Garso įvesties / išvesties jungtims.
- LED mygtukas: Controls the lighting effects of the ARGB fans.

Vaizdas: Stambus planas view of the top I/O panel, detailing the power button, USB 3.0 ports, USB-C 10Gbps port, headphone/mic combo jack, and LED control button.
5.3 Oro srautas ir aušinimas
The Antec Flux Rear case is designed with the F-LUX Platform for optimized airflow and cooling performance.
- F-LUX Platform: Features a front-mounted PSU chamber that creates an unobstructed airflow path at the bottom of the case, enhancing GPU cooling.
- Multi-directional Vent Design: Incorporates extensive air intakes at the bottom, power supply chamber, lower sides, top, and a large-area mesh front panel to create a dedicated airflow channel.
- Iš anksto įdiegti ventiliatoriai: The five pre-installed PWM fans are strategically placed to facilitate efficient air movement throughout the case.

Image: A diagram illustrating the 'Flow Luxury' F-LUX Platform, showing the internal airflow paths designed to enhance GPU cooling.

Image: A diagram detailing the 'Flux Airflow' system, indicating the positions and directions of the pre-installed fans within the PC case.
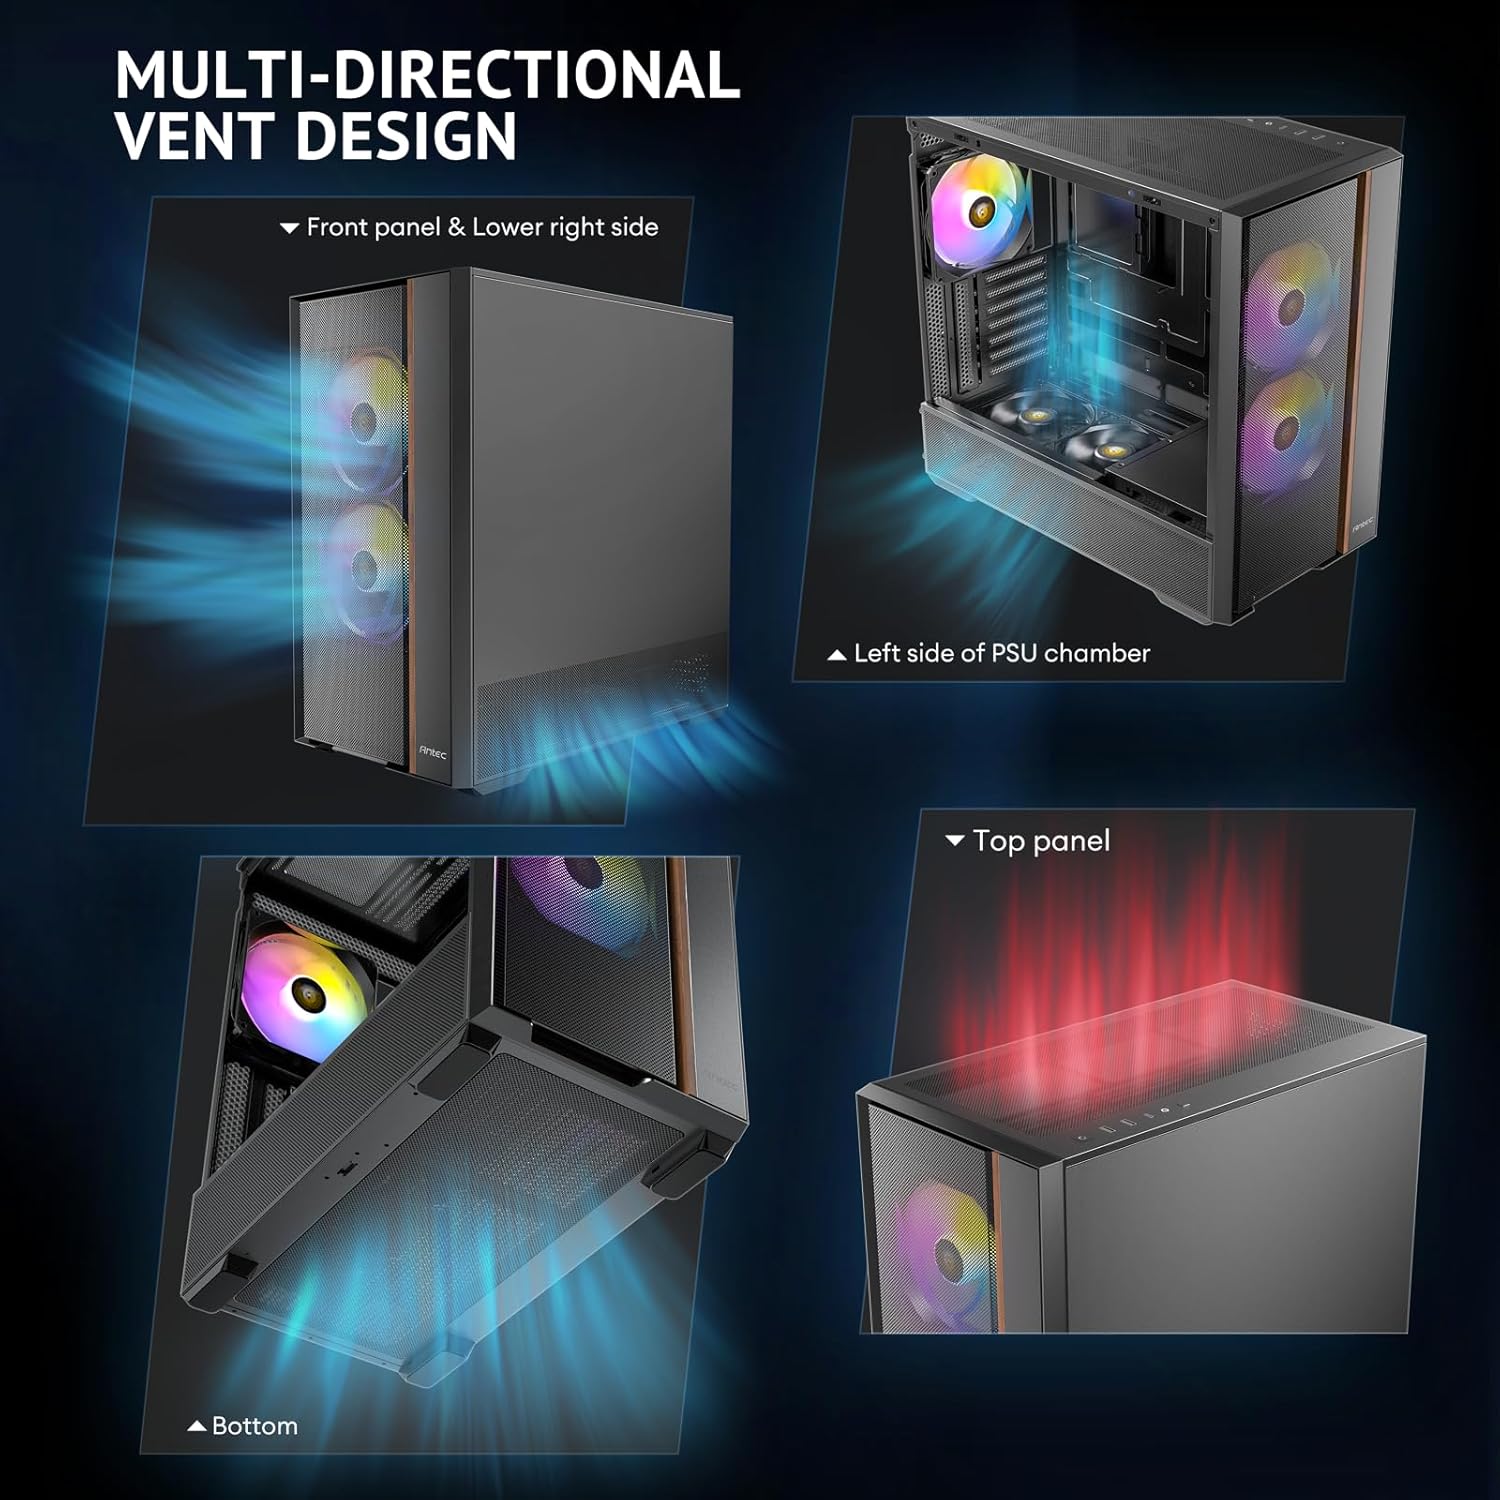
Image: Four separate images highlighting the multi-directional vent design, showing air intake points on the front panel, lower right side, left side of the PSU chamber, and the top panel.

Image: A diagram illustrating the optimized bottom air intake, specifically designed for efficient GPU cooling, with measurements for graphics card space and bottom clearance.
6. Priežiūra
Reguliarus techninis aptarnavimas padeda užtikrinti optimalų kompiuterio korpuso veikimą ir ilgaamžiškumą.
- Dulkių filtrai: Periodically remove and clean the dust filters located on the front, top, and bottom of the case. Use compressed air or a soft brush to remove accumulated dust.
- Išorinis valymas: Išorinius paviršius nuvalykite minkšta, damp šluoste. Venkite abrazyvinių valiklių ar tirpiklių, kurie gali pažeisti apdailą.
- Vidaus valymas: With the system powered off and unplugged, use compressed air to clear dust from internal components and fans.
7. Problemų sprendimas
If you encounter issues with your PC case, refer to the following common problems and solutions:
- Sistema neįsijungia:
- Ensure the PSU is properly installed and connected to the 13A extension cable.
- Verify that the power button cable is correctly connected to the motherboard's front panel header.
- Patikrinkite, ar maitinimo lizdas veikia.
- Fans Not Spinning or No RGB:
- Įsitikinkite, kad ventiliatoriaus maitinimo laidai yra tvirtai prijungti prie pagrindinės plokštės arba ventiliatoriaus valdiklio.
- Ensure ARGB cables are connected to the motherboard's ARGB header or a compatible controller.
- Press the LED button on the I/O panel to cycle through lighting modes or ensure it's enabled.
- Neveikiantys USB prievadai:
- Check if the USB 3.0 and USB-C cables from the front panel are correctly connected to the motherboard headers.
8. Garantija ir palaikymas
Antec products are covered by a limited warranty. For specific warranty terms and conditions, please refer to the warranty card included with your product or visit the official Antec websvetainę.
For technical support, product inquiries, or assistance with troubleshooting, please contact Antec customer service through their official websvetainėje arba kontaktinę informaciją, pateiktą jūsų produkto dokumentuose.


