1. Įvadas
This manual provides detailed instructions for the installation, operation, and maintenance of your AVAPOW X1 4K Dash Cam. The AVAPOW X1 is designed to capture high-quality video footage of your journeys, offering features such as 4K UHD recording, Wi-Fi 6 connectivity, G-Sensor for emergency recording, loop recording, enhanced night vision, and 24-hour parking mode with the included hardwire kit. Please read this manual thoroughly before using the device to ensure proper functionality and safety.
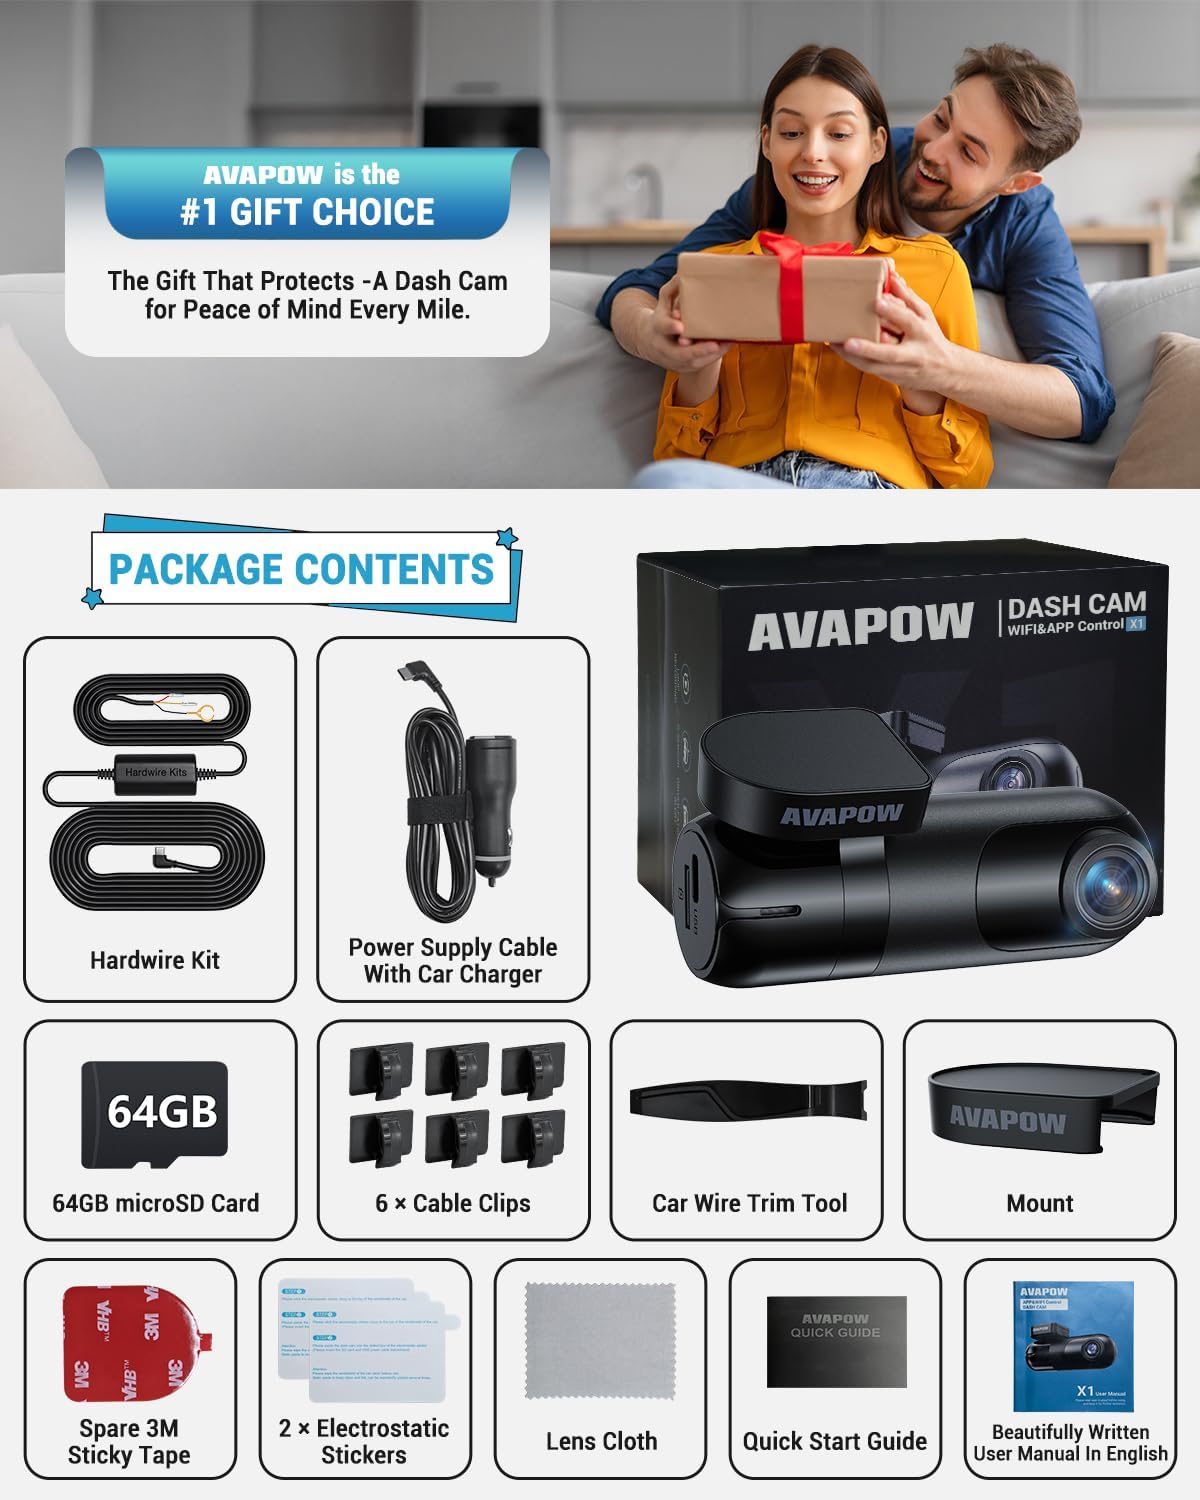
2. Pakuotės turinys
Patikrinkite, ar pakuotėje yra visi toliau išvardyti daiktai:
- AVAPOW X1 4K Dash Cam
- „Hardwire“ rinkinys
- 64 GB „microSD“ kortelė
- Automobilinis įkroviklis
- Crowbar (Trim Tool)
- Kabelių spaustukai
- Trumpas vadovas
- Vartotojo vadovas
- Spare 3M Sticky Tape
- 2 x elektrostatiniai lipdukai
- Lęšio audinys
3. Sąranka ir diegimas
3.1 Vaizdo registratoriaus montavimas
- Kruopščiai nuvalykite norimą priekinio stiklo vietą.
- Apply an electrostatic sticker to the cleaned area on the windshield. This helps protect your windshield and makes removal easier.
- Attach the dash cam mount with the 3M adhesive to the electrostatic sticker. Ensure the camera lens has a clear view kelio.
- Insert the 64GB microSD card into the designated slot on the dash cam.
- Connect the USB-C power cable to the dash cam.

3.2 Power Connection Options
You have two options for powering your dash cam:
- Cigarečių žiebtuvėlio maitinimas: Use the included car charger to plug into your vehicle's cigarette lighter socket. This provides power when the vehicle is running.
- Hardwire Kit Installation (for 24/7 Parking Mode): For continuous power and parking monitoring features, install the included hardwire kit. This connects directly to your vehicle's fuse box.
Hardwire Kit Installation Steps:
- Locate your car's fuse box (usually under the dashboard or side panel).
- Identify a constant power fuse (always on) and an ACC fuse (on with ignition). Use a circuit tester to verify.
- Connect the yellow wire (VCC+) of the hardwire kit to the constant power fuse.
- Connect the red wire (ACC) of the hardwire kit to the ACC fuse.
- Connect the black wire (GND-) to a metal part of the car body for grounding.
- Route the USB-C cable from the hardwire kit along the windshield edge and A-pillar using the provided trim tool and cable clips, then connect it to the dash cam.

3.3 Programėlės diegimas ir „Wi-Fi“ ryšys
- Download the "AVAPOW" app from your smartphone's app store (iOS or Android).
- Įjunkite prietaisų skydelį.
- On your smartphone, go to Wi-Fi settings and connect to the dash cam's Wi-Fi network (e.g., "AVAPOW_X1_XXXX"). The default password is usually "12345678".
- Open the AVAPOW app. The app should automatically detect and connect to the dash cam.
4. Naudojimo instrukcijos
4.1 Pagrindinis įrašymas
The dash cam automatically begins recording when powered on. It utilizes loop recording, continuously recording video in segments (e.g., 1, 3, or 5 minutes). When the memory card is full, the oldest unlocked footage is overwritten to ensure continuous recording.
4.2 G jutiklis (avarinis įrašymas)
The built-in G-Sensor detects sudden impacts or collisions. When triggered, it automatically locks the current video segment, preventing it from being overwritten by loop recording. This ensures critical evidence is preserved.

4.3 24 valandų parkavimo režimas
With the hardwire kit installed, the dash cam can provide 24-hour parking protection. It can be configured for:
- Judesio aptikimas: Records when motion is detected around the parked vehicle.
- Susidūrimo aptikimas: Records when an impact is detected (via G-Sensor) while parked.
- „Time-Lapse“ įrašymas: Captures frames at set intervals to condense long periods into short videos, saving storage space.

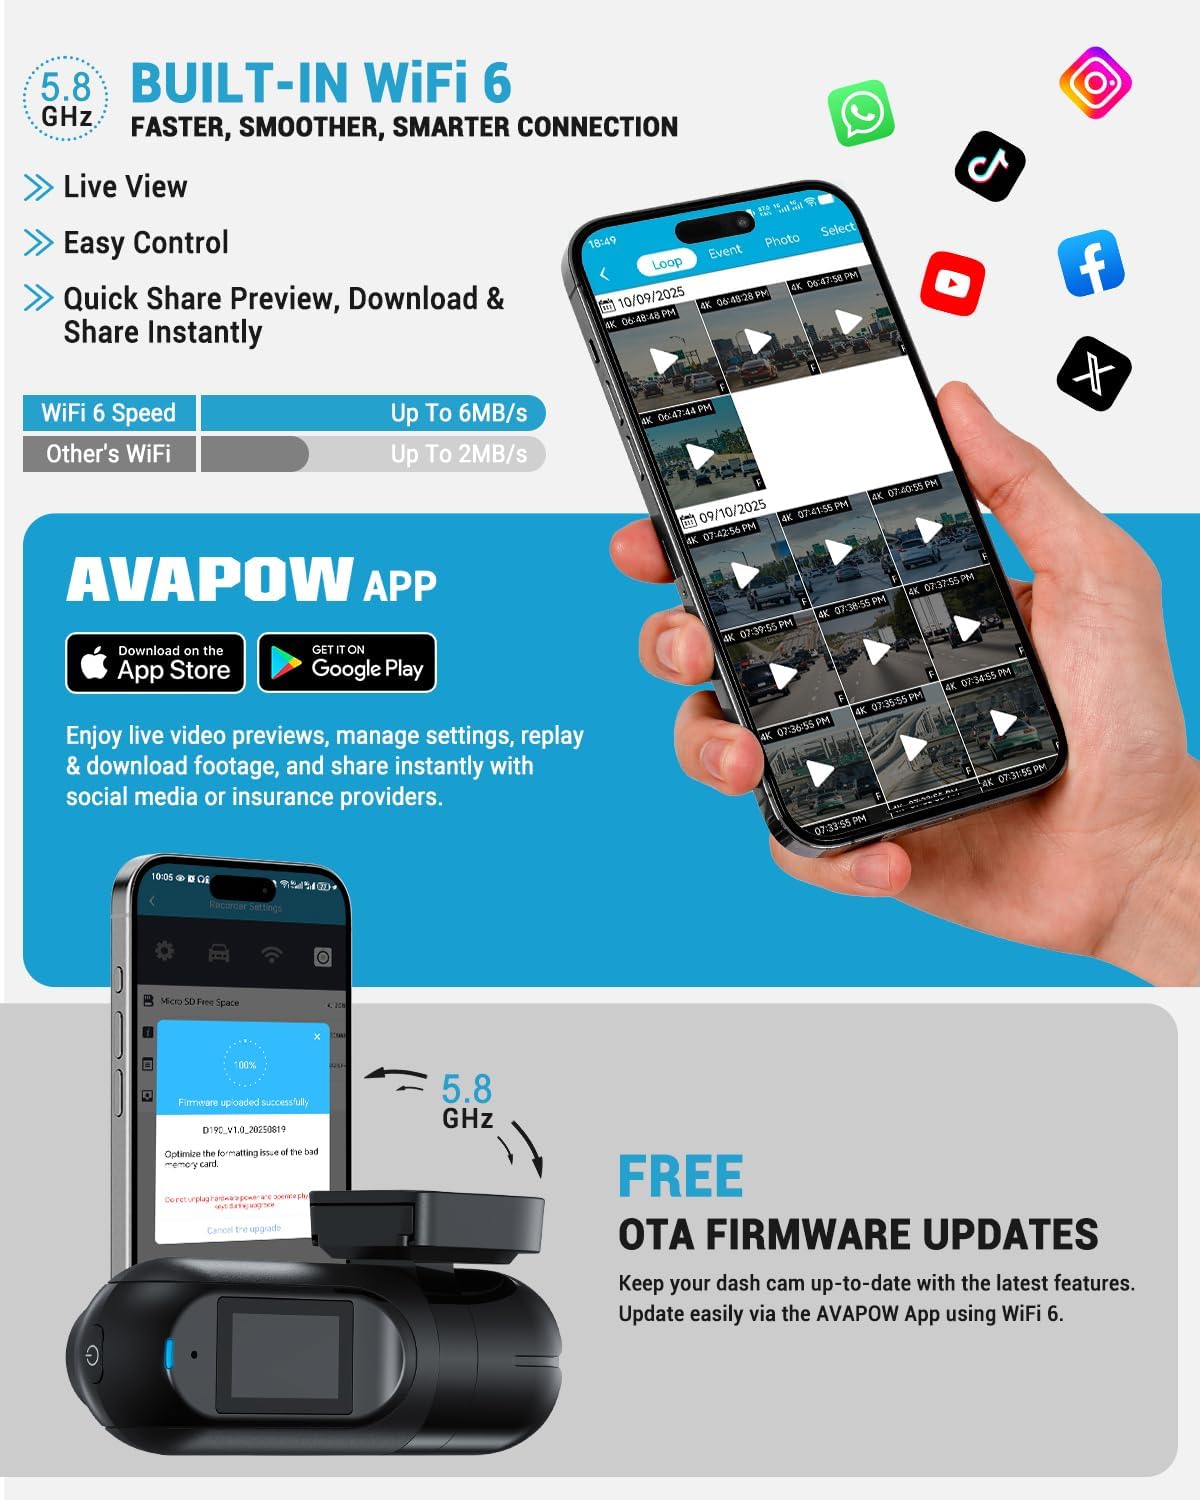
4.4 App Control and Firmware Updates
The AVAPOW app allows you to:
- View tiesioginis vaizdo transliavimas iš vaizdo registratoriaus.
- Adjust camera settings (resolution, loop recording duration, audio recording, G-Sensor sensitivity, etc.).
- Download recorded videos directly to your smartphone at high speeds (up to 6MB/s with Wi-Fi 6).
- Share video clips to social media.
- Perform Over-The-Air (OTA) firmware updates to keep your dash cam's software current.
5. Pagrindinės savybės
5.1 4K Ultra HD Recording
The AVAPOW X1 captures video in ultra-sharp 3840×2160P at 30 frames per second (fps) with a 170° ultra-wide front lens. This high resolution ensures clear capture of license plates, road signs, and other critical details, day or night.

5.2 Patobulintas naktinis matymas
Equipped with Wide Dynamic Range (WDR) and High Dynamic Range (HDR) technology, the dash cam delivers clear video footage even in low-light conditions or at night. This ensures visibility of pedestrians, license plates, and other details in challenging lighting environments.

5.3 Super Capacitor Technology
The dash cam incorporates a built-in super capacitor, allowing it to operate reliably in extreme temperatures (up to 167°F / 75°C). This technology provides enhanced durability, a longer product lifespan, and improved safety compared to traditional battery-based systems, as it is fire and explosion proof.

6. Priežiūra
- Valymas: Use the provided lens cloth to gently clean the camera lens and screen. Avoid abrasive materials or chemical cleaners.
- „MicroSD“ kortelė: Regularly format the microSD card (at least once a month) through the dash cam settings in the AVAPOW app to ensure optimal performance and prevent data corruption.
- Firmware atnaujinimai: Keep the dash cam's firmware updated via the AVAPOW app to benefit from the latest features and improvements.
7. Problemų sprendimas
- Vaizdo registratorius neįsijungia:
- Check power connections. Ensure the car charger or hardwire kit is properly connected and receiving power.
- If using the hardwire kit, verify fuse connections.
- Įrašymo problemos (pvz., užstrigimas, sugadinimas) files):
- Format the microSD card using the AVAPOW app.
- Ensure the microSD card is a high-quality, high-speed card (Class 10 or higher recommended).
- Try a different microSD card to rule out card issues.
- „Wi-Fi“ ryšio problemos:
- Įsitikinkite, kad vaizdo registratoriaus „Wi-Fi“ ryšys įjungtas.
- Verify you are connecting to the correct Wi-Fi network and entering the correct password.
- Iš naujo paleiskite ir vaizdo registratorių, ir išmanųjį telefoną.
- Ensure your phone's cellular data is temporarily disabled during connection to avoid interference.
- Parkavimo režimas neveikia:
- Confirm the hardwire kit is correctly installed and providing constant power.
- Check parking mode settings in the AVAPOW app to ensure it's enabled and configured as desired.
8. Specifikacijos
| Modelio pavadinimas | X1 |
| Vaizdo įrašymo raiška | 2160p (4K UHD 3840x2160P) |
| Laukas View | 170 laipsnių |
| Ryšio technologija | „Wi-Fi“ 6 |
| Ypatingos savybės | Built-In WiFi, G-Sensor, Loop Recording, Night Vision (WDR/HDR), 24H Parking Monitor |
| Montavimo tipas | Priekinio stiklo kalnas |
| Gaminio matmenys | 1.34 x 3.78 x 1.89 colio |
| Prekės svoris | 3.52 uncijos |
| Spalva | Juoda |
| Gamintojas | AVAPOW |
9. Garantija ir palaikymas
The AVAPOW X1 Dash Cam comes with a 2-Year Customer Support ir 24/7 Customer Care. For any questions, issues, or technical assistance, please contact AVAPOW customer service. You can reach them via phone for a faster response or email their customer care team. OTA firmware updates are provided via the AVAPOW app to ensure your dash cam always runs smoothly.


